After three weeks of much longer than normal hours during the week and attending conferences on the weekends in service to my day job, I had a two whole days at home with my garden this weekend. I found it doing very well despite my glancing harvests and prunings, but also in need of some more thoughtful attention so I started on a prioritized list of what needed to be done...and then the doorbell rang. Earlier this year I had struck up a conversation about fig trees with one of my subdivision neighbors after he noticed my 2nd year trees that are a lot more potential than production even at this point. He had shared with me how productive his established tree was with quantities that sounded more fantasy than fact compared to the 25 or so figs I expected off of my 4 immature trees. He arrived at my door on Saturday morning with a bag full of figs, the third such of the morning he told me!Most of the figs were at the peak of ripeness, but a few were so soft that even the weight of figs on top of them in the bag distorted and split them. I popped the bag into the fridge to firm up the softest of them and stop the ripening of the freshest and went online to see what my options were.Canning jam and/or preserves was the resounding result, despite changing search terms several times and going 4 search results pages deep. I did not feel ready to do canning on my own and hadn't purchased a hot water bath canner yet, but there was this unexpected bounty to deal with...An hour and multiple recipes later, I was ready to make my first fig jam. The recipe was simple:8 cups quartered figs3.5 cups sugar3 TBS lemon juice
 It was an easy recipe and the figs smelled and tasted heavenly as they and the sugar slowly caramelized on my stove top. I was nervous about the canning part but made an emergency phone-a-friend to my canning mentor to ask a few questions and by the end was more focused on saving every drop of this delicious concoction than thinking of all the ways the canning portion might go wrong.
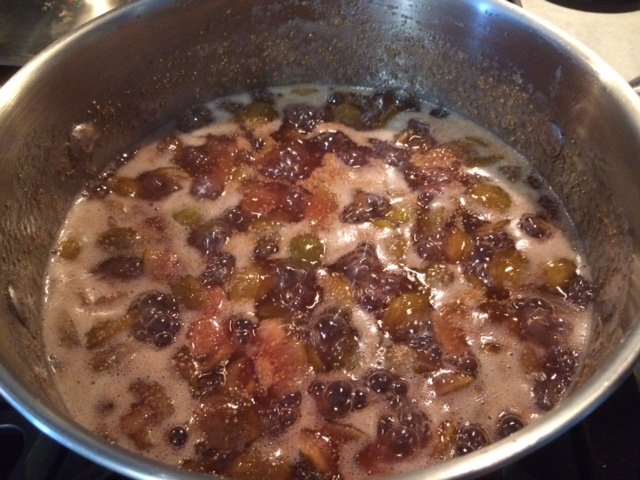 I ladled the preserved into 5 half-pint jars and prepared my first hot water bath.
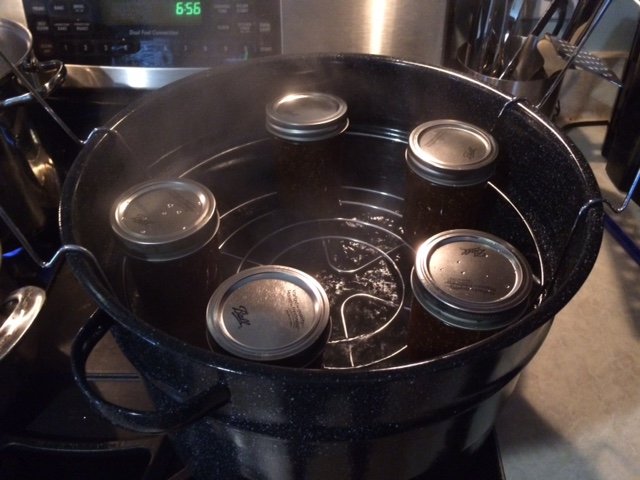 They cooked for 10 minutes in the hot water bath after it returned to a boil. I set the jars on cooking cooling racks to increase the air circulation and was pleased to hear my first *pop* of a sealing jar not long after.
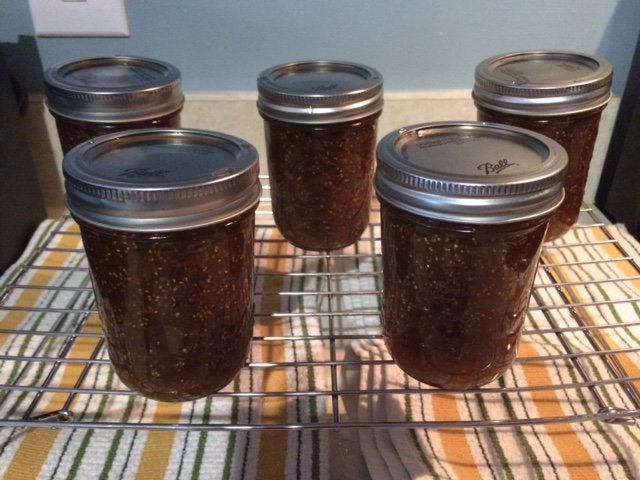 All 5 jars popped within 3o minutes of coming out of the bath and are now labeled and in my pantry.The title of this post is about doing what needs to be done when the opportunity exists - trying a new fig jam recipe and canning for the first time were not on my to-do list, but I couldn't let this unexpected windfall go from overripe to compost in my refrigerator without at least trying my hand at canning to preserve the bounty.As a postscript, I had enough jam for 5 3/4 jars and since the 6th jar did not meet the headspace requirements for the canning recipe, I sealed it the same as the others but put into the refrigerator immediately after it too popped. Tonight's desert was a french bread smothered in this homemade jam and it was wonderful!
Saving Seed - Tomatoes
One of my goals for this year's garden is to save more of my own seeds for varieties I know I will be planting year after year. Saving my own seed moves my garden a little closer to being self-sufficient and maybe more importantly, by picking the best of the crop to save seed from year after year, I will be naturalizing the seeds to the place where they are grown instead of having seeds ideally suited to growing somewhere else.It is important to note that while the seeds of hybrid varieties can be saved, what grows from those seeds will likely have little resemblance to the previous year's plants. With the heirloom varieties I grow, I should be able to save seeds with reasonably reliable results but with normal variations.I am familiar with the fermenting method of saving tomato seeds but wanted to research my options to see if another method would work. I ran across this video that shows how to save tomato seeds on a paper towel.Fermenting definitely has benefits, the fermenting process helps break down the outer coating on tomato seeds, improving germination rates the following year, but increases the amount of seed handling and well...comes with a stinky, moldy cup hanging around for a week or two.I went with the paper towel method because it is easier, cleaner and has the added bonus that the bits of paper towel that will be torn off with the seeds next year will help hold moisture next to the seeds as they start to germinate.These Roma tomatoes will be popped in the freezer until I have enough to make a big batch of sauce to can or freeze.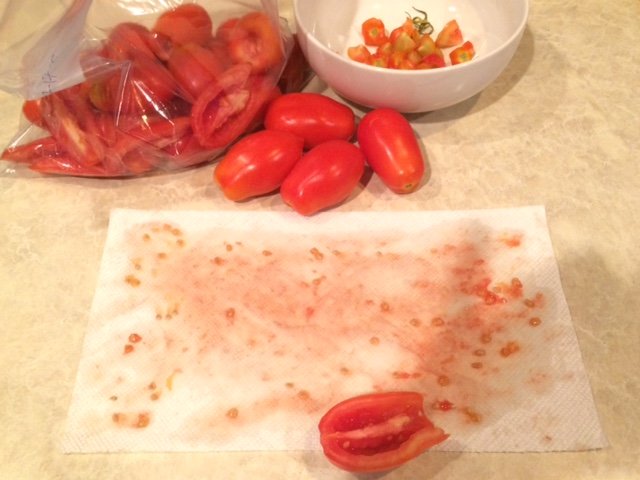 Selecting only the best specimens to save seed from and making sure to save from more than one plant to maintain genetic diversity. Each paper towel of seeds is from one tomato.
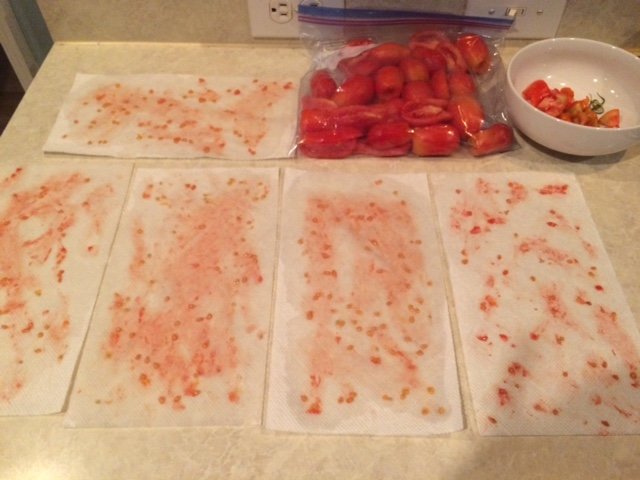 I have also been saving seed from the Amana Orange Beefsteak tomatoes.
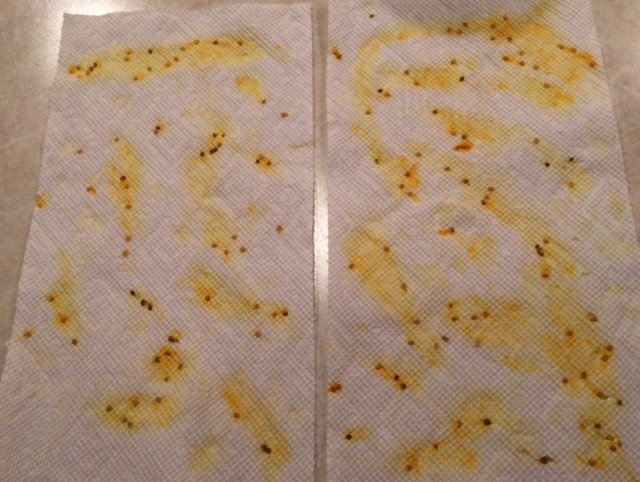 The seeds have been drying on wire shelving for a little over a week and are ready to be packaged, labeled and tucked into my seed box for next year.
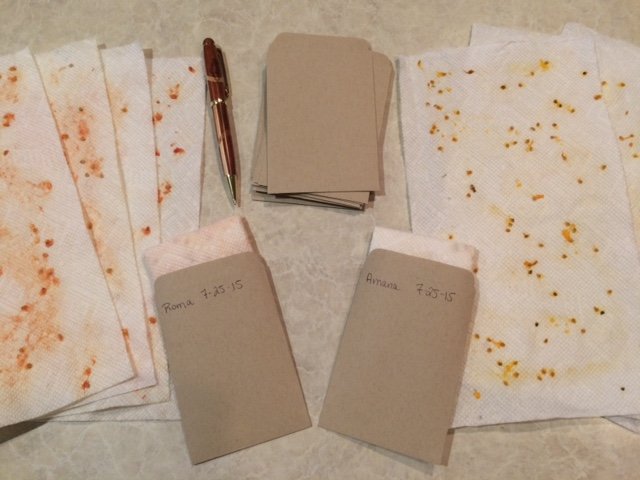 I plan to test the germination rate in late winter when there is still time to order and start seeds if this method does not prove viable. If it does work well, I will be looking to use something similar to paper towels again next year, but with recycled material that has not been bleached. Kaizen!
Canning - Green Beans
 I received a wonderful offer today from a dear friend and colleague. A hands-on canning lesson with fresh Blue Lake bush beans from her husband's garden. The photo below captures about half of his very productive garden. He is growing okra, summer squash, beans, broccoli, tomatoes, eggplant, basil and I am sure I am missing at least a few more.
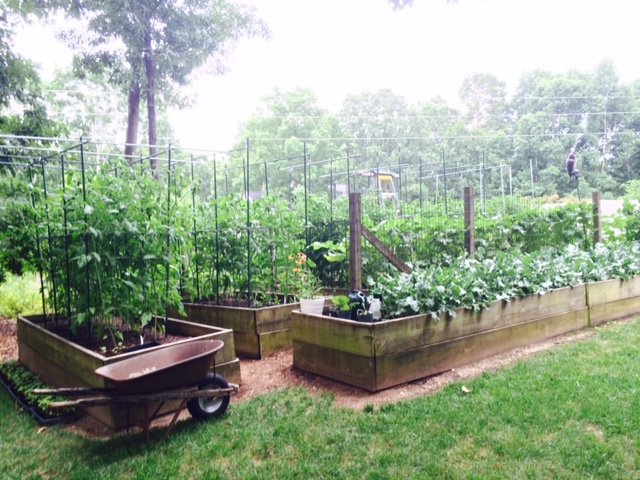 The Ball canning recipe book was open on the island and 6 quarts of beans were cleaned and snapped in a large bowl. We used a colander to submerge a portion of the beans into boiling water for 5 minutes.
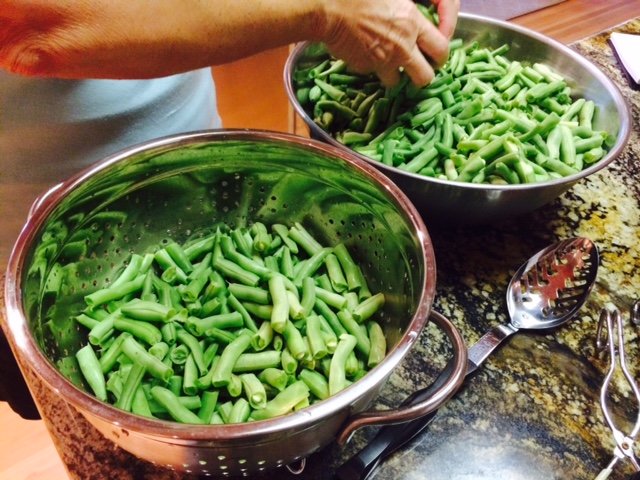 The 1 quart canning jars fresh out of a 180 degree hot water bath are started with 1 tsp. salt before being packed with freshly cooked beans to 1" from the top of the jar. The cooking liquid is then ladled in to the same 1" from the top. Long sticks are used to remove air bubbles by compressing the cooked beans inward from the jar and working all the way around it a couple of times.
 The liquid is topped off to 1" again and the neck of the jar cleaned to prepare it for being sealed.
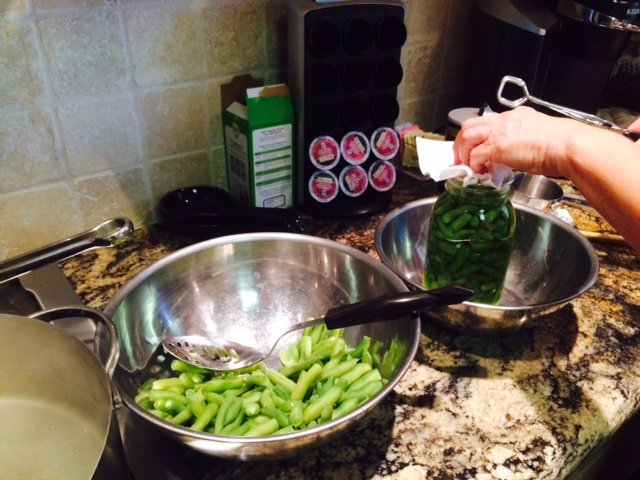 The hot lid is added fresh from the hot water bath (180 degrees) with tongs.
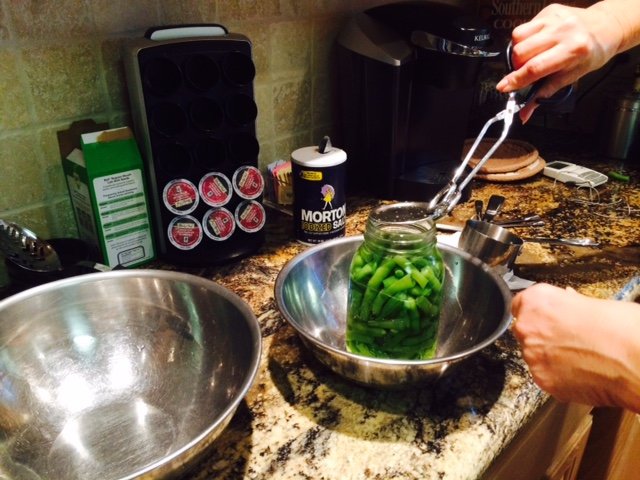 The lids are screwed on hand-tight and jars are packed into the pressure cooker.
 The recipe instructions for the pressure cooker are very specific. Eventually the pressure reaches 10 lbs and the beans are cooked another 25 minutes.
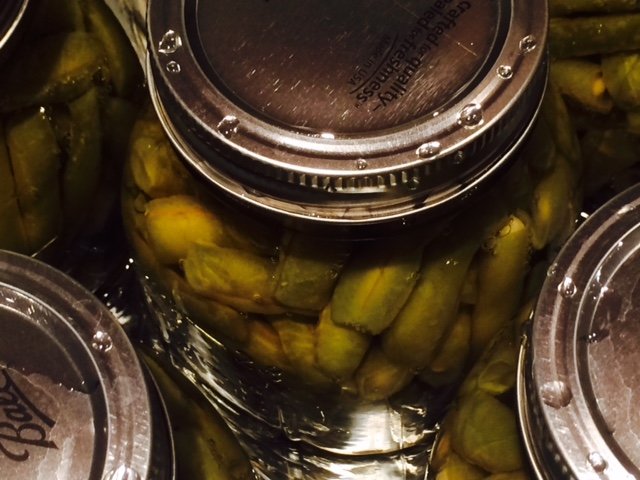
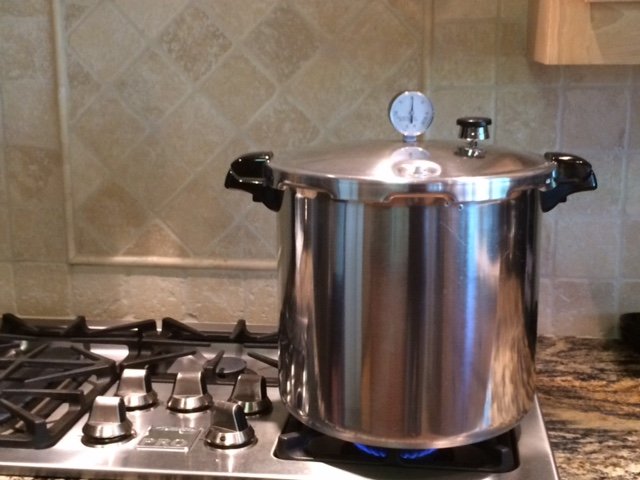 At the end of a couple of hours of wonderful company and conversation and a bit of vino, she had canned green beans and I had more experience and comfort with canning.
 On top of the lesson, she generously shared 2 quarts of the newly canned beans as well as some of their fresh garden bounty. I thanked her by graciously inviting myself to an upcoming tomato canning :)
Early July Update
This morning I started 22 strawberry runners and found another 8 that were already well established in the existing strawberry bed. I began this year with 32 plants and I think I will start 2016 with double the number.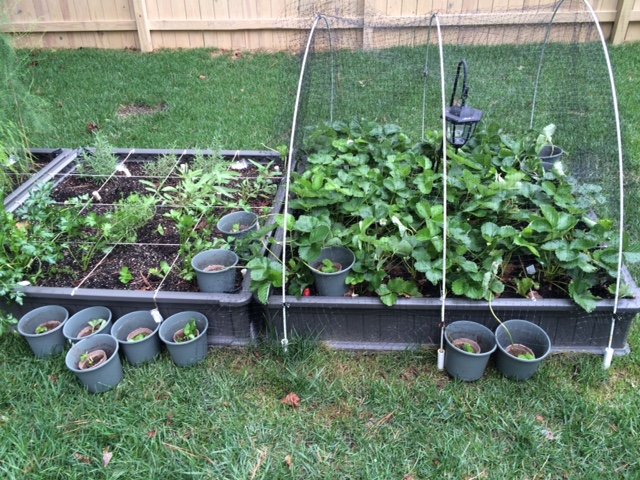 The serrano peppers are being harvested green but I am letting a few go to red also. They are hotter than jalapenos but I think they have a better flavor also.
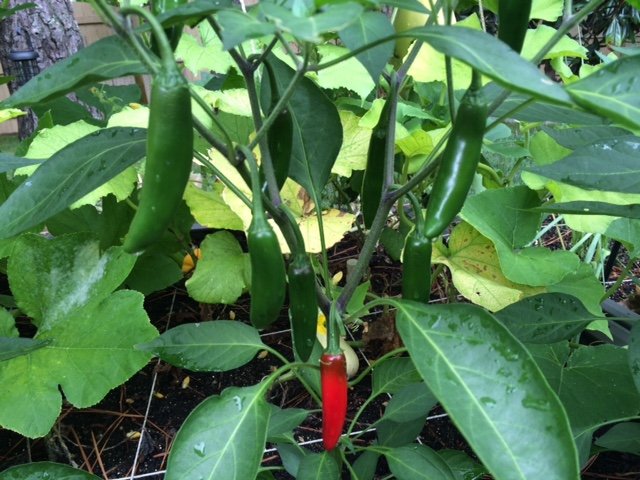 The Blue Beauty heirloom tomatoes are so pretty as their color develops. The bird netting has so far kept all of the slicing and roma tomatoes safe from birds and squirrels. My fingers are crossed that this holds true when they ripen too.
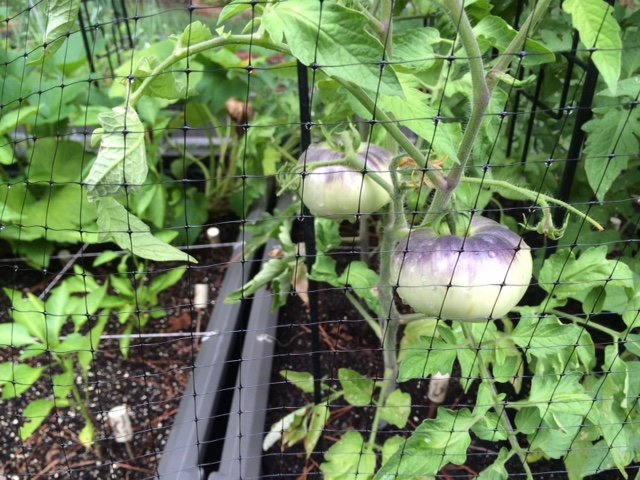 The first year blackberry has sent up one good cane so far which is secured to the trellis and is topped at 6.5' to encourage lateral shoots.
 The edamame is very close to harvest. I will freeze them in serving size vacuum sealed packages and hope to have enough to enjoy them throughout the year until the next harvest.
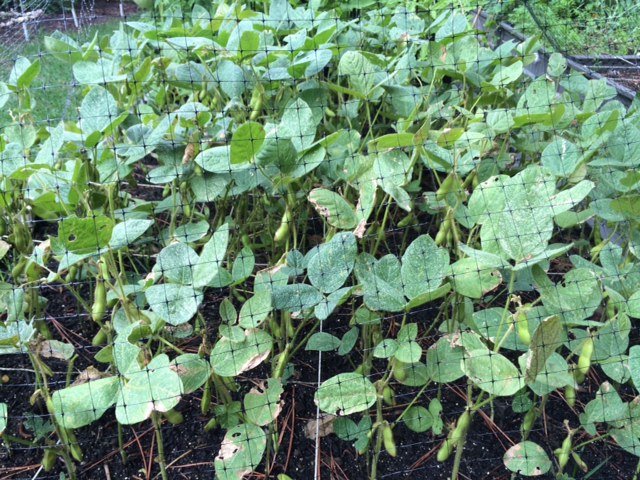 That's the garden update for this overcast and occasionally rainy July 3rd.
If I Were a Rich Man
I have the outlines of a dream homestead in mind and every time I think of it, the chorus from "If I Were a Rich Man" plays in my head. It sits on a small acreage, less than 15. It has a good sized, stocked lake, space for an expanded back yard garden, a greenhouse and a mixed fruit orchard. There is a place for a small apiary and for backyard chickens.Close on the heels of the song from Fiddler on the Roof is a tongue in cheek quote I first heard in a Michael Pollan book:As the farmer who won the lottery said when asked what he was going to do with his winnings, “Keep farming until it’s all gone.”While I enjoy the idea of my dream homestead, I am going to keep trying to make my .2 acres as productive as possible in the meantime!
A Tisket, A Tasket
A tisket, a tasket, sandwich greens in my basket!Tonight's dinner shopping spree in the garden was for accouterments for egg salad sandwiches. Clockwise starting at the bottom is some spinach that is on the verge of bolting in this warm weather, some lola rosa lettuce, cilantro and those olive green sprigs at the 3 o'clock position are sweet pea shoots (trimmed from the growing tips of my producing plants) which add a light, sweet pea taste to any sandwich, salad or stir-fry. In the center are leek thinnings which I use like scallions and add a lightly onion taste to dishes.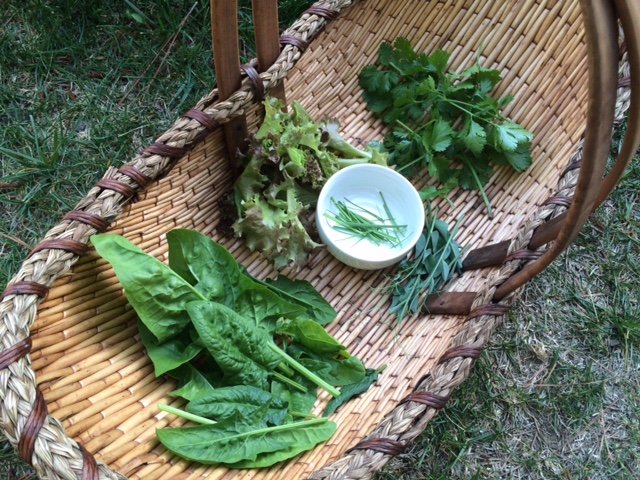 If you to garden but don't want to dine on salads nightly, I agree wholeheartedly and suggest we make a nice sandwich instead!
One Man's Trash is Another Man's Haute Cuisine
In the past couple of years microgreens have become a buzzword on restaurant menus and news articles talking about their nutritional content compared to the mature varieties of the same plant. Some early studies show that there may be reason to laud their nutritional content and chef's put them on their menus because they are delicious to the eye and the taste buds.I grow a number of indoor microgreens (basil, cilantro, mustard, arugula, beets) to add color, flavor and crunch to dishes but you don't have to set up a grow area to get some microgreens in your diet, you can just repurpose your plant thinnings.This year I overseeded my regular and dwarf varieties of pak choy and basil in my backyard garden because I was using 3 year old seeds and suspected that I would have low germination rates. Surprise, the seeds germinated at a remarkable rate and now I have a whole lot of extra seedlings that will have to be removed to make room for the vigorous individuals to grow to maturity. Rather than cut them and toss them in the compost, I let edible seedlings grow enough to be used as microgreens before snipping them down.Below you can see that I thinned one square of the dwarf pak choy that will be used as microgreens today and I will save thinning the square next to it until I can use them in a meal. Waste not, want not!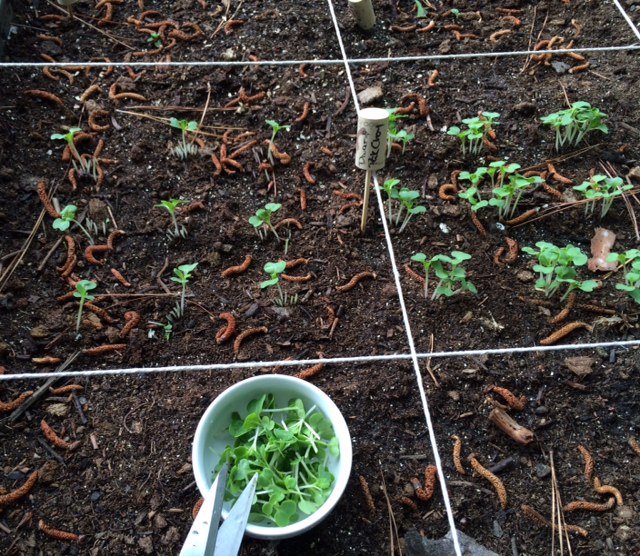 Whether you are just thinning seedlings or clipping microgreens to go into your next meal, be sure to use scissors or a similar sharp pruner to cut the plants at soil level. If you pull on your thinnings, you may damage the delicate roots of the one you have selected to grow to maturity.
Getting The Most From Your Harvest
For urban growers, getting the most production out of the smallest space possible is an absolute priority! I can grow a lot in my 224 sq ft space, but there are ways of making what you grow give you even more.One of my favorite methods of getting more is to harvest leaves, but allow the plant to regenerate and keep growing more leaves. Not all garden plants are suitable to this, but if it is an herb or vegetable you grow for the leaves, chances are that you can.Some of my favorite plants to steal from are cilantro, chard, spinach, lettuce, basil, oregano, rosemary, sage, thyme and parsley and you can do this even when they are quite young. The trick is to only steal a little from each plant so the plant can recover and continue to grow.Below are my young cilantro plants. I choose the largest, oldest leaves from furthest down the plant stem to leave the fresh young growth undisturbed and pinch off one or two from each plant or as much as is needed for a meal.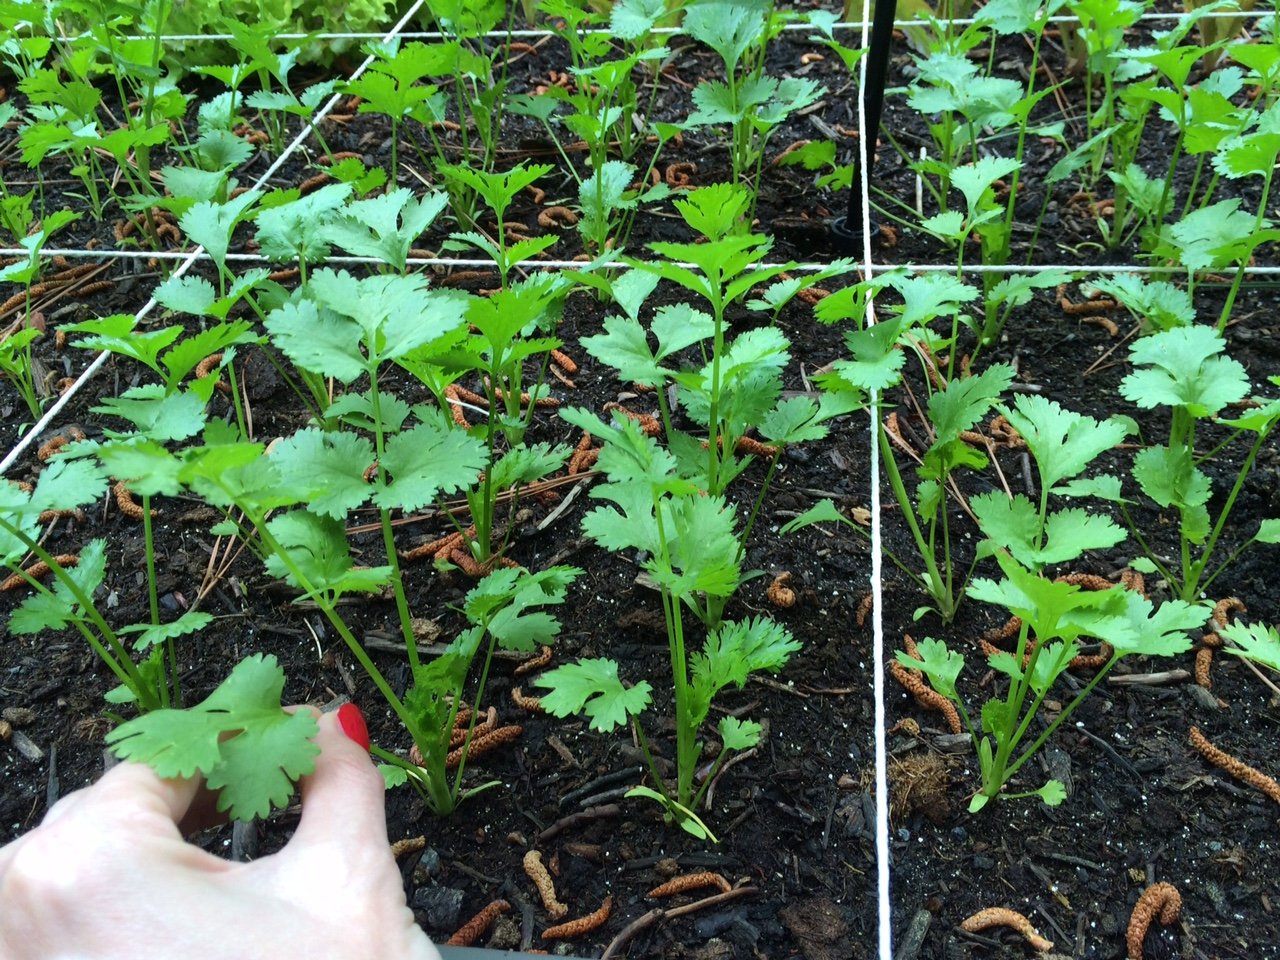 The spinach is more mature but I still want to keep the plants growing and only harvest what I need right before a meal.
 There is nothing fresher than still warm from the sun or wet from the rain.
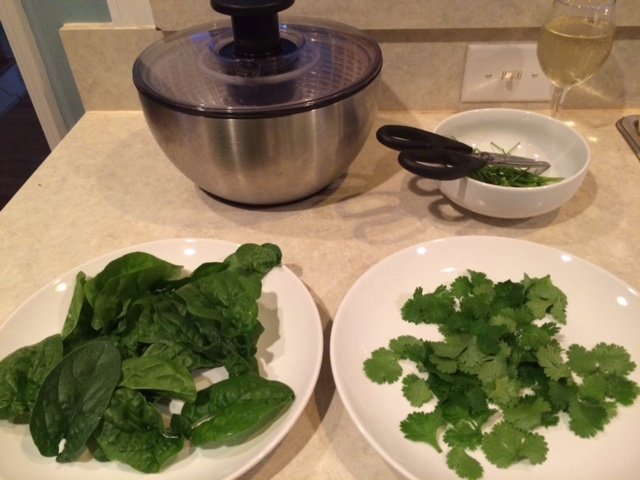 Who says you can't have your plants and eat them too :)*Note - even those little cilantro and spinach stems will be put to good use either as flavorings for stocks or to into the compost.
Extensive Gardening
If you are not familiar with the terms extensive and intensive, they can be a bit misleading. Extensive doesn't mean large, it means requiring little or no additional inputs (fertilizer, compost, labor, etc.) and intensive doesn't mean working hard, it means using a lot of those same inputs. A great primer on the differences can be found here.For my initial garden set up, it was intensive. I purchased the raised beds, the materials to make soil (compost, vermiculite and peat moss) and seeds. But once it is set up, I was able to become much more extensive. I save seeds, any part of the plants that do not end up on a dinner plate go into the compost to feed the next generation, seedlings that need to be thinned have those same two options - food or compost, or as my son says "the circle of life".I still have water as a major input when the skies aren't doing the watering for me and I still have to buy some seed, but otherwise it is a pretty closed cycle with most of what my garden needs coming from my garden and yard. I have looked into the rain barrel collection options but I am not convinced that water that has run off a petroleum based shingle roof is a good idea for growing my food.In the meantime, more and more people like me, who have a generational disconnect from the conventional farming ways of our grandparents and great-grandparents are taking up farming and urban farming. With this new generation of growers we are seeing an entirely new set of best practices and innovative ideas. Maybe someday soon I will be able to have a completely closed system.
Growing My Garden
One month and seven days after the evil groundhog did his worst, the Raleigh area has had two days in a row that could reasonably be called spring-like. The latin edict of carpe diem sent me to my backyard today to set up my new garden beds in preparation for the spring planting and transplanting that will be upon me in a few short weeks.Back in 2011 when I was learning about square foot gardening, I did a lot of research on what to make my raised beds out of. I wanted to find something both durable but also easy to break down and transport since I knew I would only be in Kansas for a few years. I found the Lifetime Products 4 x 4 raised beds and have never looked back. They are easy to put together, rot resistant, BPA free, lightweight and transportable (10 of them traveled with me from Kansas after a year and a half in use) and are very nice to look at. I priced out the Lifetime beds compared to making wood ones and found the lifetime to be a better bargain for my needs.Today I wanted to show how easy they are to put together so here I am with my weed barrier in place and putting together one of my new beds in my On Screen Debut.Another benefit of the Lifetime beds is that they have little markers for the square footers among us. I use those guides to drop in small, galvanized screws and tie kitchen string between them to mark out my squares. It creates an attractive, floating (but still flexible) grid to plant within.I now have all of my beds set up and in place and just need to mix the soil for 4 of them. I have 8 that need to have their floating grids of kitchen string but should have my garden up and ready to go in the next two weeks, which is a good thing considering the size of my zucchini starts!
New Beginnings
The groundhog has come out of his hole to do his evil once again this year and after few minutes spent researching his predictions (hint - he pretty much always sees his shadow and his accuracy is debatable) I got down to the real business of early February - seeds!My 2015 garden as it exists on paper and in seed packets, has already expanded over previous years' in terms of both square footage and vegetables to be grown. It may expand a bit more before the daffodils raise their heads and announce the official start of Gardener's Spring.I have been busily recycling the newspapers left in my driveway and on the office breakroom table for months into folded newspaper seed pots in preparation for this first full week of February.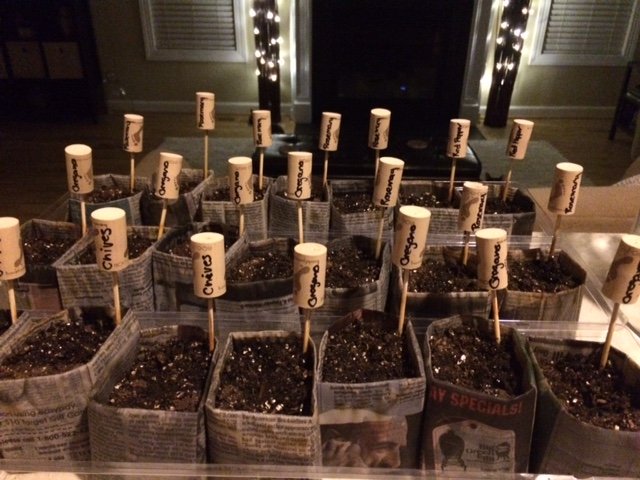
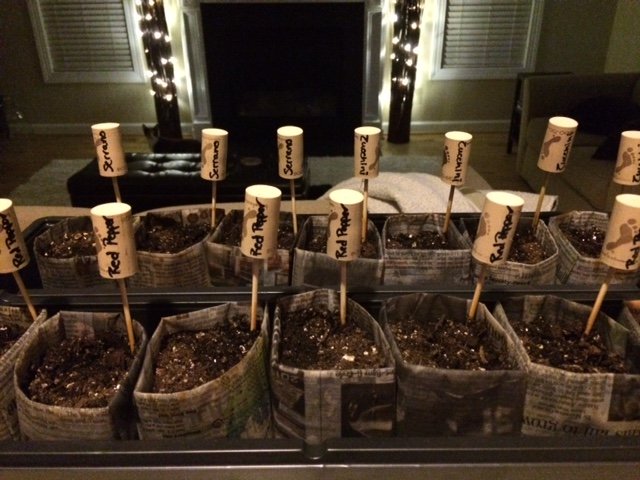 I would also like to that all those generous people that donated used wine corks for my plant markers ;)
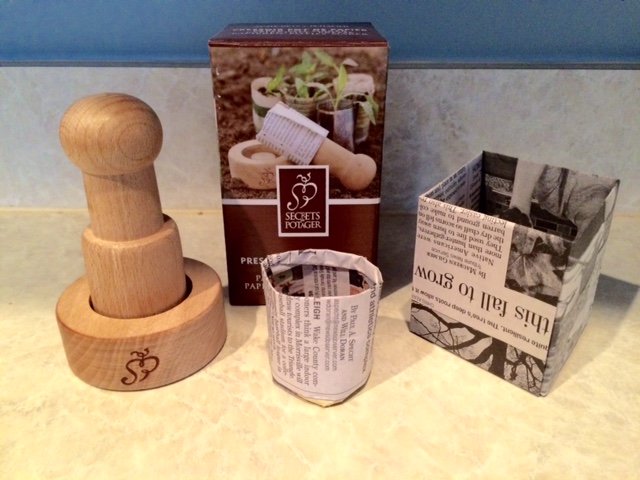
Garden Craft
I ran across this wooden paper pot maker online and wanted to try it. I made a couple of so-so pots with it this morning then searched for a video tutorial to see if there were any tricks to doing it. During my search I ran across this origami paper pot video so I had to try that too.I think I prefer the origami version for strength of construction, aesthetics and depending on the seedling being started, size, but both fun ideas for biodegradable seedling pots that recycle newspaper.