
I started my journey into the wild a few months ago when I became curious about wild rice because it checks all the boxes for something to put on the planned buying list; lightweight, non-perishable, high nutrition and delicious.I quickly learned that this little grain is not a rice at all and that most of the wild rice on the market is cultivated, so it isn't really very wild either. Instead, wild rice is an aquatic grass with 3 varieties native to different parts of North America and bonus fact, wild rice is North America's only native cereal grain.Nearly all of the commercially available wild rice on the market is the cultivated variety with a tougher, glossier sheath. It is grown in man-made paddies that are first flooded and later drained for mechanical harvesting. But there is some wild rice on the market that is truly wild, self seeding and hand harvested from natural lakes as it has been for at a couple thousand years in Lake Superior area of Minnesota. Currently this truly wild rice sells for around three times the price of the farmed varieties.I found many examples of both cultivated and truly wild rice online and because of the price difference, wanted to do a comparison. Before purchasing though, I took advantage of a local foodie connection and reached out to a friend in northern Minnesota to see which brands she trusted only to learn she buys local and direct, getting her supply of truly wild rice from the hand-harvester. While she had no advice to offer on commercially available brands, she did generously offer to share some of hers*.I ended up purchasing a 1 lb. bag of each to try and as far as cooking goes, the truly wild version cooks in about 1/2 the time (30 mins) of the cultivated variety. They have both been prepared in plain water and water+chicken broth. Both were delicious when served hot with a little butter, reheated and served cold, tossed in salads and fajitas for extra protein and fiber. Since it is so flexible, I make double and triple batches to have cooked rice on hand throughout the week.The first few times I made it I used the standard stove top method. But then I tried the Anson Mills technique and the results were beyond compare. This involves straining the rice just before it is done, spreading out in a shallow pan and placing in a warm oven to dry for 5 minutes then patting with butter and serving.Whether truly wild or cultivated wild, I think this grass grain is on my table to stay!* The wild rice pictured at the top of this post is some of the truly wild rice my northern Minnesota friend shared from her personal stash with me. The sheath is not the uniform mahogany of the cultivated variety and gives away its grassy nature. I am not sure which method was used to dry/parch this wild rice versus the varieties I have purchased, but that may have played into the cooked result. My 11 year old who knows nothing of the provenance of any of the wild rice that has been a staple on our table for the past few months declared this wild rice to be the best we have made.
Read More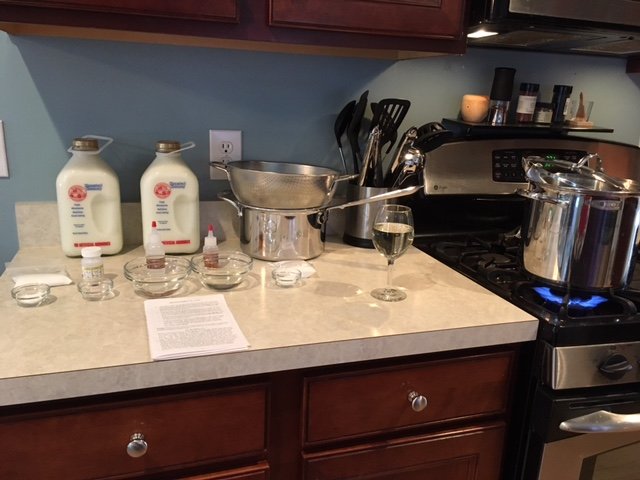
Mozzarella Mise En Place
Cooking Up A Hurricane - Mozzarella (Part 2)
As a cook (and human being) I am much more comfortable in the zone where I am critiquing past performance and looking for areas for improvement over standing on the precipice of something I have never tried. To that end, one of my favorite phrases is the French culinary phrase 'mise en place", which means "putting in place" and is a practice used in recipes that benefit from having all the ingredients measured and prepared before beginning.For my first ever adventure into home cheese making, mise en place was required...and possibly wine...Soft-cheese making is pretty straight forward (for the practiced) but with some specific temperatures serving as prompts to move to the next phase. Since this was my first go at it, that translated into me constantly monitoring temps so as not to pass or miss an important temperature window.With the first attempt at anything there are questions...are my curds curdy enough? Is the mesh in my strainer too large (or too small) that I have curds filling the holes?But then magic! I made cheese!!In the end, like any new recipe, it went mostly well with a decent and edible result. Then I begin the process of #Kaizen - constant, incremental improvement:
The cheese was a little firmer than most of the purchased mozzarellas I am familiar with - did I over work the curd?
The cheese was good, but a little on the salty side - I need to cut the salt in 1/2 for the next attempt.
My mozzarella was a little more yellow than the milky white mozzarellas I buy - is that related to the milk I purchased, something I did...I need to spend some time on google...
My favorite recipes rarely began as they are today and I am happy to add cheese-making to the list that is being constantly improved and refined until it reaches the point of second nature.
Read More
Collards in the Garden
Collards - From Garden to Table
This year I grew the heirloom collards called Georgia Southern Creole, a pre-1880 southern variety that has done quite well overall.Growing organically means that some of the leaves were ventilated by a mid-summer cross-striped cabbage worm invasion (treated with BT) and that I am currently trying to diminish the whitefly population with a hose and organic soap. Having no pests is not an option, keeping them in check is the goal.No matter how your collards were grown, its always best to give them a good soak and cleaning before cooking and the easiest way to do that is to fill up a sink with enough water to cover then swish, swirl and agitate, drain and repeat.I have tried a number of collards recipes and variations since moving to the south 3 years ago and this is the one I like best so far:Braised Collards:
1 lb of washed collards, stems still on
1 TBS oil (I use an extra virgin olive that is good for cooking, but any vegetable oil should work)
3 slices of thick sliced bacon, cut into lardons
1/2 tsp red pepper flakes (more or less depending on preference)
1 medium onion, chopped
1 TBS red wine vinegar
6 TBS stock (chicken, vegetable or mushroom)
Salt to season
Remove stems from collards and stack leaves and stems separately. Finely dice the stems and set aside. Stack a few collard leaves and roll into a cigar shape and cut crosswise (chiffonade) into 3/4" pieces, repeat until all leaves are cut and set aside separate from the stems.In a large frying pan (I like to use my 10" straight walled pan) on medium-high, heat oil until hot but not smoking. Add bacon and red pepper flakes and stir until bacon begins to crisp. Add onion and diced collard stems. Cook until onions are translucent and stems have begun to soften, about 10 minutes.Add the chopped leaves one handful at a time, turning into the bacon and onion mixture after each handful before adding the next. When all of the collards have been added and turned into the mixture, salt to season. When the mixture begins to sizzle, add the red wine vinegar and use a wooden spoon to gently deglaze the pan while turning the mixture.Add your stock* and turn into mixture, cover and turn heat to low. Let cook another 10-15 minutes until greens reach desired softness. If necessary, add more stock to keep from drying out.*Note - I filter and freeze the water after I have rehydrated morels and use this to add liquid and a delicious umame component to many dishes, including this one.
Read More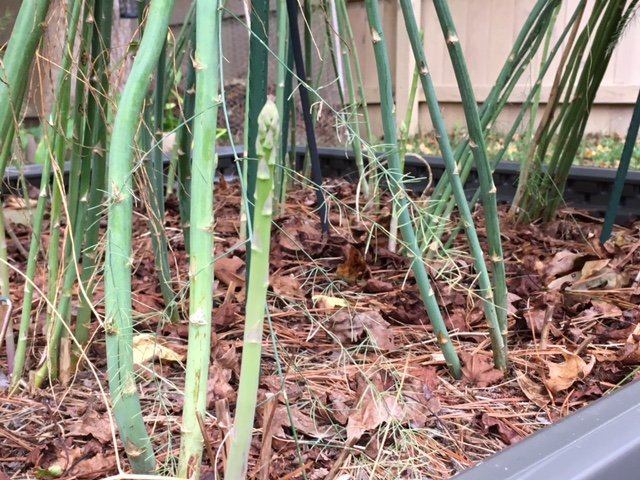
Fall Asparagus Spear
Fall Harvest Asparagus
This post comes after more than a year of researching every way I can think of and completely failing to find anything related to the matter at hand. The matter at hand is the second growth of asparagus spears in the early fall, long after the asparagus crowns have been allowed to grow the long, bushy fronds they need in order to feed the crown for next year's growth and more specifically, whether or not a small portion of the second growth can be harvested.Unable to find any information either for or against sneaking a few of these late season spears, I have had to reason this out for myself for the past two years and while the result is probably entirely predictable (Garden fresh asparagus in fall? Yes please!), I like to think my reasoning well rooted in a layman's pseudo-botany. The rationale goes something like this: the individual asparagus crowns have been photosynthesizing since May, and of the new spears coming up in September/October I am only taking about 1 out of every 3 of the new growth spears and then only off of crowns that already have more than 3 stems that have fully grown out and are working hard to supply nourishment to the crown to take it through winter and make a stronger growth next year.With 16 crowns all together (8 Jersey Knight and 8 Purple Passion) all of which are enjoying a youthful resurgence right now, this equals out to around 4-5 spears per week that are coming indoors and leading to some interesting, not-normally-on-the-same-plate combinations. This afternoon for lunch, I sauteed some asparagus picked 30 minutes earlier along with some Italian kale harvested at the same time.But my favorite has been adding asparagus to my Whatever Is Fresh Scrambles!This one featured rehydrated morels, 4 spears of asparagus, 4 cherry tomatoes and 2 red serrano peppers - all from the garden except for the morels. I saute all ingredients except the more delicate tomatoes in butter with a little olive oil until the asparagus is just shy of done.When the asparagus has softened, add scrambled eggs to the mix then fold in the quartered cherry tomatoes.When the eggs have finished cooking, plate with a little shredded cheese of your choosing - I have used both colby-jack and mozzarella and both have worked wonderfully. Top with your choice of fresh herb (I alternate between basil and dill) and voila - delicious and nutritious meal in just a few minutes!
Read More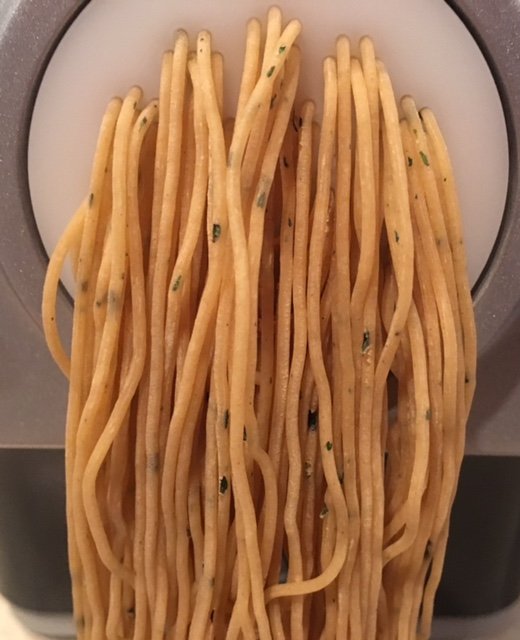
Extruding Basil Herbed Pasta
Better With Basil - Pasta Maker
Late blight is wrecking havoc on North Carolina tomatoes this year, particularly the heirloom varieties. Last year I was pulling down green tomatoes in late November and this year they were pretty much done by late August. C'est la vie.Luckily, there are some good things happening in the kitchen while I wait for the fall lettuce and spinach to fill in the garden. I have been working with my pasta maker, trying different shapers and getting the hang of the process. This week I wanted to try adding some fresh basil into the mix so I chopped it very finely and tossed 1 gram of it with the Anson Mills pasta flour before adding it to the maker using the angel hair shaper.The result was very pretty and did have a hint of basil taste. I was concerned that the basil would interfere with extruding and/or the pasta's ability to hold together when cooking, it did neither.I want to try the experiment again with a little more basil which means I should probably use the spaghetti shaper to be safe. I had already started the sauce when I decided to try adding basil to the pasta but next time I would like to try it with a simple butter garlic sauce that won't overpower the flavor of the pasta like the thick, homemade tomato sauce in the photo above.I am also wondering if I can do the same thing with finely chopped, fresh spinach and a thicker noodle.With fall/soup season just around the corner I have also ordered some kansui, the alkaline ingredient that gives ramen noodles their distinctive texture and the ability to hold up well in soups.I am beginning to suspect that the folks that sell fresh pasta and noodles at the Farmer's Market aren't doing it to make money, they just want an excuse to make more than they can personally eat...
Read More(Nearly) Nose to Tail Cooking
Chef John from Food Wishes (on YouTube and BlogSpot) has become a permanent presence on my laptop and in my kitchen over the past 6 months. In addition to being an award winning chef, he is a gifted educator and my go-to guy for recipe ideas for farmer's market finds, cooking techniques and new takes on old dishes.Recently I have made two of his recipes that were particular standouts for me. They were easy, delicious and used parts of the vegetable or animal normally thrown away without a second thought.I have been cooking with broccoli stems for years, but it is not often I see them in recipes. For his broccoli angel hair pasta recipe he calls for simmering the diced stems until soft as part of the garlic sauce and for his paella recipe, he calls for sauteing the shrimp shells to add extra flavor and body to the sauce.Briefly my results followed by Chef John's fantastic recipe videos:
Read More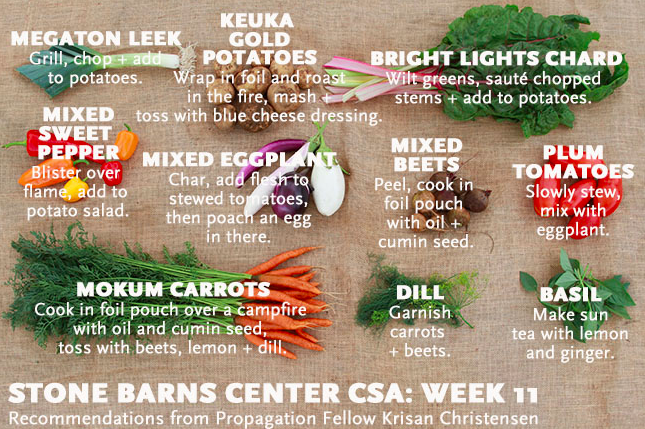
Week 11
22+ Reasons to Love Stone Barns Center
There are many more reasons to love the Stone Barns Center for Food & Agriculture than the 22 that inspired this post, so after you have finished reading here, click on over to their site and see what the + is all about.Like so many others, I first learned of the farm at Stone Barns and the gifted Farm Director, Jack Algiere in Dan Barber's brilliant book The Third Plate, but it was not until last weekend that I actually visited the Center's website to see what I could learn about the farm itself.What I found was the truly inspired and inspiring gallery of images from each of the 22 weeks of the farm's 2015 CSA (community supported agriculture).Inspired because in addition to the beautifully photographed produce with variety labels, perfect for those of us looking to expand our varietal repertoires, the images also include a couple of lines for how to prepare them, sometimes individually and sometimes in combination with other items from that week's box, answering the ubiquitous CSA question of "Okay, I have it, now what do I do with it?".Inspiring because all the suggestions are for whole foods, so simply prepared that there are no recipes or even need of recipes.Part of the Stone Barns Center's mission is "to create a healthy and sustainable food system" and teaching a new generations of farmers how to grow healthy soil while growing healthy food is part of achieving that mission, but so is educating the consumers of that food system because it doesn't matter how healthy and sustainably food can be produced if the people shopping for food do not know what to do with a variety of fresh produce.Kudos to the Stone Barns Center for Food & Agriculture for this simple, but powerful idea to better serve their own CSA customers, but also for going a step further and making it available to anyone who might find themselves staring at a bunch of carrots (or leeks, or beets, or peppers, or kale, etc.) and wanting to make a great meal starting with whole ingredients!Click through the full 22 week gallery of their 2015 CSA and "Farm-Driven Cuisine".And a special thanks to the Stone Barns Center for allowing me to use two of the images from their gallery - in this case, a picture is worth four hundred and eleven words.
Read MoreFlavor Bases From Around The World In Less Than 2 Minutes!
Fired Up For Summer
I know it's a bit early to be thinking about summer and fresh from the garden salsa, but the recipe below for Fire-Roasted (Cherry) Tomato Salsa from the very entertaining Chef John Mitzewich (Food Wishes) sent me back to my garden plan to make sure I plenty of cherry tomatoes started to enjoy this salsa all summer!My favorite recipes to make have at least some portion of the ingredients coming from my own garden and this one definitely fits the bill for being NearlyHomeGrown with cherry tomatoes, cilantro, oregano and serranos substituting for jalapenos as key ingredients.
This Ain't Your Grandma's Pressure Cooker
A couple of weeks ago I was interested in understanding how pressure cookers work and I ran across this aptly titled video by America's Test Kitchen "Why Chefs Love Pressure Cookers".I was intrigued with the chefs describing how pressure cookers can cook sometimes tricky dishes to perfection and how the steam within the pressurized chamber infuses the dishes with deep flavor, but it was Tony Maws using a counter-top electric pressure cooker that completely captured my attention and sent me searching in a whole new direction.Electric pressure cookers eliminate a lot of the fear inducing factors novice pressure cooker users have about the stove top kind as well as a lot of handy features cooks of any level will love. They have a sear setting to brown meats and/or veggies before adding in liquid to finish the meal, they have food-type settings (i.e. meat, vegetables, rice, beans) to take a lot of the guesswork out of the length of time and pressure to cook with, and have redundant safety features to avoid the exploding pots some of us remember seeing in the 70s and 80s when an inattentive cook allowed the pressure to get a little too high.Fast forward a couple of weeks and dozens of viewings of pressure cooker meal recipes later and my Breville Fast Slow Pro was here and ready to be tested. I started with this simple Pot Roast recipe from Flo Lum (more on her in a minute). The meat was seared then removed from the pan to sear the carrots and onions while the pan was gently deglazed.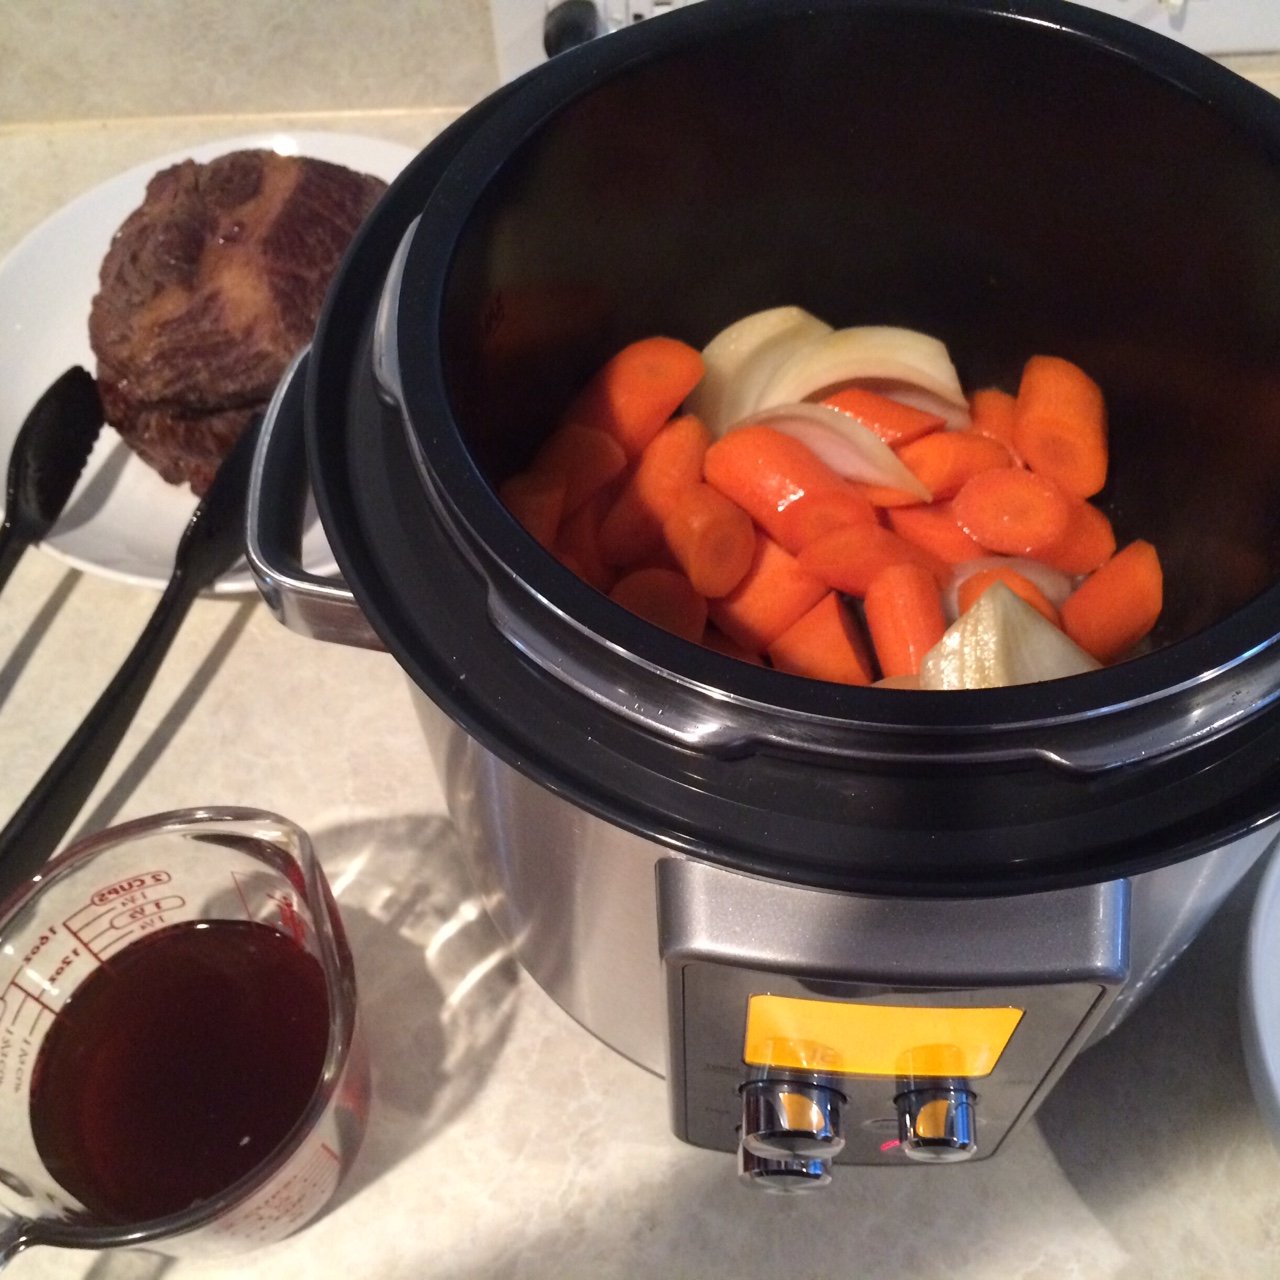 The veggies were then removed, the meat added back in and the veggies placed around it. A little thyme, salt and pepper and it was ready to cook.
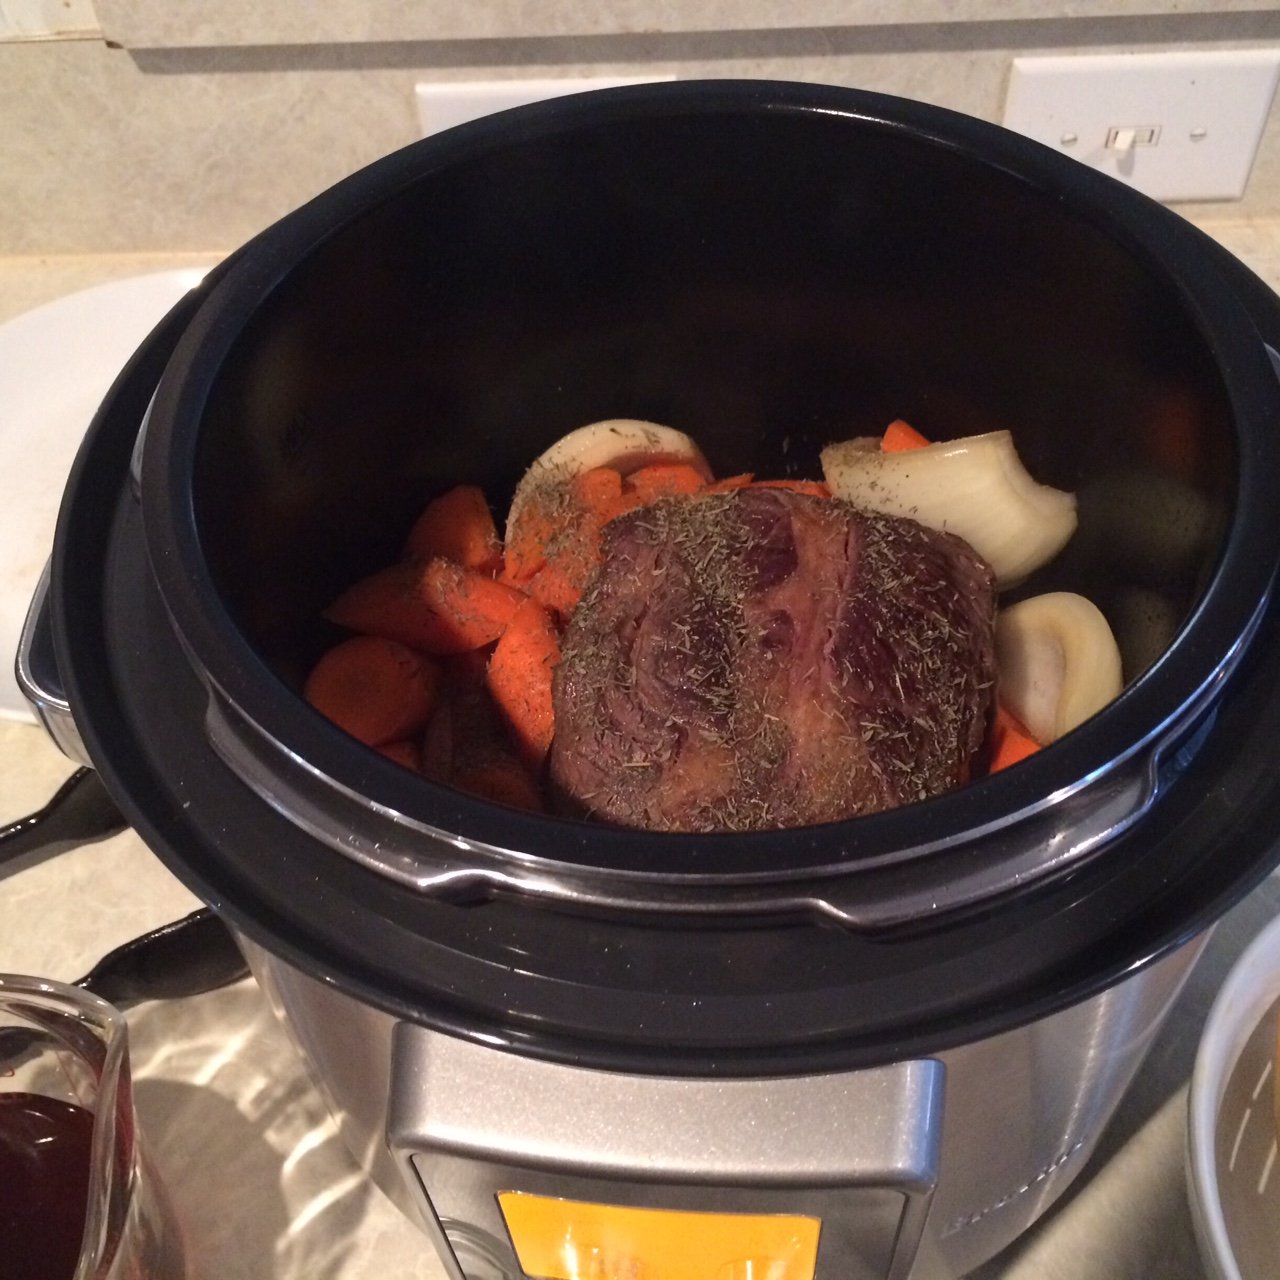 In just 50 minutes I had a delicious one-pot meal that was tender, flavorful and so easy!
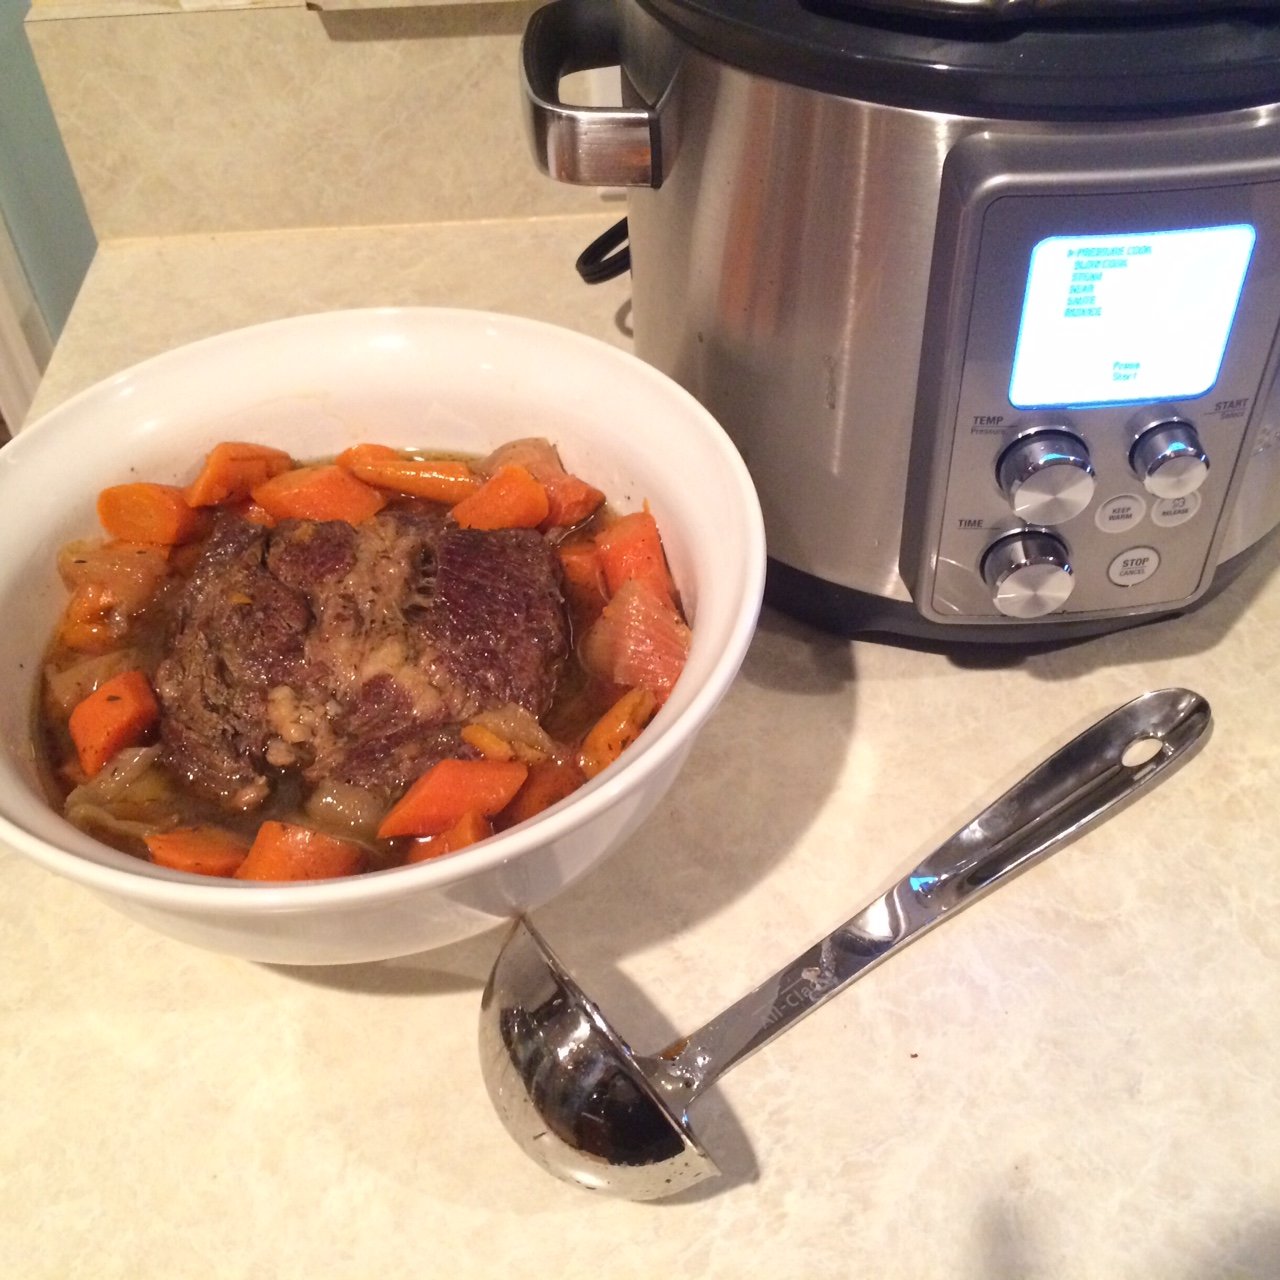 I had been accumulating recipes I wanted to try once my cooker arrived and will share some of the variety below. A disproportionate number are from Flo Lum's pressure cooker playlist because she does a great job of displaying the versatility of these counter top appliances and she has a companion blog for printable versions of her recipes.Zuppa Toscana - Risotto - Mashed Potatoes - Low Country Boil - Applesauce - Holiday Ham - Baby Back RibsAfter seeing the Zuppa Toscana recipe I had to reconsider my decision to not grow kale this year and now have some Nero Di Toscana seeds started to add some fresh, homegrown flavor to this dish when I make it later this year.
To Buy or Not To Buy, That is the Question (Dal Fry)
Each year between September and January the question of "what to grow" must be asked and answered by growers everywhere. This is the time of year when seeds are carefully saved, seed catalogs are perused and garden plans begin to be sketched out for the following year.Asking and answering the question of what to grow necessarily means also answering the question of what not to grow, i.e. "what to buy" the following year with the answer being - everything else.Wendell Berry spoke eloquently on the consumer side of agriculture with his often cited quote, "Eaters must understand that eating takes place inescapably in the world, that it is inescapably an agricultural act, and that how we eat determines, to a considerable extent, how the world is used." So this answer to "what to buy" is in many ways, just as important as what we chose grow.Consumers are considering this question of the provenance of our food more often today and answering it from a variety of perspectives such as the locally-seasonally available movements to reduce food miles like the 100 Mile Diet (and its many variations), the Fair Trade movement and the certified organic movement. We are setting personal standards and restrictions on what we can and will purchase.Though it doesn't have a name or a label, another way to look at growing vs. purchasing locally from other growers vs. purchasing locally after being transported from across the globe is to consider the water content. Fruits and vegetables in particular have incredibly high water content and shipping this water across the world with fossil fuels comes at enormous environmental impact.Foods that are high in water content are highly perishable so the varieties grown are selected for their ability to withstand the journey, not for their flavor or nutrition. The perpetual summer these commercially grown and shipped varieties create in our grocery stores crowds out consumer demand for locally grown produce when it is in season, impacting the number of US family farmers that can make a living growing food.So which foods make a great planned buying list? Outside of locally grown fruits and vegetables, purchased from local farmers when they are in season, buying dried foods which are light and unlikely to be damaged in transport compared to high-water foods helps keep local farmers farming and reduces the need to ship water from one part of the globe to another. Rice, wheat, oats and other grains as well as beans, lentils and pasta are all high in nutrition, lightweight compared to water heavy fruits and vegetables, have a long shelf-life and the water gets added by you when you are ready to use them.A few months ago I wanted to try making a dal fry (a Punjabi lentil dish) and found this great crock pot recipe for toovar dal fry over at The Novice Housewife which I made with only one modification - I added the tomatoes at the end of cooking the dish, not the beginning.The dal fry was fantastic and I wanted to investigate growing lentils myself. I quickly learned that the lentils used in the dish cannot be grown in my humid area so were not a candidate for future garden plans, but since they are a dried and nutritious food as well as being delicious, dal fry will remain on my menu.
Variations On A Theme - Potato Leek Soup
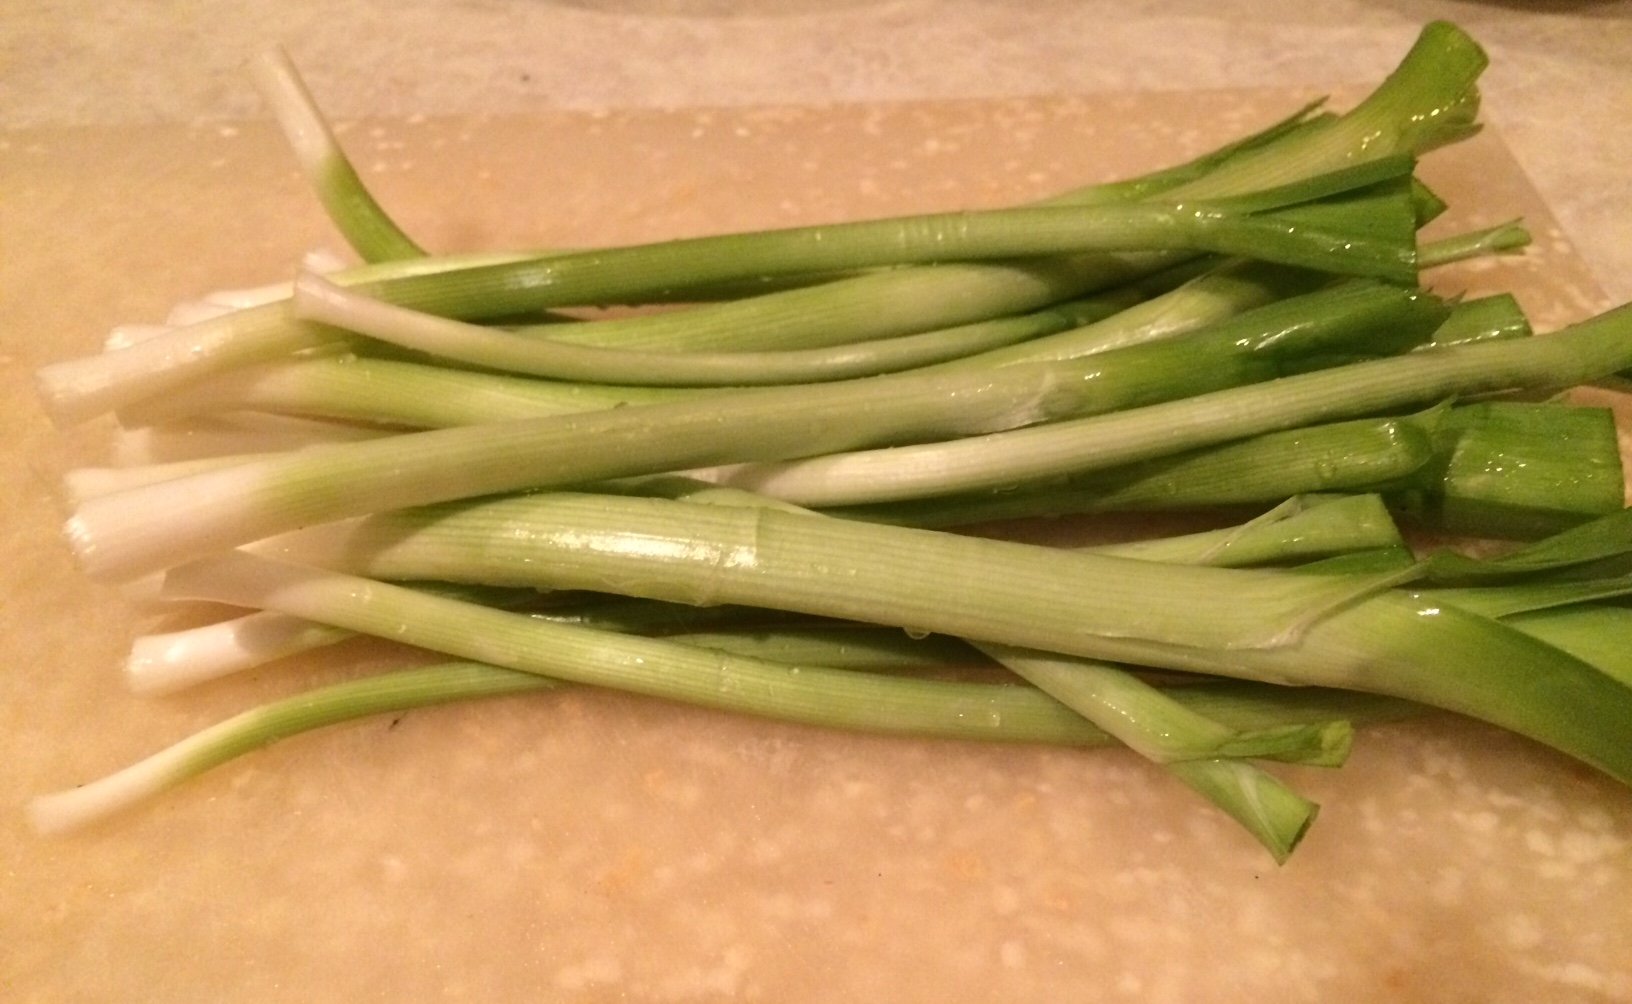
My favorite recipes are the ones that resemble a good canvas - a delicious backdrop that can be accentuated and modified by what is in season and/or on hand. Having just finished a post about an overabundance of serrano peppers, I wanted to do a variation on a fall favorite - potato leek soup.This year's leeks are on the thin side which I attribute to my north facing backyard garden, so I harvested roughly 3x the number I would normally use for this recipe.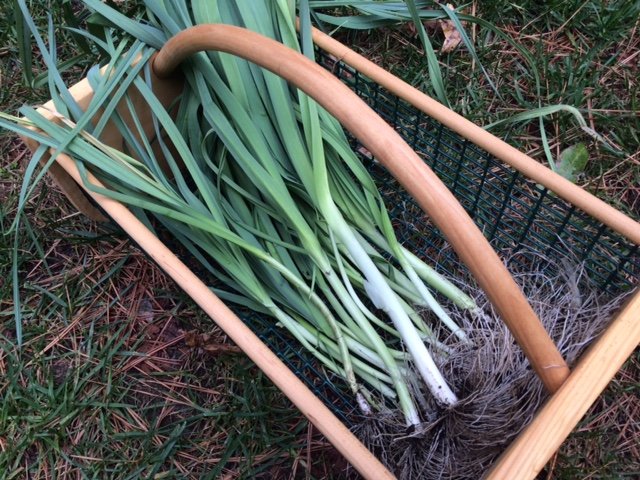
 I decided to add some kick to the background canvas and finely chopped 4 roasted red serranos from my freezer and fresh oregano.
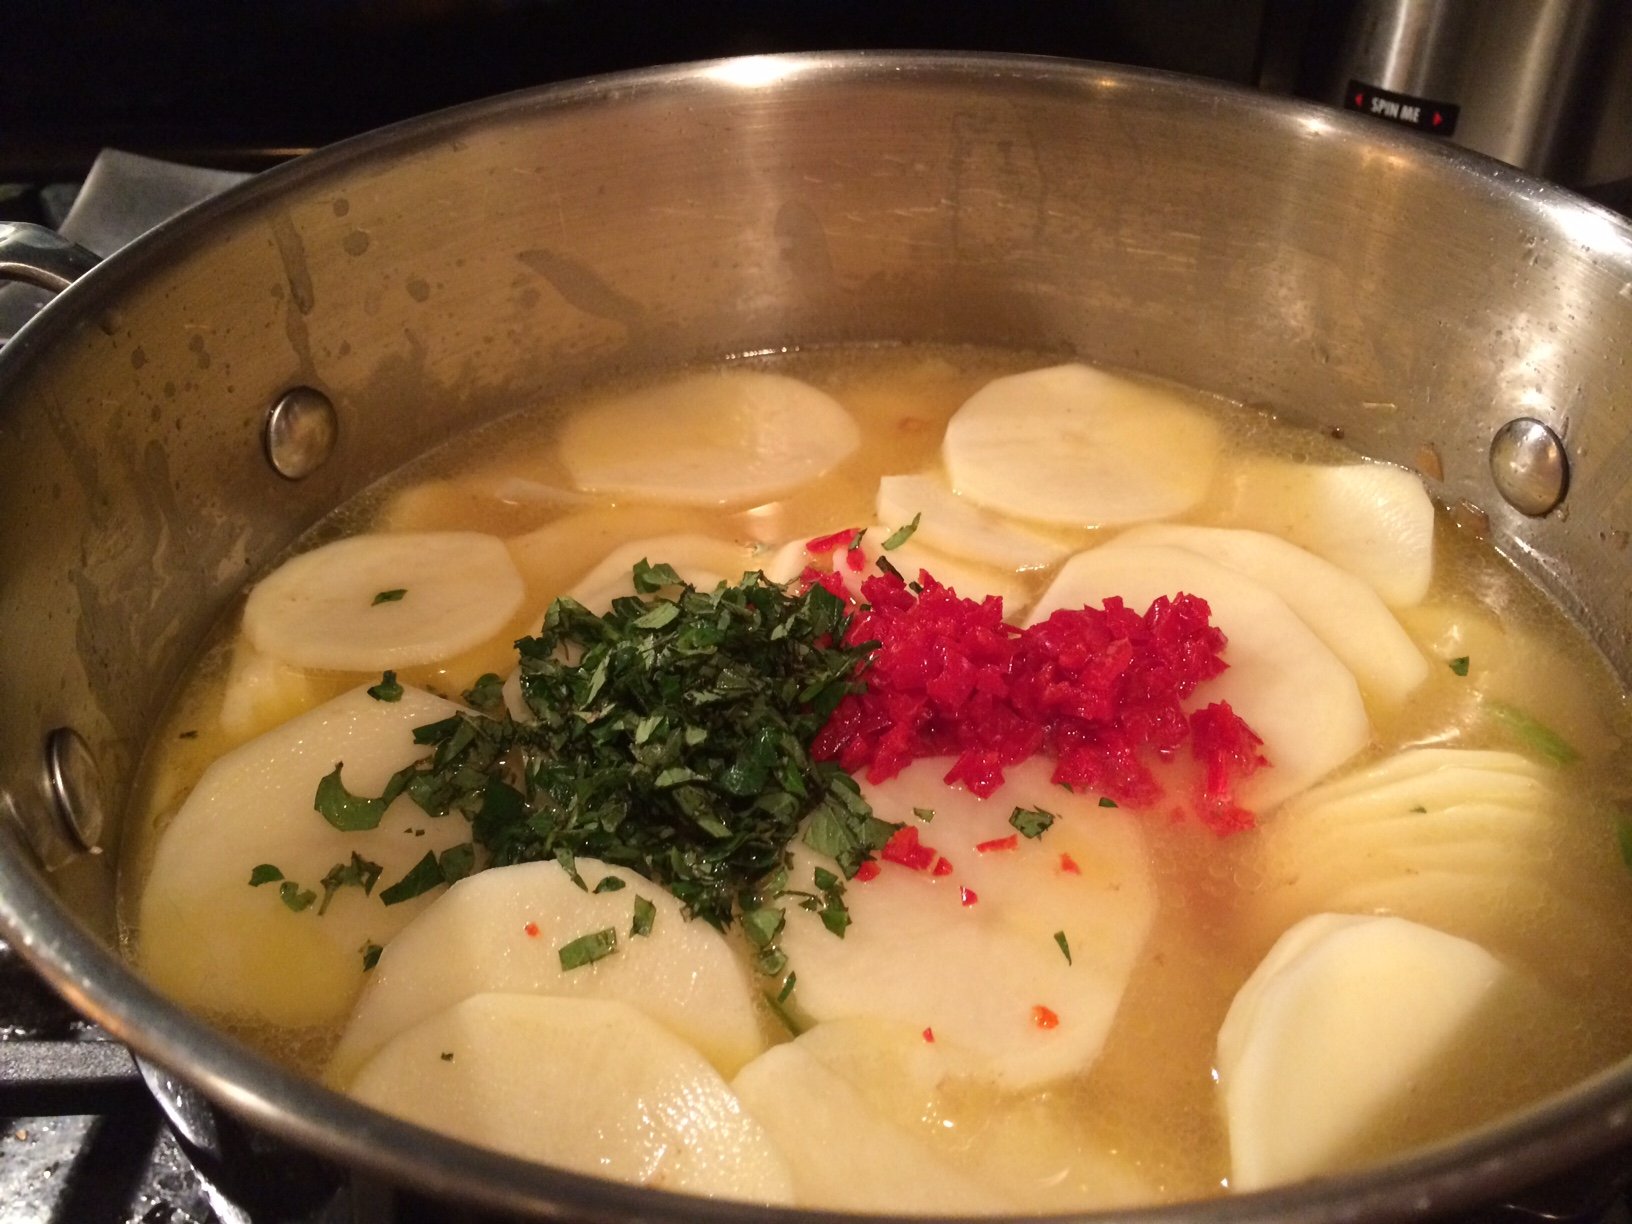 On it's own, this soup is mild but hearty making it a perfect backdrop for any number of flavor profiles.
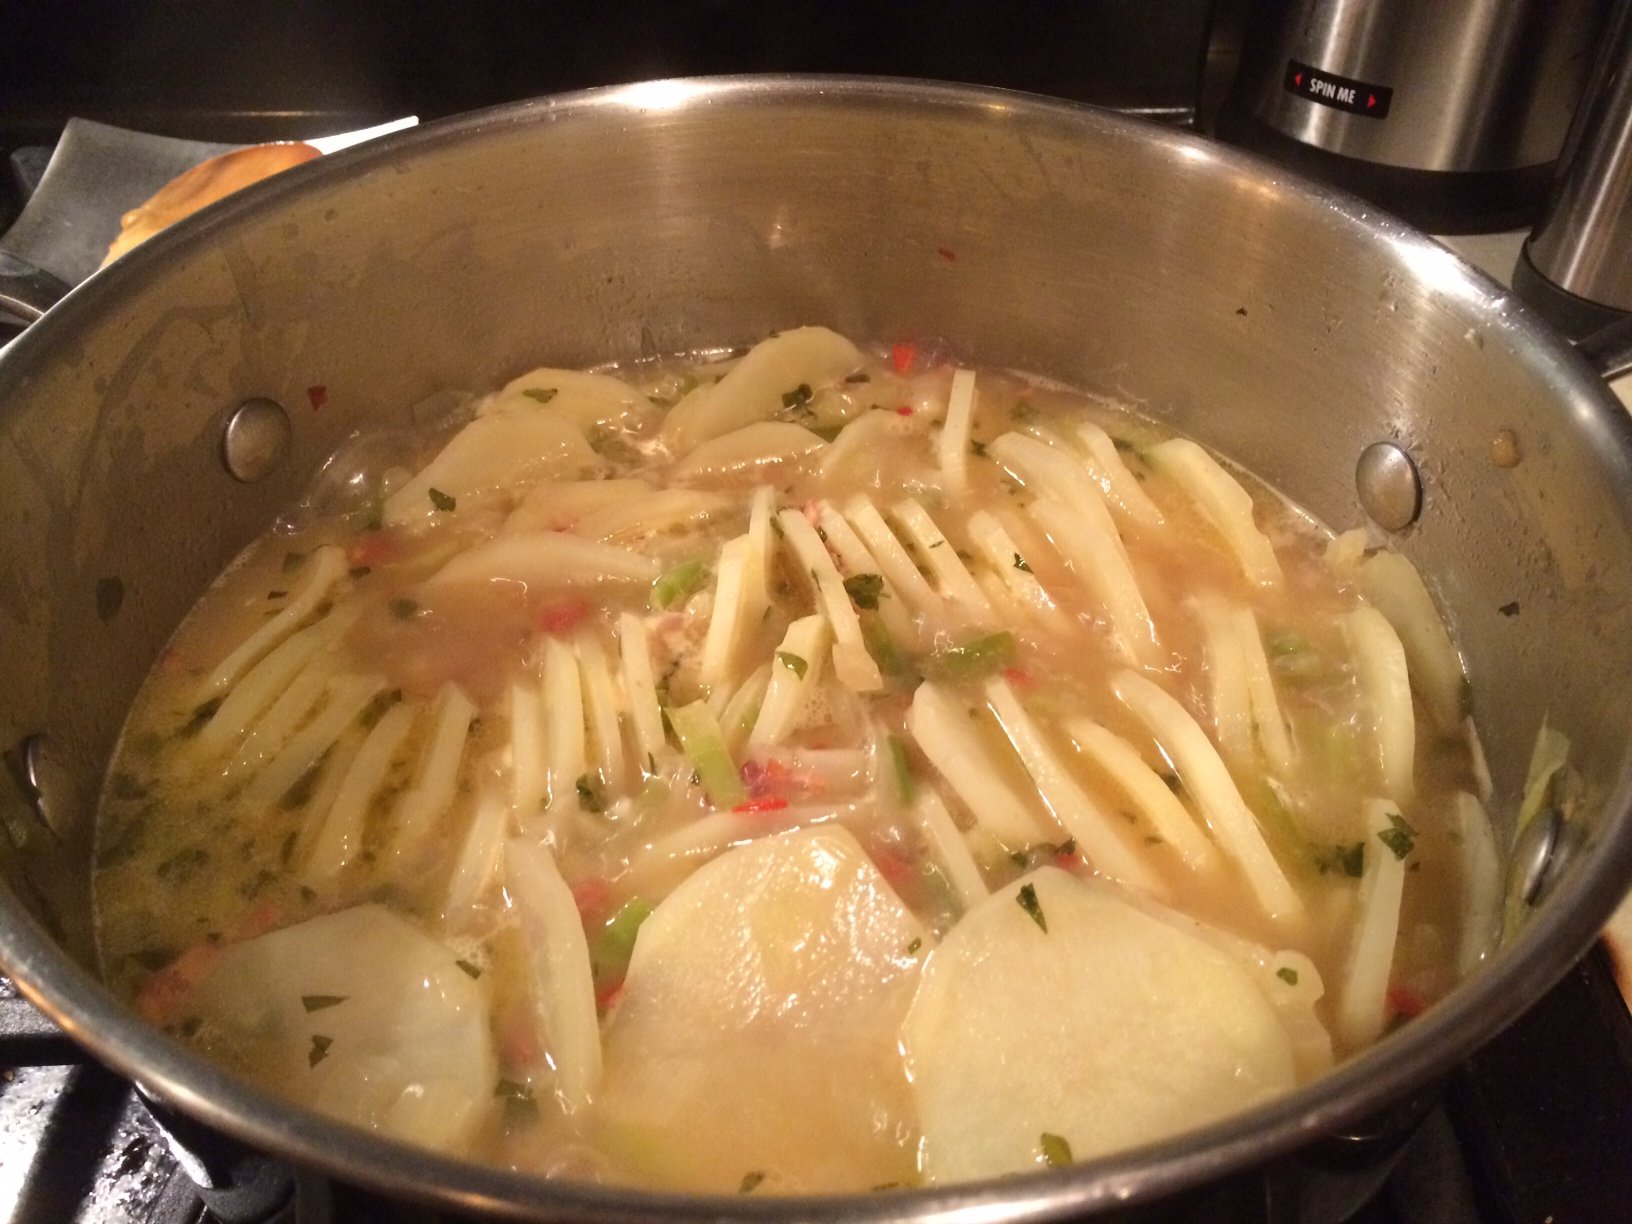 The genius of this soup is the mandolin sliced potatoes.
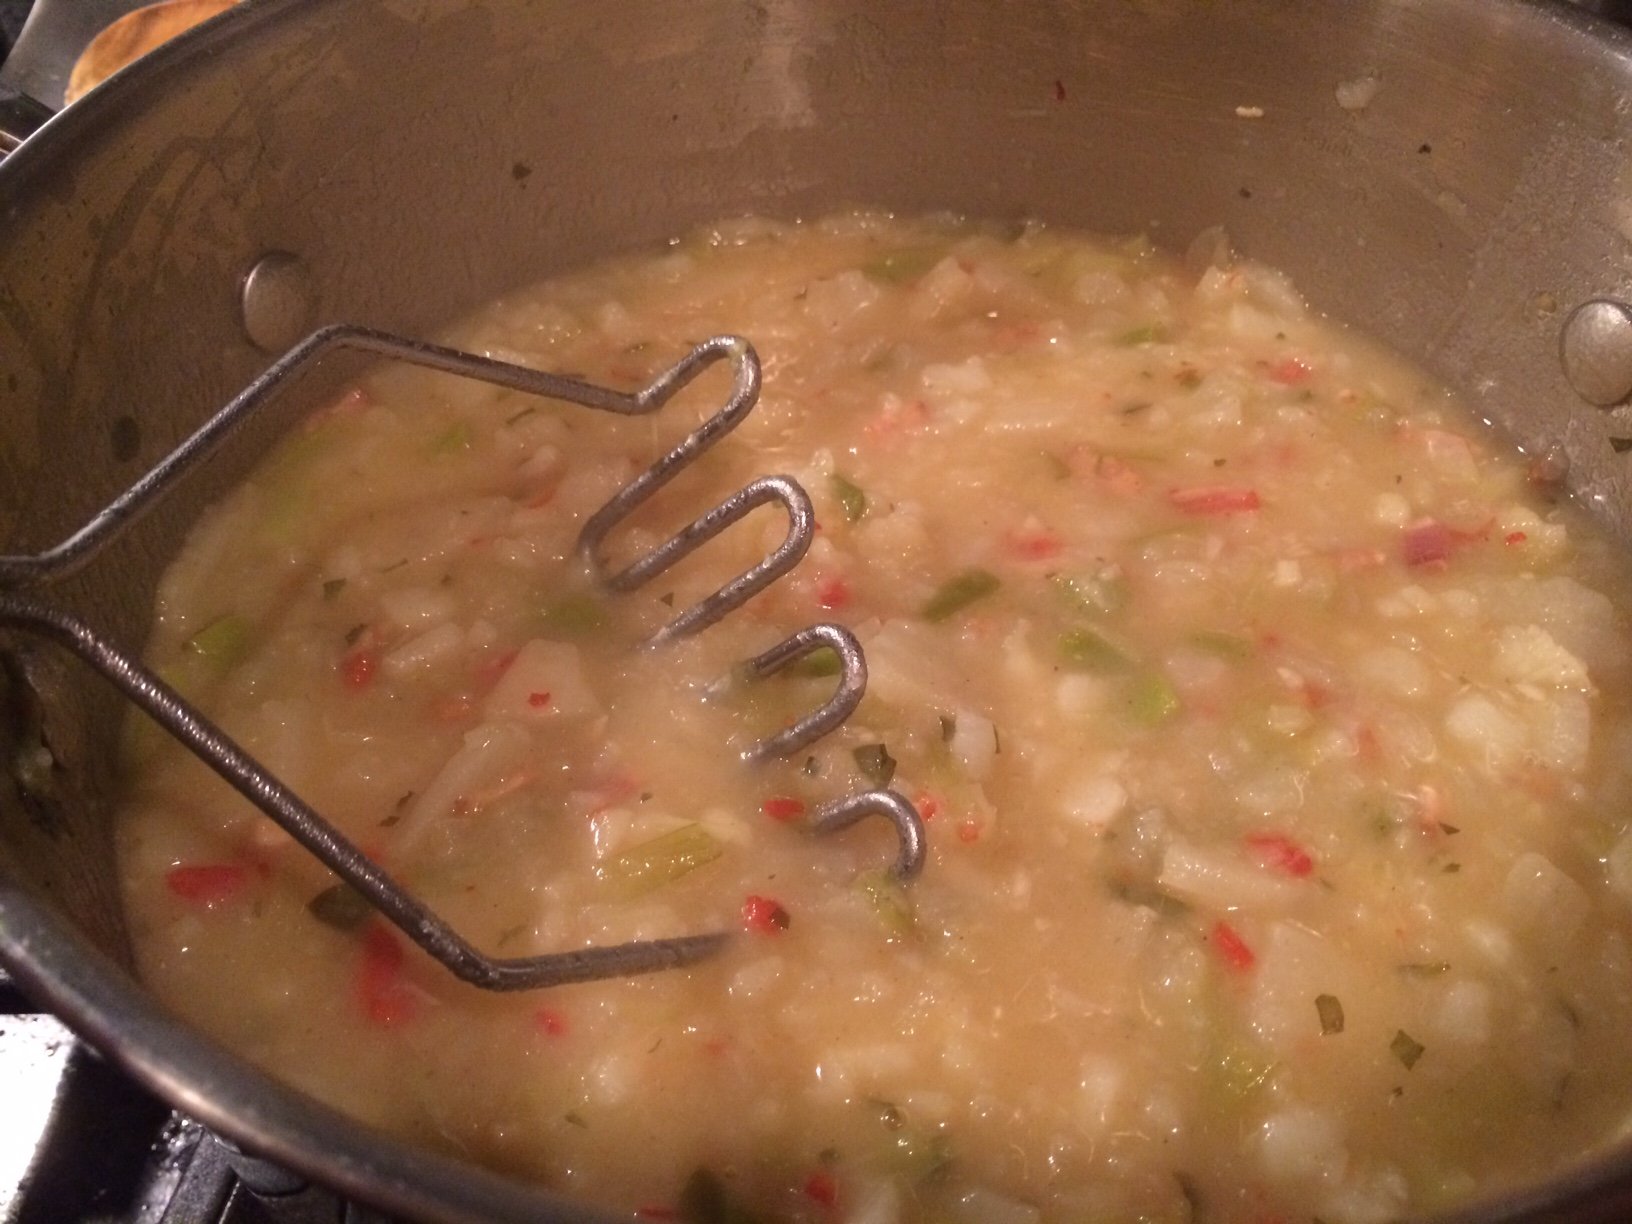 Once cooked through and gently mashed, they thicken the stock and the mashing breaks the potatoes into bite-sized pieces.
 Add a little cream and cook on low for a few more minutes and voila!
 A delicious meal that varies depending on preferences and additions!
Making Hay While The Sun Shines - Part 3
The wonderful thing about being taken under the wing of a traditional southern food mentor is that in addition to the lesson at hand, there are other tantalizing tidbits sprinkled throughout the lessons like breadcrumbs, just waiting for me to pick up the trail.During my green bean pressure canning lesson, the utensil drawer was opened to look for some other object and the Norpro Wood Corn Cutter and Creamer made its debut into my life. My mentor explained that device is used to cream corn, which she does annually with Silver Queen, her favorite hybrid variety. The tool was dropped back into the drawer and the green bean lesson continued.That night I began researching the tool and process of making and preserving creamed corn. My mentor uses the "Another way" method described at the bottom of this link over at the National Center for Home Food Preservation (the online bible for how to safely preserve food). The creamer tool was so inexpensive and the corn so abundant at the NC State Farmers Market, I had to give it a try!My whopping 45.5 lbs of corn had 65 ears in it and sold for only $25 - one of the many great reasons to grow or buy abundantly in season and preserve in wholesome ways for the off season. I enlisted help from the cutest and most enthusiastic corn shucker imaginable to get through the pile.
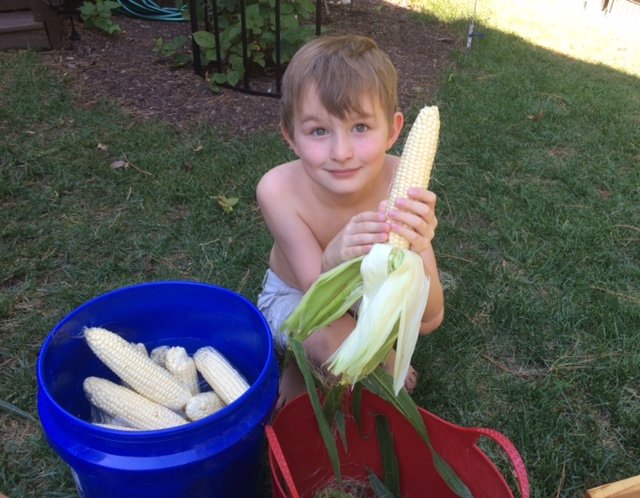 Once shucked, the corn was washed, trimmed of any ear worm damage and ready to be creamed. It took a little experimentation to get the cutters to the right height for the chunkiness I desired. I found compromise by setting it on a creamier height and using knife cut corn once every 8 or so ears to get nice big kernels.
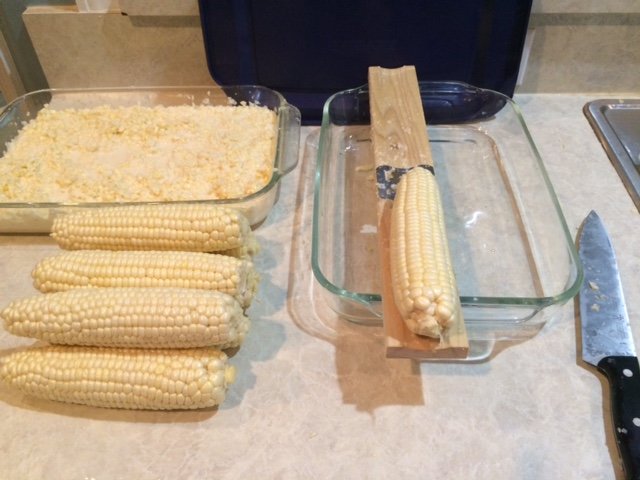 Following the instructions from my mentor and the National Center for Home Food Preservation the creamed corn was cooked in two double boilers for about 10 minutes.
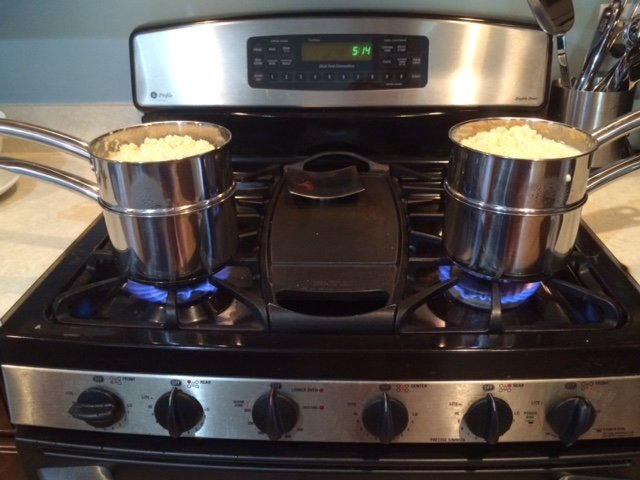 Once thickened it the pots were set in an ice bath to stop the cooking process.
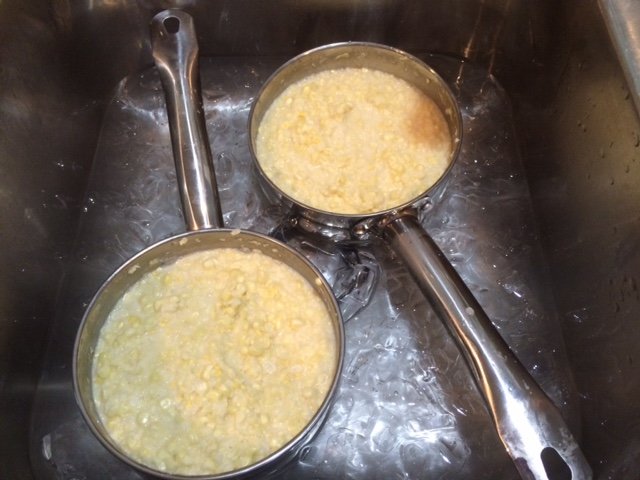 Once cooled, it was ladled into the freezer bags that work with my vacuumsealer at serving sizes of roughly 15.5oz each. They were frozen flat to take up less space then vacuumsealed.
 All in all, my 45.5lbs of corn ended up being 15.5lbs of creamed corn with much of the difference being the cobs that were cut up and added to compost so they were a gain for next year's soil also. The entire process took about 4 hours from shucking to the last batch being put in the freezer and finished with a total of 16 servings. I froze 15 of them for the months to come and made one fresh that night. I knew the project was a success (and one likely to be repeated before the end of corn season) when my little shucker took his first bite of our homemade creamed corn and asked if there was enough for seconds.
Vinegared Cucumbers
 As my Marketmore and Chinese Yellow cucumbers swing into full production I have been looking for a recipe that I recall from childhood. I have heard them called refrigerator pickles, cucumber salad, marinated cucumbers and vinegared cucumbers, though there are multiple meanings to some of those monikers so I am sticking with calling them vinegared cucumbers.Pro Tip - when picking cucumbers, bring them in and pop them into an ice bath to remove the "field heat" and cool them down quickly. They will keep better for longer with this trick.There are many variations on this recipe and I tried a couple before cobbling together this one that comes closest to the crisp, bright taste I remember in my grandmother's vinegared cucumbers:2 cucumbers with the skin peeled in strips then sliced to preferred thickness3/4 cup apple cider vinegar1 1/2 cups waterA few slices of red onion (optional)Pack cucumber slices into two 1/2 pint canning jars (or whatever you have that you can put a lid on), packing red onion along sides and top. Mix together vinegar and water and pour over until cucumbers are covered. Close jar and marinate in the refrigerator for at least 12 hours.
Making Hay While The Sun Shines - Part 1
After three weeks of much longer than normal hours during the week and attending conferences on the weekends in service to my day job, I had a two whole days at home with my garden this weekend. I found it doing very well despite my glancing harvests and prunings, but also in need of some more thoughtful attention so I started on a prioritized list of what needed to be done...and then the doorbell rang. Earlier this year I had struck up a conversation about fig trees with one of my subdivision neighbors after he noticed my 2nd year trees that are a lot more potential than production even at this point. He had shared with me how productive his established tree was with quantities that sounded more fantasy than fact compared to the 25 or so figs I expected off of my 4 immature trees. He arrived at my door on Saturday morning with a bag full of figs, the third such of the morning he told me!Most of the figs were at the peak of ripeness, but a few were so soft that even the weight of figs on top of them in the bag distorted and split them. I popped the bag into the fridge to firm up the softest of them and stop the ripening of the freshest and went online to see what my options were.Canning jam and/or preserves was the resounding result, despite changing search terms several times and going 4 search results pages deep. I did not feel ready to do canning on my own and hadn't purchased a hot water bath canner yet, but there was this unexpected bounty to deal with...An hour and multiple recipes later, I was ready to make my first fig jam. The recipe was simple:8 cups quartered figs3.5 cups sugar3 TBS lemon juice
 It was an easy recipe and the figs smelled and tasted heavenly as they and the sugar slowly caramelized on my stove top. I was nervous about the canning part but made an emergency phone-a-friend to my canning mentor to ask a few questions and by the end was more focused on saving every drop of this delicious concoction than thinking of all the ways the canning portion might go wrong.
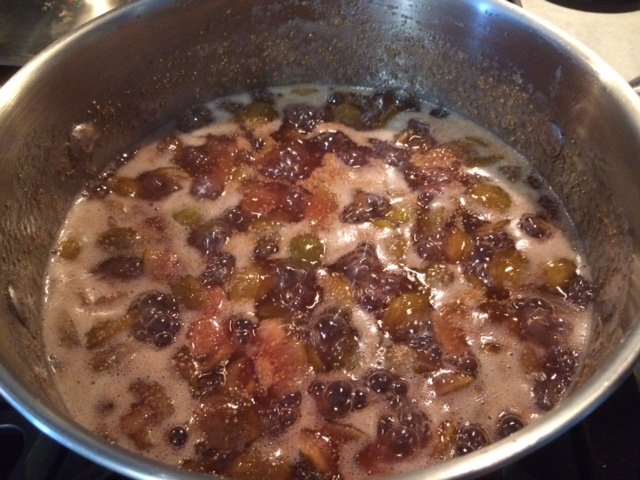 I ladled the preserved into 5 half-pint jars and prepared my first hot water bath.
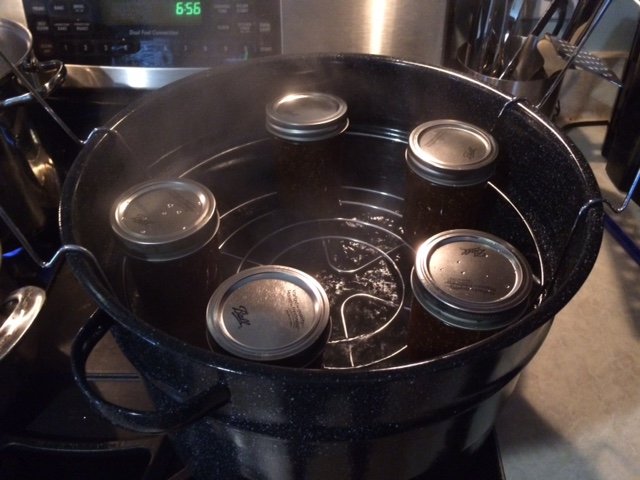 They cooked for 10 minutes in the hot water bath after it returned to a boil. I set the jars on cooking cooling racks to increase the air circulation and was pleased to hear my first *pop* of a sealing jar not long after.
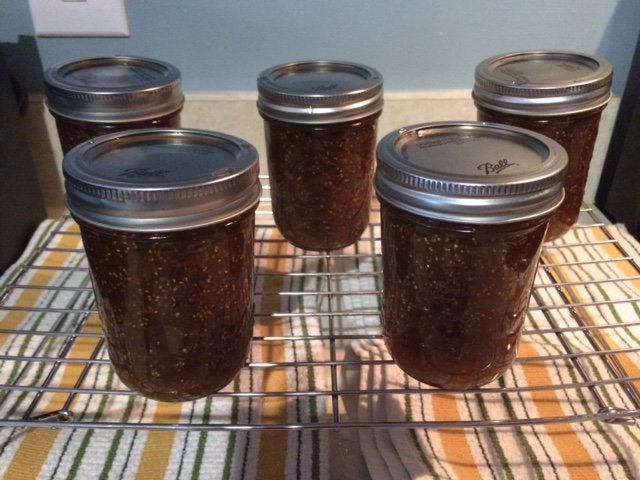 All 5 jars popped within 3o minutes of coming out of the bath and are now labeled and in my pantry.The title of this post is about doing what needs to be done when the opportunity exists - trying a new fig jam recipe and canning for the first time were not on my to-do list, but I couldn't let this unexpected windfall go from overripe to compost in my refrigerator without at least trying my hand at canning to preserve the bounty.As a postscript, I had enough jam for 5 3/4 jars and since the 6th jar did not meet the headspace requirements for the canning recipe, I sealed it the same as the others but put into the refrigerator immediately after it too popped. Tonight's desert was a french bread smothered in this homemade jam and it was wonderful!
Canning - Green Beans
 I received a wonderful offer today from a dear friend and colleague. A hands-on canning lesson with fresh Blue Lake bush beans from her husband's garden. The photo below captures about half of his very productive garden. He is growing okra, summer squash, beans, broccoli, tomatoes, eggplant, basil and I am sure I am missing at least a few more.
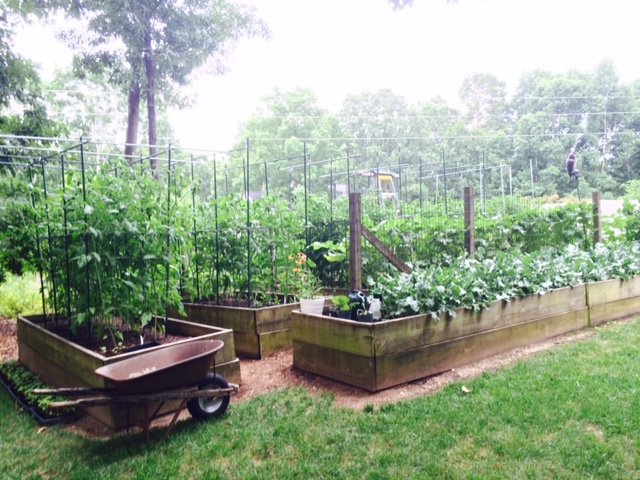 The Ball canning recipe book was open on the island and 6 quarts of beans were cleaned and snapped in a large bowl. We used a colander to submerge a portion of the beans into boiling water for 5 minutes.
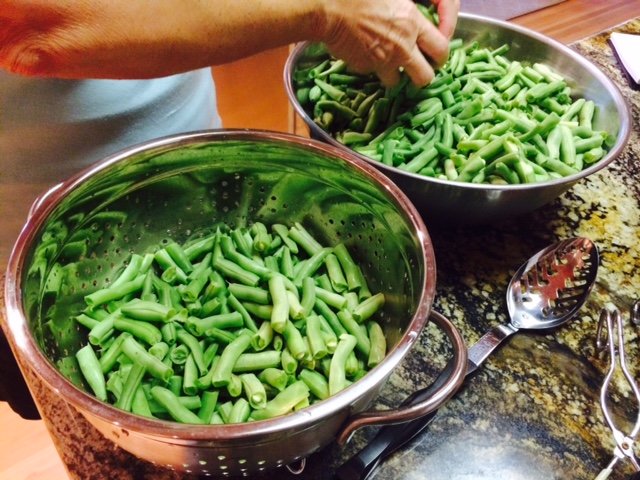 The 1 quart canning jars fresh out of a 180 degree hot water bath are started with 1 tsp. salt before being packed with freshly cooked beans to 1" from the top of the jar. The cooking liquid is then ladled in to the same 1" from the top. Long sticks are used to remove air bubbles by compressing the cooked beans inward from the jar and working all the way around it a couple of times.
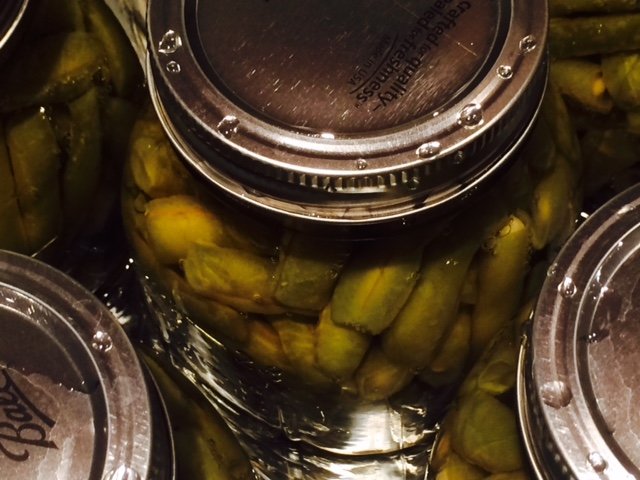
 The liquid is topped off to 1" again and the neck of the jar cleaned to prepare it for being sealed.
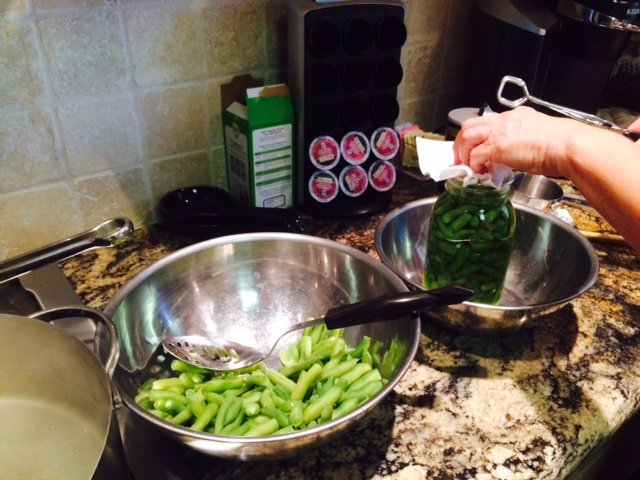 The hot lid is added fresh from the hot water bath (180 degrees) with tongs.
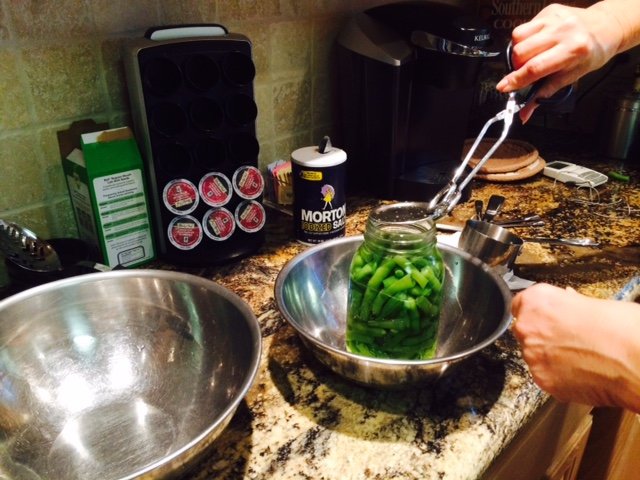 The lids are screwed on hand-tight and jars are packed into the pressure cooker.
 The recipe instructions for the pressure cooker are very specific. Eventually the pressure reaches 10 lbs and the beans are cooked another 25 minutes.
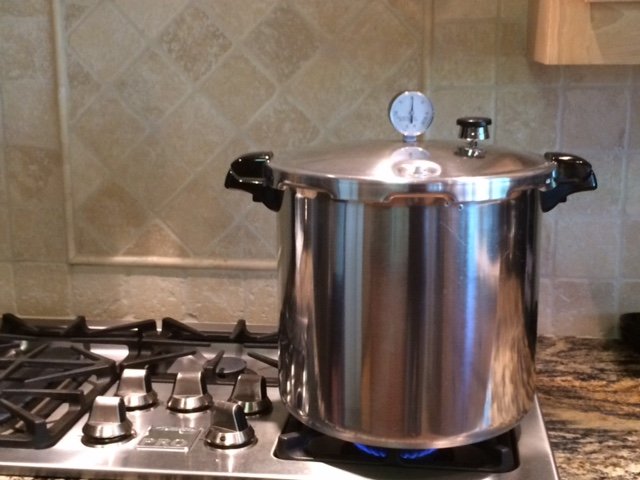 At the end of a couple of hours of wonderful company and conversation and a bit of vino, she had canned green beans and I had more experience and comfort with canning.
 On top of the lesson, she generously shared 2 quarts of the newly canned beans as well as some of their fresh garden bounty. I thanked her by graciously inviting myself to an upcoming tomato canning :)
Spring Garden to Summer Garden
It is June and the turning from the spring garden to the summer garden is well underway. I am quickly picking the last of my lettuce before it bolts meanwhile the edamame is flowering.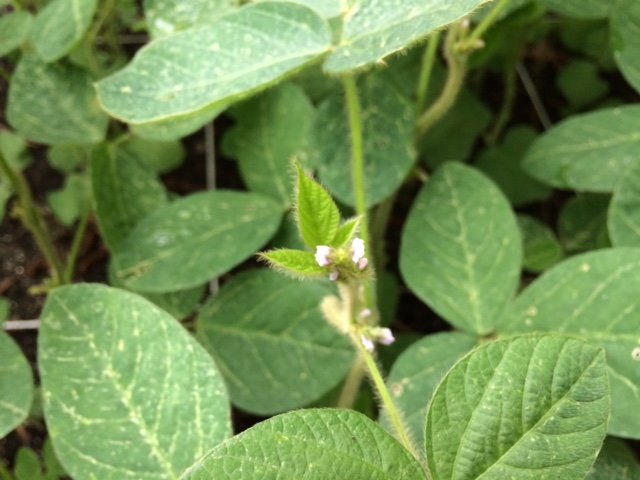 The sugar snap peas, snow peas and strawberries are in full swing while the blueberries are just beginning to take on a purple hue.
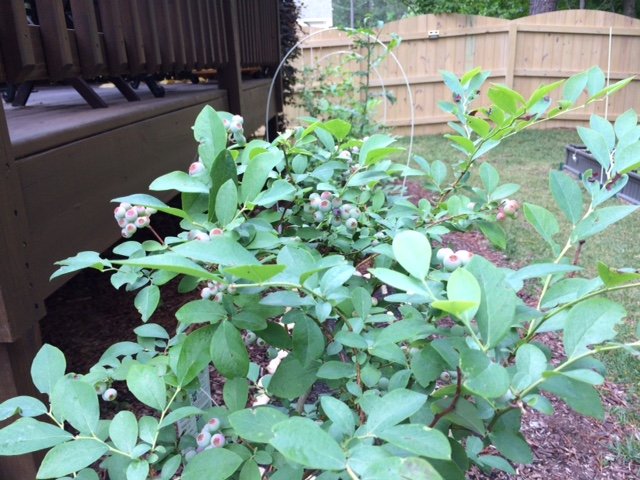 The serrano peppers are fruiting and flowering at the same time.
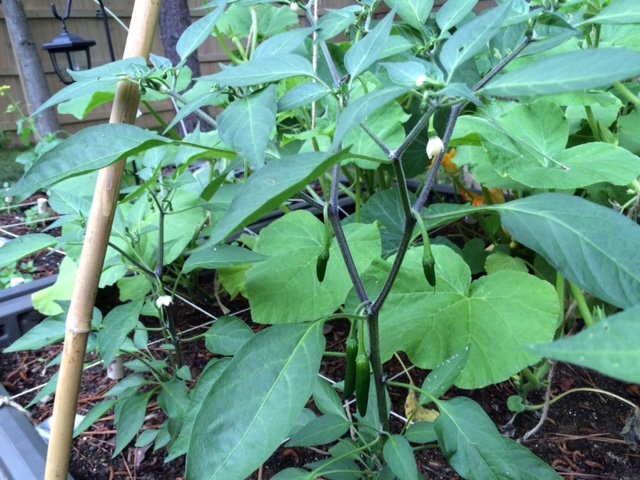 I am pleased with how many spears my first year asparagus crowns are throwing up. The shoots are tall and flopsy when they grow out so they are staked for support during this first unmolested this year. I hope to be able to sample a couple of spears next year and in 2017 they should be healthy, happy crowns I can harvest from.
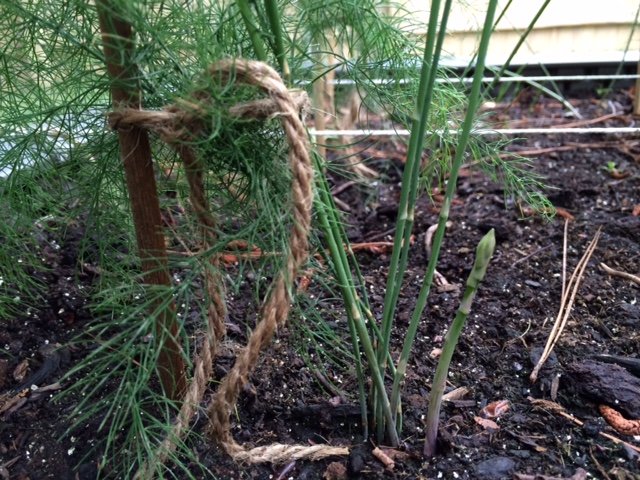 The spaghetti squash have reached the top of the 8' bamboo supports and are making good use of the top bar to spread out.
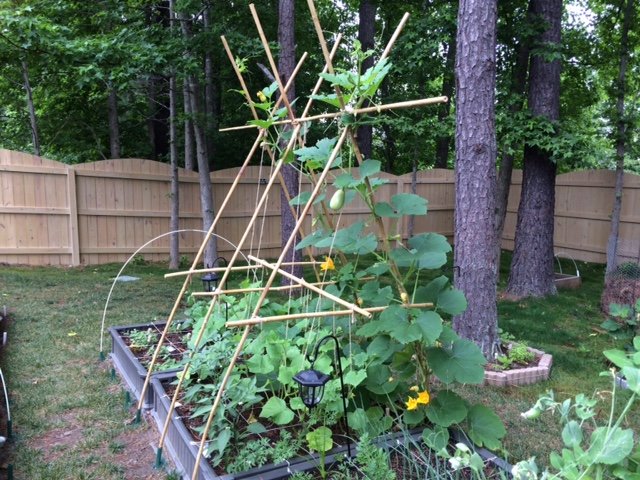 Not pictured:The blackberries are hard, green nubs right now. The pepper plants are flowering as are the zucchini, cucumbers and tomatoes. The chard is getting large and I hope to try stuffed chard leaves soon. The acorn squash is blooming but staying much closer to the ground than the climbing spaghetti.I love this time of year!
Winter Pesto
I grow a lot of basil indoors during the winter months. I have learned that around 14 smallish pots is the ideal number to have enough fresh basil on hand for my near daily culinary use as well as the occasional fabulous hostess gift. Once in a while though, events conspire and a couple of days go by with no foraging and the basil gets a bit overgrown.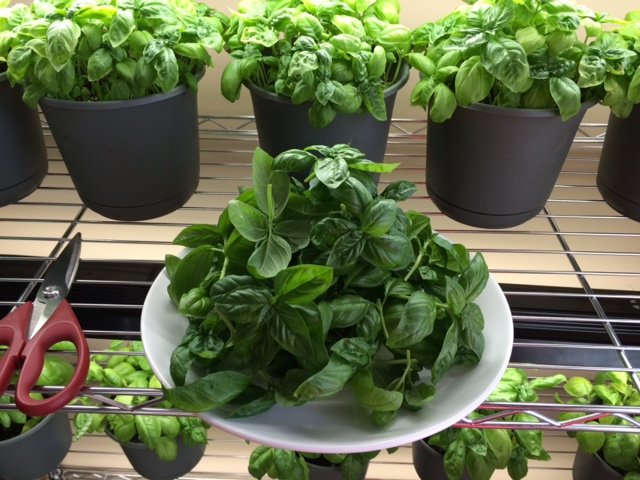 So one of the side effects of growing so much basil is the need to make a small batch of pesto about once a month. A lot of pesto recipes are based on a large quantity, summer harvest. Here is the scaled down version I make with my winter basil:Winter Pesto:2 cups packed fresh basil leaves (I prefer Genovese Sweet Basil)1/4 cup olive oil2 garlic cloves, pressed1/4 cup toasted pine nutssprinkle of salt1/2 cups shredded Parmesan, Pecorino or blendBlend all except the cheese in food processor until smooth, adding in the olive oil a little at a time. Add the cheese and pulse again until preferred consistency.Pesto is great because even in small batches you can stretch out its bright, summery taste. You can freeze 1/2 TBS dollops in an ice cube tray for a quick, pre-measured burst of flavor for any soup, add to softened butter for wonderful bread spreads, blended with hummus for dip, a spread to spice up a grilled cheese, tossed with pasta - the list is endless.
New Find
I discovered a real gem this weekend - a blog called DigginFood.com with great companion videos under the name Grow.Cook.Eat. Willi Galloway and her husband Jon are urban gardeners in Seattle at their "little urban homestead" where they grow and cook a wide variety of foods fresh from their backyard garden.The blog dates back to April 2008, which is good news since I ran through all the videos already. They also have a book called Grow Cook Eat that I will put on my must read list.If you are looking for some fresh ideas for fresh food this is a great site!
Odds and Ends
So a couple of ideas to mix up some of the recipes posted here:Homemade croutons are as easy as leftover bread from pasta night! I have been adding these to the Tomato Salad for the past couple of weeks and they are a little bit of heaven.Cut leftover bread into cubes, about 2 cups worth2 TBS of butterSprinkle of garlic saltMelt the butter on low-med heat. Add bread cubes and toss until well covered. Let cook until golden brown on one side then turn. Continue until most sides are golden and bread is crunchy. Remove from heat and sprinkle with garlic salt.Another idea that I have been using to mix it up (mix it up in this context means hiding healthy food in kid-friendly food) is adding puree to the homemade pasta sauce. I keep frozen spinach, carrot and butternut squash puree on hand at all times. It is amazing how many dishes you can slip one or more of these into without altering the taste, consistency or the likelihood that it will be eaten by kids under the age of 7. One of my favorites is to add one TBS of each to the pasta sauce about 5 minutes before it is done, enough so it is heated thoroughly and blended, but without cooking out all the healthy goodness. Having purees on hand is easy as this:Pick your vegetableSteam until tender (this varies wildly from 1-2 minutes for spinach to 20 minutes for butternut squash)PureeUse your measuring spoon to put TBS dollops on a sheet of wax paper. Place in freezer until frozen. Remove from wax paper and put into freezer safe bags and voila! You have pre-measured TBS of your favorite vegetable puree to thicken up soups and sauces or to add a little extra nutrition to an otherwise ho-hum dish.