The Scarlet Kale in my counter top hydroponic system has been growing by leaps and bounds to the point that they are overshadowing the slower paced cilantro and parsley starts.I needed to trim some leaves to let more light down to the smaller plants in the middle and a great excuse for kale chips.I use my hands to toss the rough chopped leaves with a little olive oil then sprinkle with salt (cayenne or any other spice you would like to add) and toss again.Cook at 350 on a parchment lined pan for until crispy and paper like, apx 10 minutes.I like to let mine cool on a rack for good air circulation and while I haven't done side by side experiments, I think it keeps them crispier.
Read More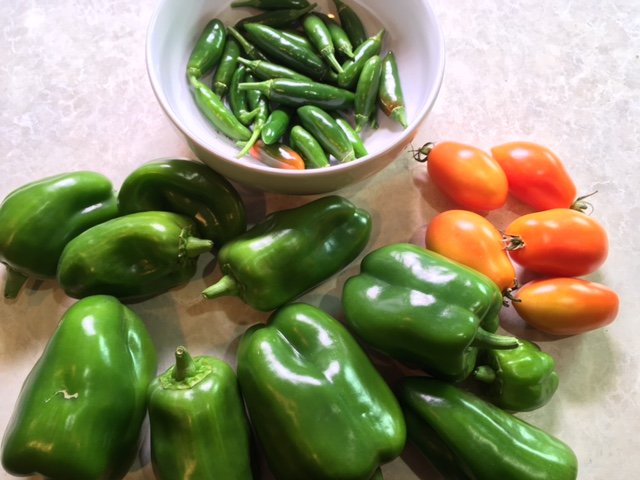
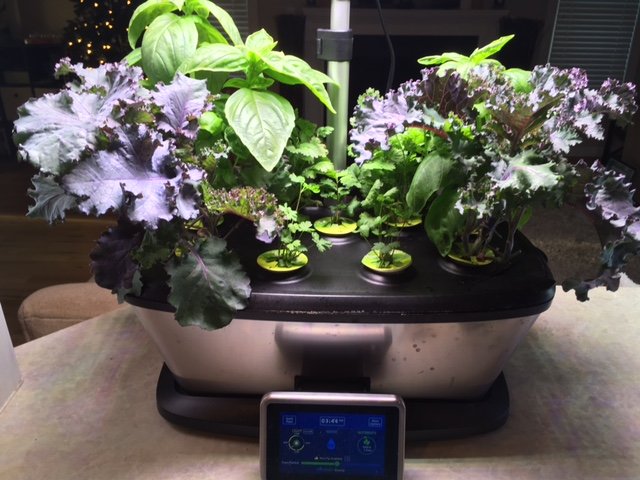
Mid November Harvest
Autumn Recess
Autumn has arrived in North Carolina, bringing with it the final harvest of bell peppers, roma tomatoes and serrano peppers.The herb garden has brushed off the first few light freezes and stands ready to make meals fragrant and savory for months to come. I am confident that the thyme, oregano and sage will over winter well and hope that the french tarragon and parsley will also.Parsley is such a staple of fall and winter dishes that I have more growing on my deck. I have been poaching from the deck parsley for a few weeks thinking that it would not handle the frosts as well, but so far it is also doing wonderfully.In previous years I have repeatedly removed pine needles from the garden beds only to replace it with a different mulch. This year I have come to my senses and am embracing the pine trees taking care of mulching for me.Collards, carrots, cabbage and parsnips are tucked into their naturally (and effortlessly) mulched beds.The fall planting of sugar snap peas has been supplying tender pea shoots and now has peas forming as well.The hydroponic herbs were changed over 10 days ago to the varieties I know and love to cook with and are already doing quite well. I am growing 2 plantings each of my favorite basils and cilantros, 3 of the flat leaf parsley and just for fun I am trying to grow 2 red kales hydroponically.With the Super Bowl and attendant tomato starts almost 2 months away, this cozy, fall garden that is mostly taking care of itself feels like a recess.
Read More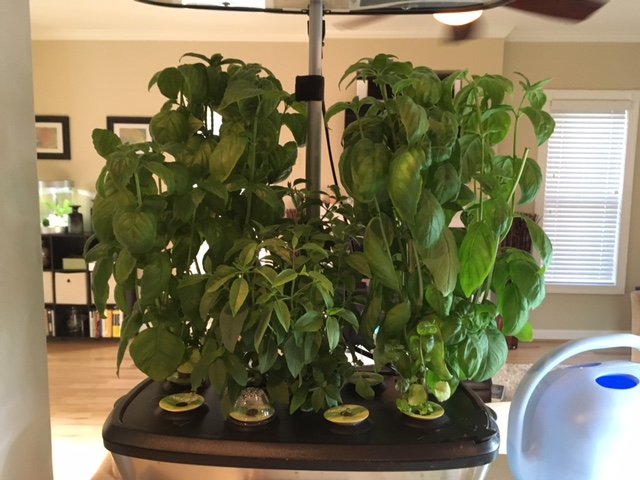
Hydroponic Basil
Aero Garden Update - Day 46
Day 46 of the prepackaged herb pack that came with my AeroBount and I have excellent basil growth, both genovese and thai. The mint was just starting to grow and the cilantro, parsley and chives never really took off. The genovese basil, while in the same family, is not the basil I usually grow. I do not know if it is a function of the variety or of the hydroponics but it bruises extremely easy and blackens quickly on warm dishes.My Baker Creek order came in last week with seeds for my hydroponic herbs and counter top microgreens so I decided to ditch the prepackaged herbs and start my own this weekend.My aero garden has space for 9 pods so I planted 2 of each except for the parsley that I planted 3 pods of because fall stews + parsley = YUM!
Read More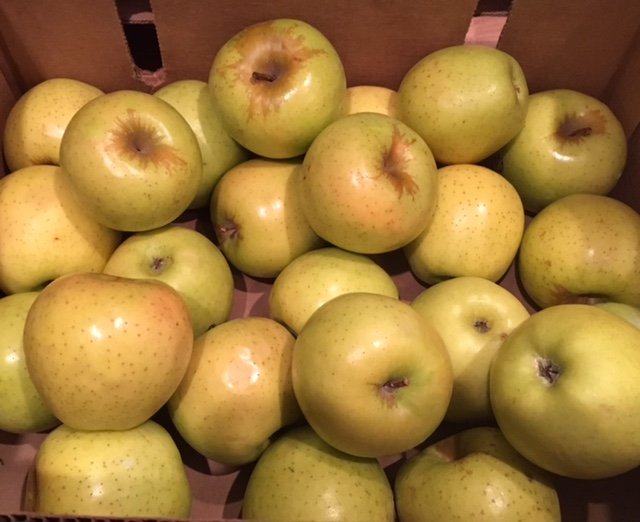
Ginger Gold Apples
Cooking Up A Hurricane - Applesauce (Part 1)
Hurricane Matthew made landfall in the Carolinas this morning, just north of Charleston, SC, and more than 5" of rainfall is expected for the Raleigh region over the next 24 hours. With the cool, windy and very wet weather keeping most of the Mid-Atlantic seaboard indoors until late Sunday it was time to get cooking.As part of this week's CSA delivery from The Produce Box I special ordered 15 lbs of slightly blemished Ginger Gold Apples from a local farmer to make applesauce in my pressure cooker.Apples were peeled (not guaranteed organic), cored and cut into 16ths. Some very small bruises were present and easily cut out.The apple chunks and spices were placed in the pressure cooker - I used Flo Lum's recipe with two variations, I added a bit of freshly ground nutmeg and cut my apple chunks a bit smaller for a smoother texture.The end result was a delicious treat that will not last long enough to worry about freezing.I know apples are traditionally paired with pork, but try pairing them with homemade cheese quesadillas, especially for the under 10 yo set!
Read More
Unboxing AeroGarden Bounty Elite
Taking The (hydroponics) Plunge
It all started so simply...I was looking for a birthday gift for a friend. She does some gardening and is always looking to eat healthier so I went to a few of my favorite online shops and searched Gifts For Gardeners to see what came up.What came up (over and over) were the counter-top, hydroponic growing contraptions that promise fresh herbs, greens and veggies faster than their soil bound counterparts. The reviews spanned the positive to strongly positive and some of the user videos showed amazing results.I have been resistant to the idea of hydroponics because it is not a natural system and doesn't even attempt to mimic a natural system. Food plants grown hydroponically are not dining at the full banquet of known and unknown plant (and human) nutrients, minerals and components found in organically rich soil, but instead are fed a simplified diet of nitrogen, phosphate, calcium and magnesium diluted in water. What does that mean for the creatures that are eating them? But there is the not-so-small matter of having fresh herbs to cook and garnish with through the winter months... Many of my outdoor herbs are still doing very well, though my beloved basil is already beginning to look pretty rough and with fall officially here, some of the others will begin to say good-bye for 2016 in the coming weeks. This is the time of year I usually begin my indoor herb garden in the dormer nook upstairs as a stop-gap measure to cover the basics (basil, rosemary, oregano, cilantro) until they can be sown outdoors again.Overall, my indoor herbs usually do pretty well each year in their little corner of the house, though they do have to cope with occasional fungus flies, aphids, powdery mildew outbreaks and a water deficit when I travel. The more I considered it, the more it seemed that growing a mix of fresh herbs through the winter months right on my kitchen counter, right where I cook and where I can be a bit more attentive on a day-to-day basis, even if it is hydroponically, is maybe not such a bad idea. Herbs are especially dense on flavor and hopefully will not have a watered down taste. Enter the AeroGarden for my friend and myself.I opted for the Bounty Elite from William Sonoma because it has the most space for plants (up to 9 depending on variety) and the LED light can raise from 15" to 24" as plants grow.I have to admit, I was impressed by the touch screen display that shows days since planting, days until nutrient add and monitors and alerts for water level. It is programmable by plant group being grown (herbs, tomatoes, lettuce, peppers, flowers, etc).If you happen to have kids under the age of 10 in the house, the space age looking pod domes are an added bonus.So I am taking the plunge, I hope this particular horticultural/culinary experiment works out well - if the herbs I am growing are as robustly flavored as their soil bound brethren, it will mean my indoor garden upstairs is relegated to spring seed starting and even more herbs are making into everyday meals than they already are. Updates to follow!
Read More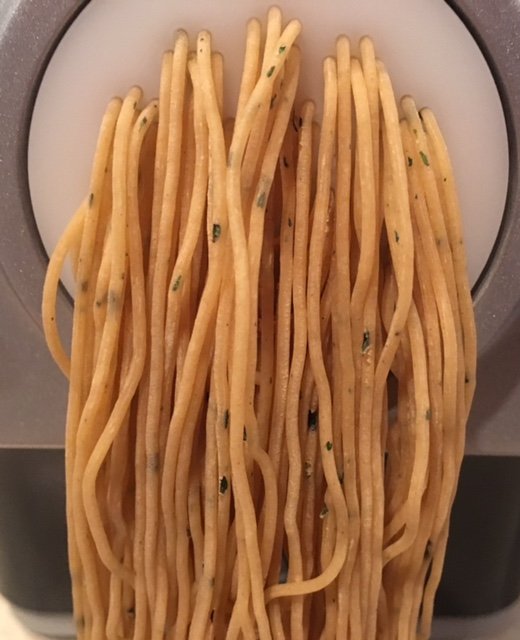
Extruding Basil Herbed Pasta
Better With Basil - Pasta Maker
Late blight is wrecking havoc on North Carolina tomatoes this year, particularly the heirloom varieties. Last year I was pulling down green tomatoes in late November and this year they were pretty much done by late August. C'est la vie.Luckily, there are some good things happening in the kitchen while I wait for the fall lettuce and spinach to fill in the garden. I have been working with my pasta maker, trying different shapers and getting the hang of the process. This week I wanted to try adding some fresh basil into the mix so I chopped it very finely and tossed 1 gram of it with the Anson Mills pasta flour before adding it to the maker using the angel hair shaper.The result was very pretty and did have a hint of basil taste. I was concerned that the basil would interfere with extruding and/or the pasta's ability to hold together when cooking, it did neither.I want to try the experiment again with a little more basil which means I should probably use the spaghetti shaper to be safe. I had already started the sauce when I decided to try adding basil to the pasta but next time I would like to try it with a simple butter garlic sauce that won't overpower the flavor of the pasta like the thick, homemade tomato sauce in the photo above.I am also wondering if I can do the same thing with finely chopped, fresh spinach and a thicker noodle.With fall/soup season just around the corner I have also ordered some kansui, the alkaline ingredient that gives ramen noodles their distinctive texture and the ability to hold up well in soups.I am beginning to suspect that the folks that sell fresh pasta and noodles at the Farmer's Market aren't doing it to make money, they just want an excuse to make more than they can personally eat...
Read More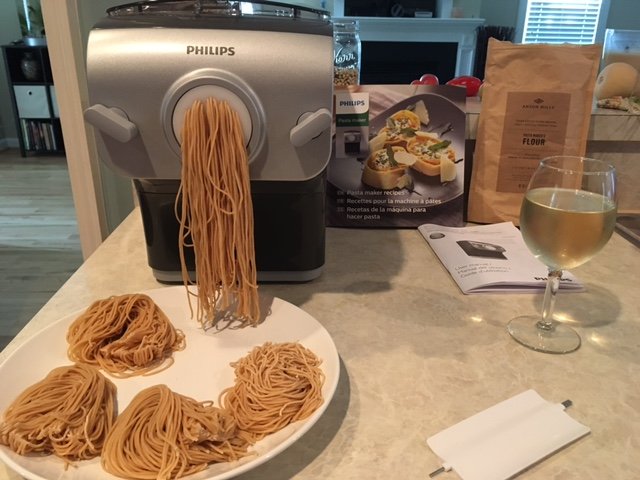
Making Angel Hair
Mangia - Seconda Parte
Recently I wanted to find some great make-ahead recipes that I could prepare in batches and freeze for fast and easy, but still homemade meals that I would feel good about on those "I don't feel like scratch cooking" nights. Stuffed pastas kept catching my eye as something highly versatile (options including but definitely not limited to: cheese, spinach, squash, beef, tuna with a bechamel sauce) and are super easy to freeze and reheat.I already had a great homemade pasta dough recipe (for use with the KitchenAid stand mixer and pasta roller attachment) and ravioli filling recipe but wanted to do some research and see if some varieties freeze better than others.While doing searches for freezing homemade stuffed pastas my results kept turning up all these recipes and ads for pasta maker machines...hmm. A few dozen YouTube videos and Amazon.com reviews later, I decided a pasta maker was just what I needed both to make fast and easy ravioli for my make-ahead meals as well as ditching the boxed, dried stuff in my pantry for fresh, on-demand pasta made with high quality wheat*.I found the pasta maker I wanted on sale at Williams-Sonoma - the Philips Smart Pasta Maker. I liked this one in particular because in addition to the weighing function which helps you fine-tune your liquids if you are using more or less than a perfect single or double batch of pasta flour, it comes with 8 shaping discs meaning no accessories to purchase later.I had to try it right away after it arrived so I made a simple angel hair pasta to get a feel for the machine and process.The adverts say that you will have fresh pasta in 15 minutes, I am pretty sure they mean when the last of the noodles come out because this machine begins extruding pasta in just 3 minutes!I made a double batch which was double the amount I needed. The other 1/2 can be dusted with flour and refrigerated for a few days or frozen for a longer storage time.The pasta was fantastic - delicious and with great bite, perfect al dente!* A note on the pasta flour I use - as much as possible, I buy my grains from Anson Mills. I could do a whole series of posts on Anson Mills and founder Glenn Roberts and how they are reviving lost tastes through heirloom grains. If you haven't read it yet, a great way to get to know Glenn is through Dan Barber's seminal book The Third Plate. I became an instant convert based on what I knew about Glenn's grains. Tasting them only further cemented my ardor.
Read MoreDon't Blink
During the past week of business travel my indoor plant starts have grown with the vigor of youth into a verdant and slightly unruly bunch of tweens.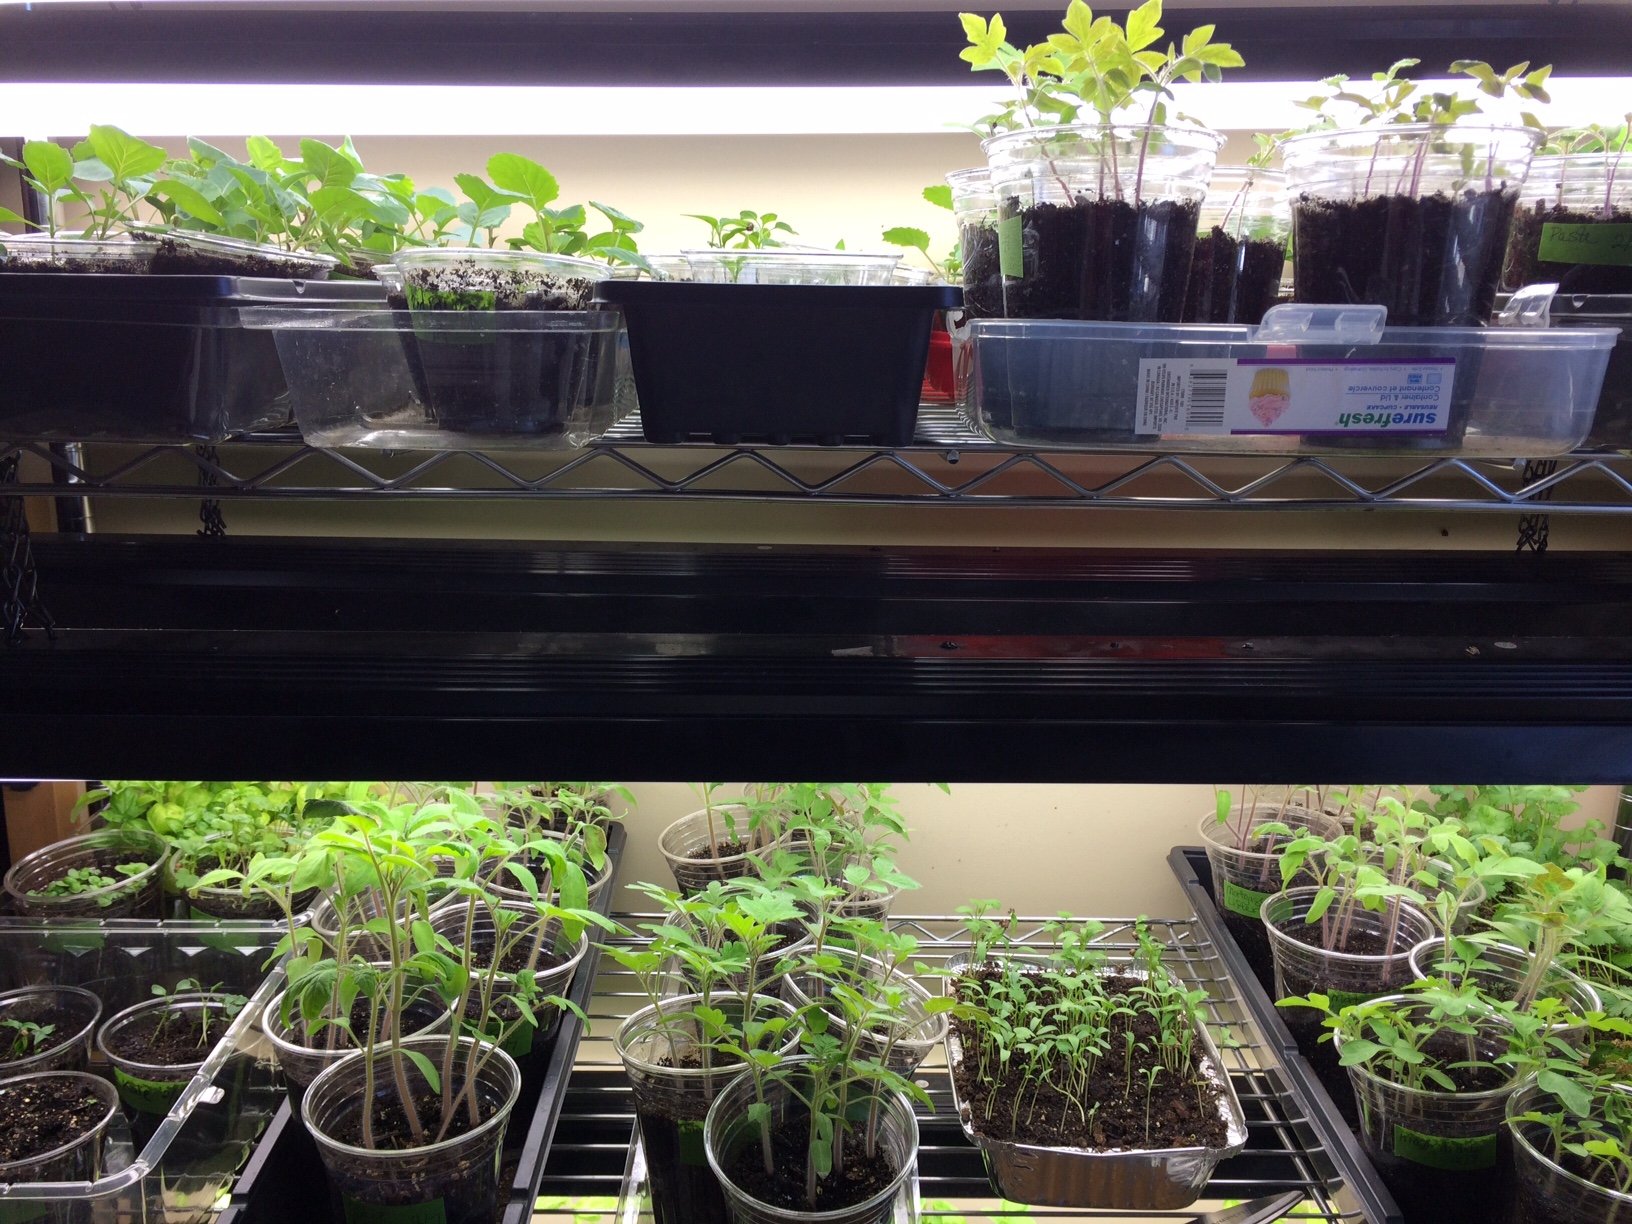 The tomatoes from my saved seed are particularly in need of thinning. I seeded them a little more thickly since I did not know what my germination rate would be. While they initially lagged about week behind fermented seeds I purchased this year, the germination rate for my saved seed looks to be close to 100%.
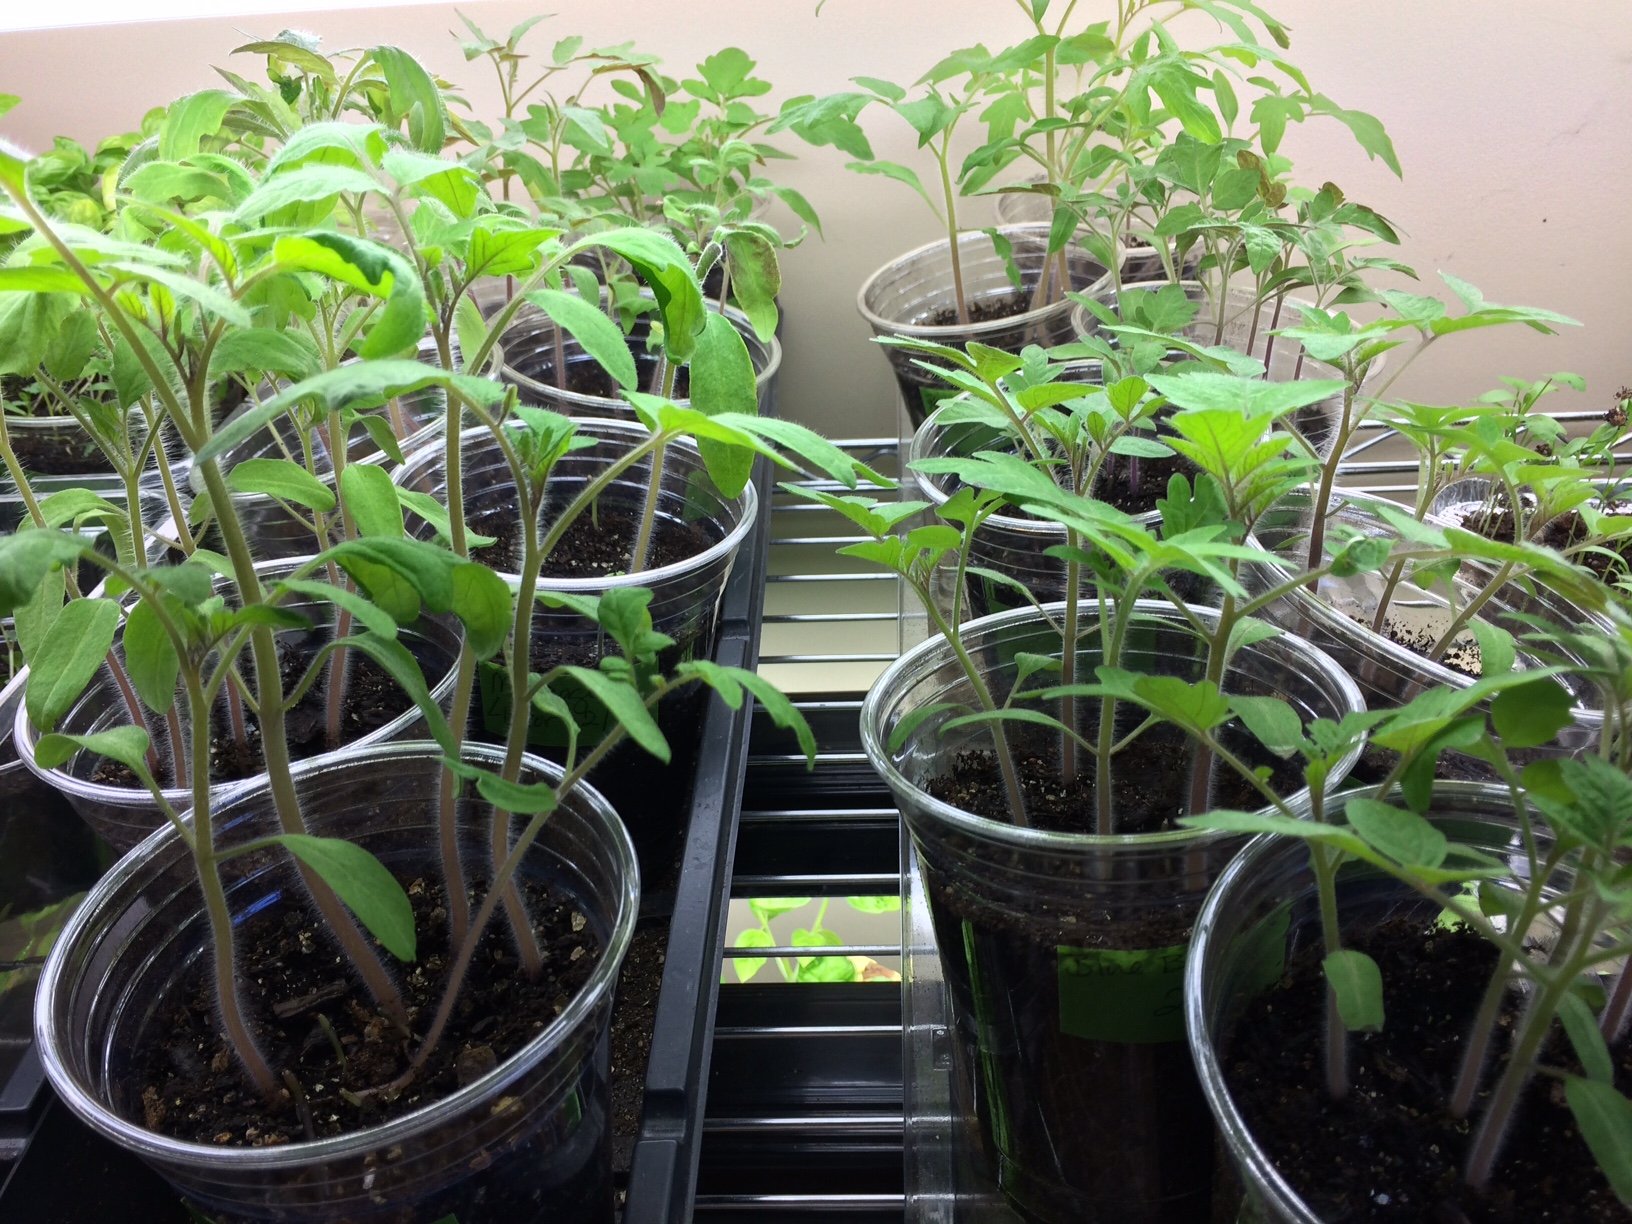 Pro Tip - always use scissors to snip off the plants you are thinning to avoid disturbing the roots of chosen specimen.
This Ain't Your Grandma's Pressure Cooker
A couple of weeks ago I was interested in understanding how pressure cookers work and I ran across this aptly titled video by America's Test Kitchen "Why Chefs Love Pressure Cookers".I was intrigued with the chefs describing how pressure cookers can cook sometimes tricky dishes to perfection and how the steam within the pressurized chamber infuses the dishes with deep flavor, but it was Tony Maws using a counter-top electric pressure cooker that completely captured my attention and sent me searching in a whole new direction.Electric pressure cookers eliminate a lot of the fear inducing factors novice pressure cooker users have about the stove top kind as well as a lot of handy features cooks of any level will love. They have a sear setting to brown meats and/or veggies before adding in liquid to finish the meal, they have food-type settings (i.e. meat, vegetables, rice, beans) to take a lot of the guesswork out of the length of time and pressure to cook with, and have redundant safety features to avoid the exploding pots some of us remember seeing in the 70s and 80s when an inattentive cook allowed the pressure to get a little too high.Fast forward a couple of weeks and dozens of viewings of pressure cooker meal recipes later and my Breville Fast Slow Pro was here and ready to be tested. I started with this simple Pot Roast recipe from Flo Lum (more on her in a minute). The meat was seared then removed from the pan to sear the carrots and onions while the pan was gently deglazed.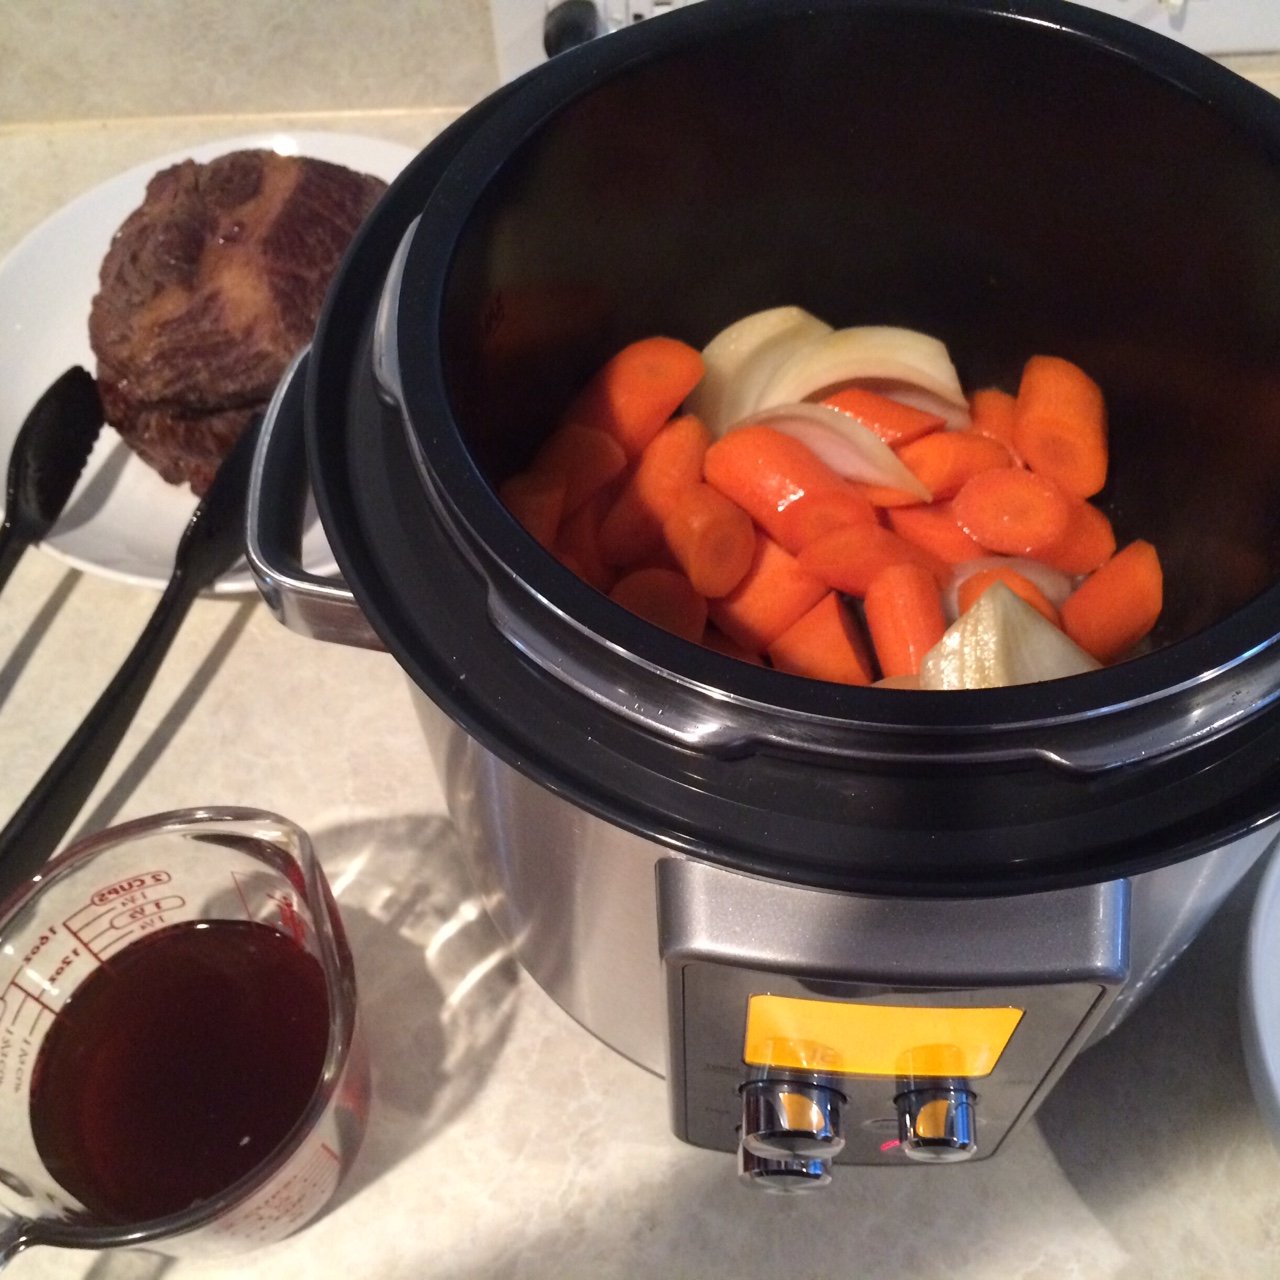 The veggies were then removed, the meat added back in and the veggies placed around it. A little thyme, salt and pepper and it was ready to cook.
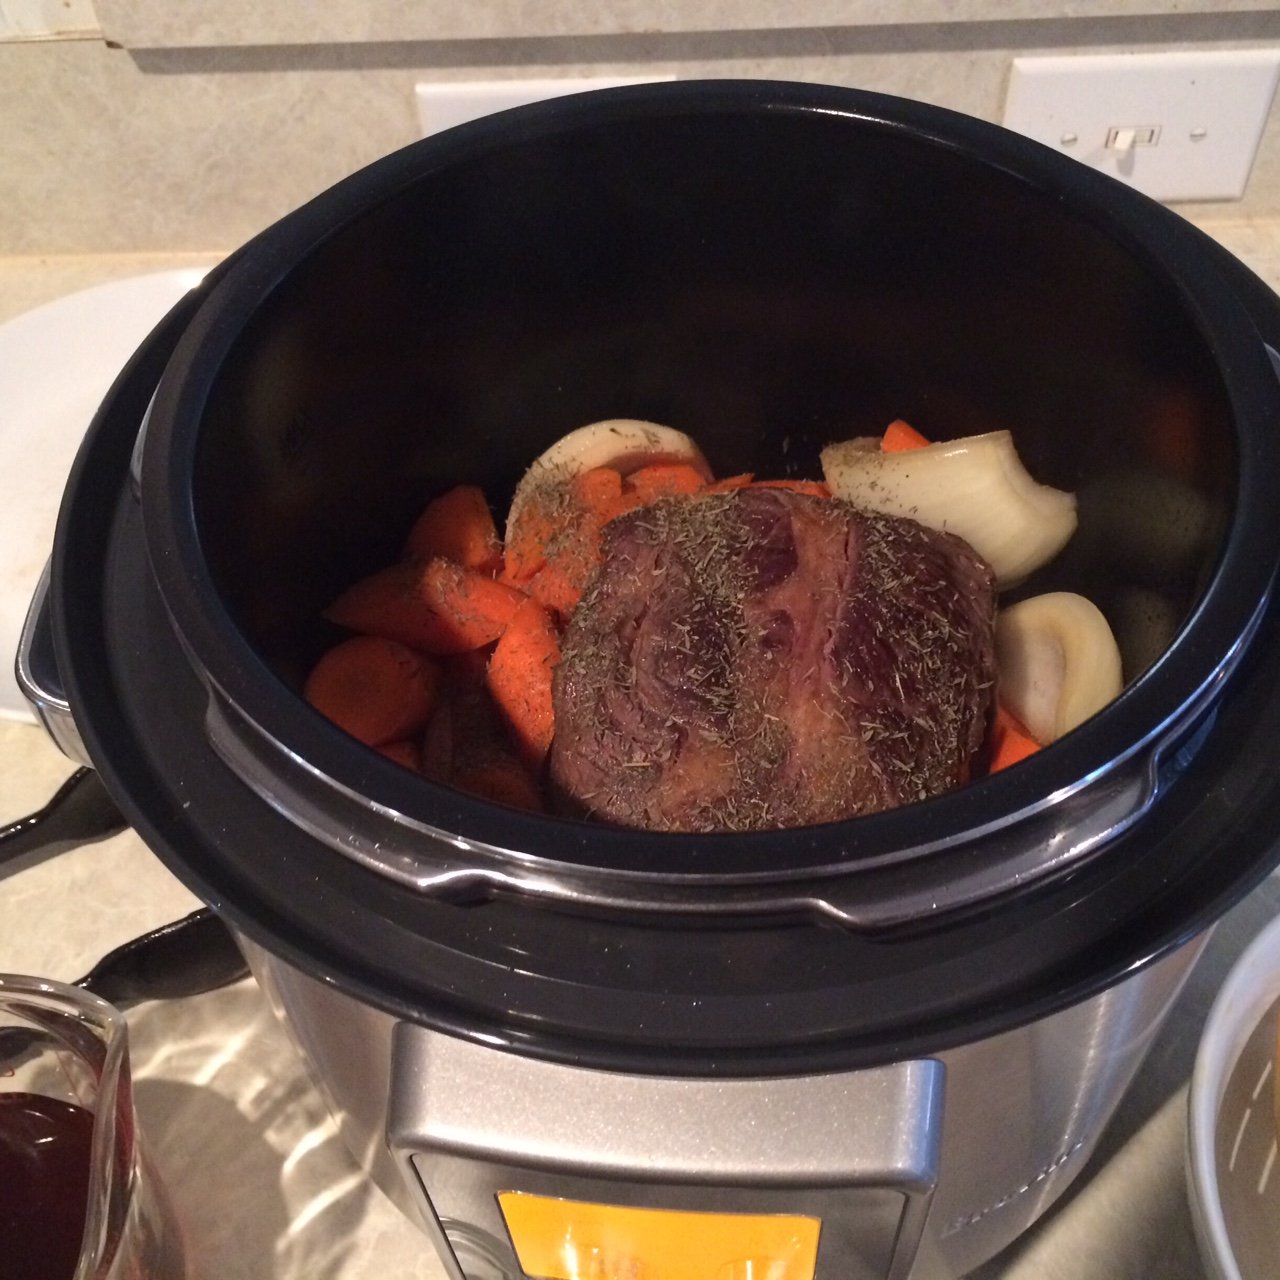 In just 50 minutes I had a delicious one-pot meal that was tender, flavorful and so easy!
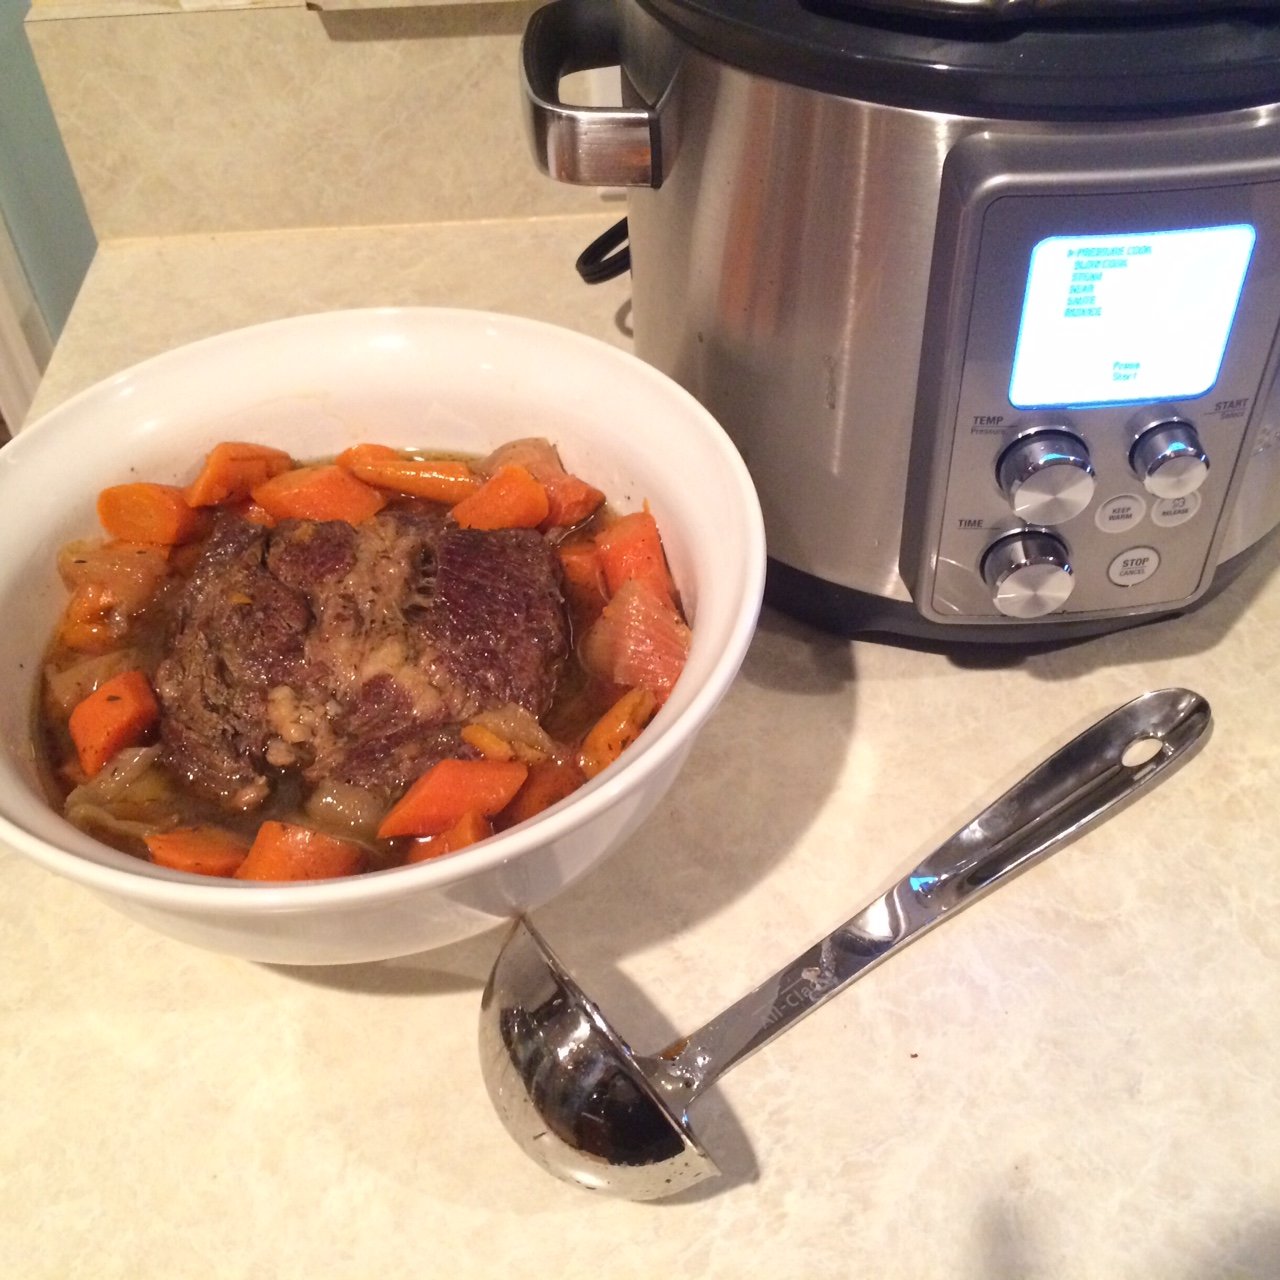 I had been accumulating recipes I wanted to try once my cooker arrived and will share some of the variety below. A disproportionate number are from Flo Lum's pressure cooker playlist because she does a great job of displaying the versatility of these counter top appliances and she has a companion blog for printable versions of her recipes.Zuppa Toscana - Risotto - Mashed Potatoes - Low Country Boil - Applesauce - Holiday Ham - Baby Back RibsAfter seeing the Zuppa Toscana recipe I had to reconsider my decision to not grow kale this year and now have some Nero Di Toscana seeds started to add some fresh, homegrown flavor to this dish when I make it later this year.
Starting My Garden Early
While Punxsutawney Phil and the meteorologists work out their differing predictions for the end of winter, growers are already hard at work preparing for spring, summer and fall.January plant starts included cabbage, chili peppers, bell peppers and rosemary.
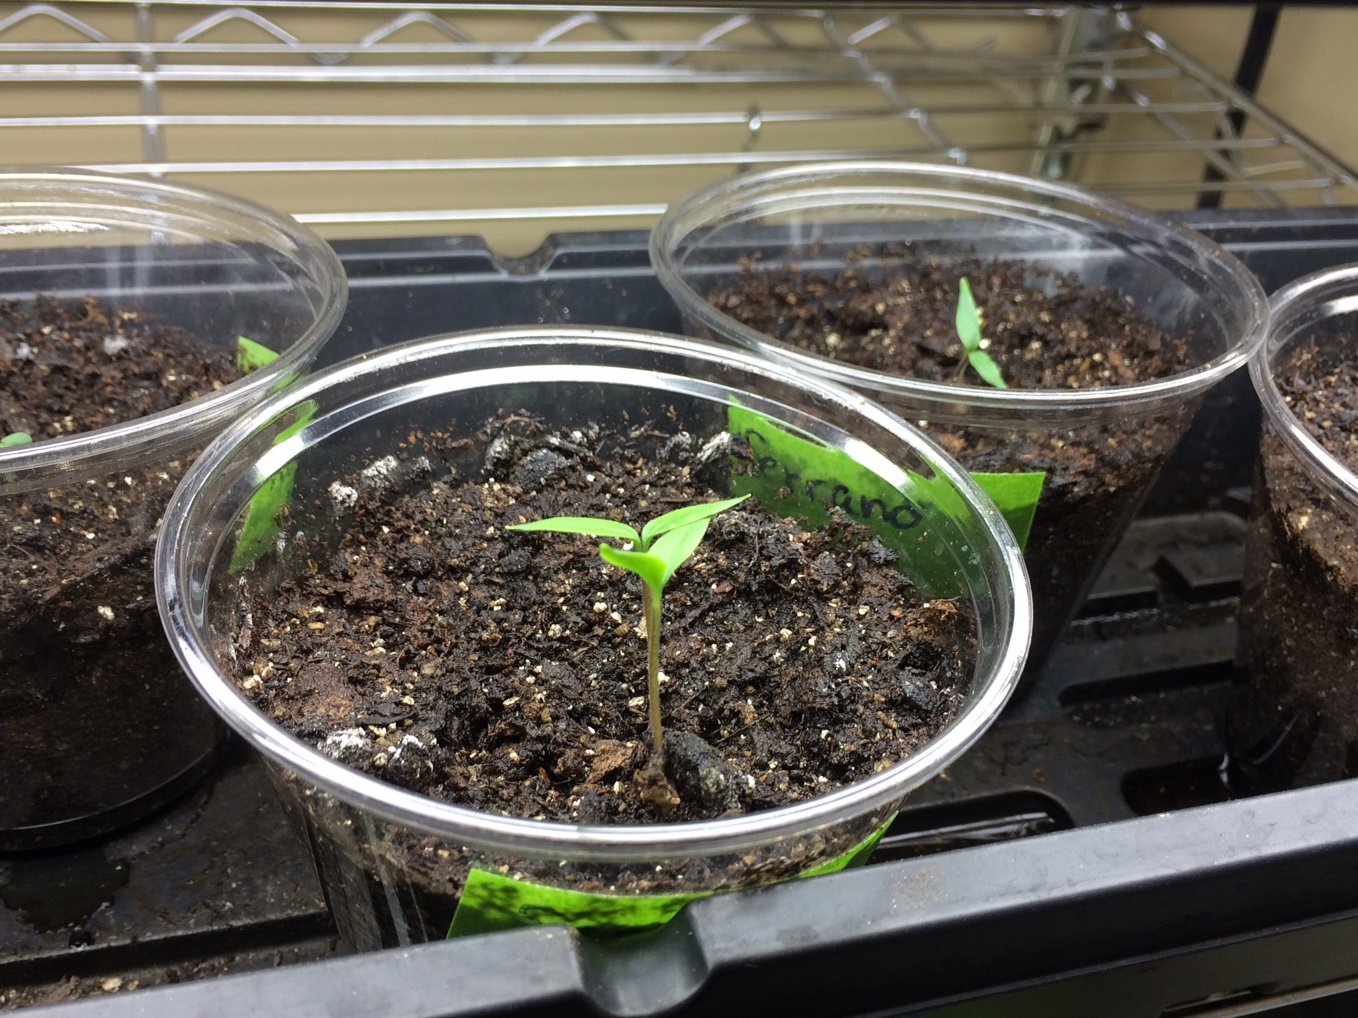 Now that February has begun, the seed starting kicks into high gear with oregano, collards and lots and lots of tomatoes with 8 varieties and a total of 38 plants this year!
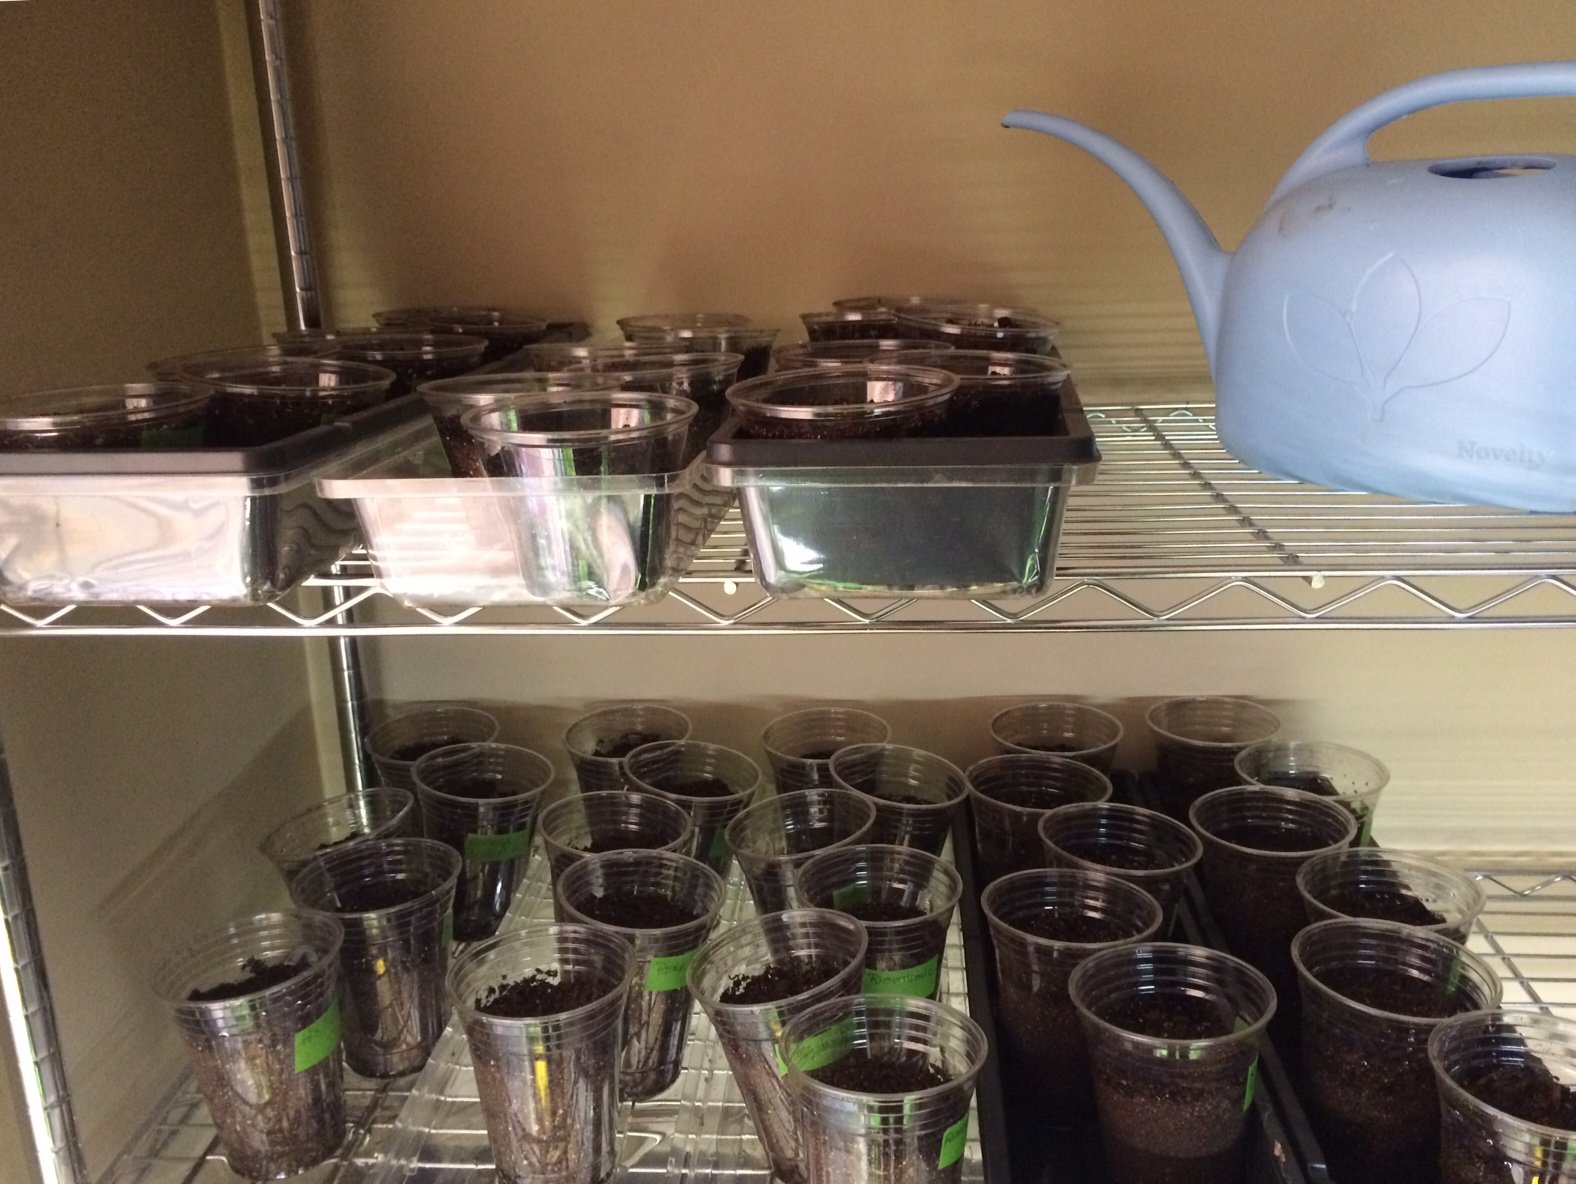 The new starts will welcome roommates in my growing nook for the cilantro and basil I grow indoors each winter. I purchased inexpensive shop lights, metal wire shelving units and florescent tubes 5 years ago so I never have to go a grey winter day without their bright colors and fresh flavors complimenting meals.
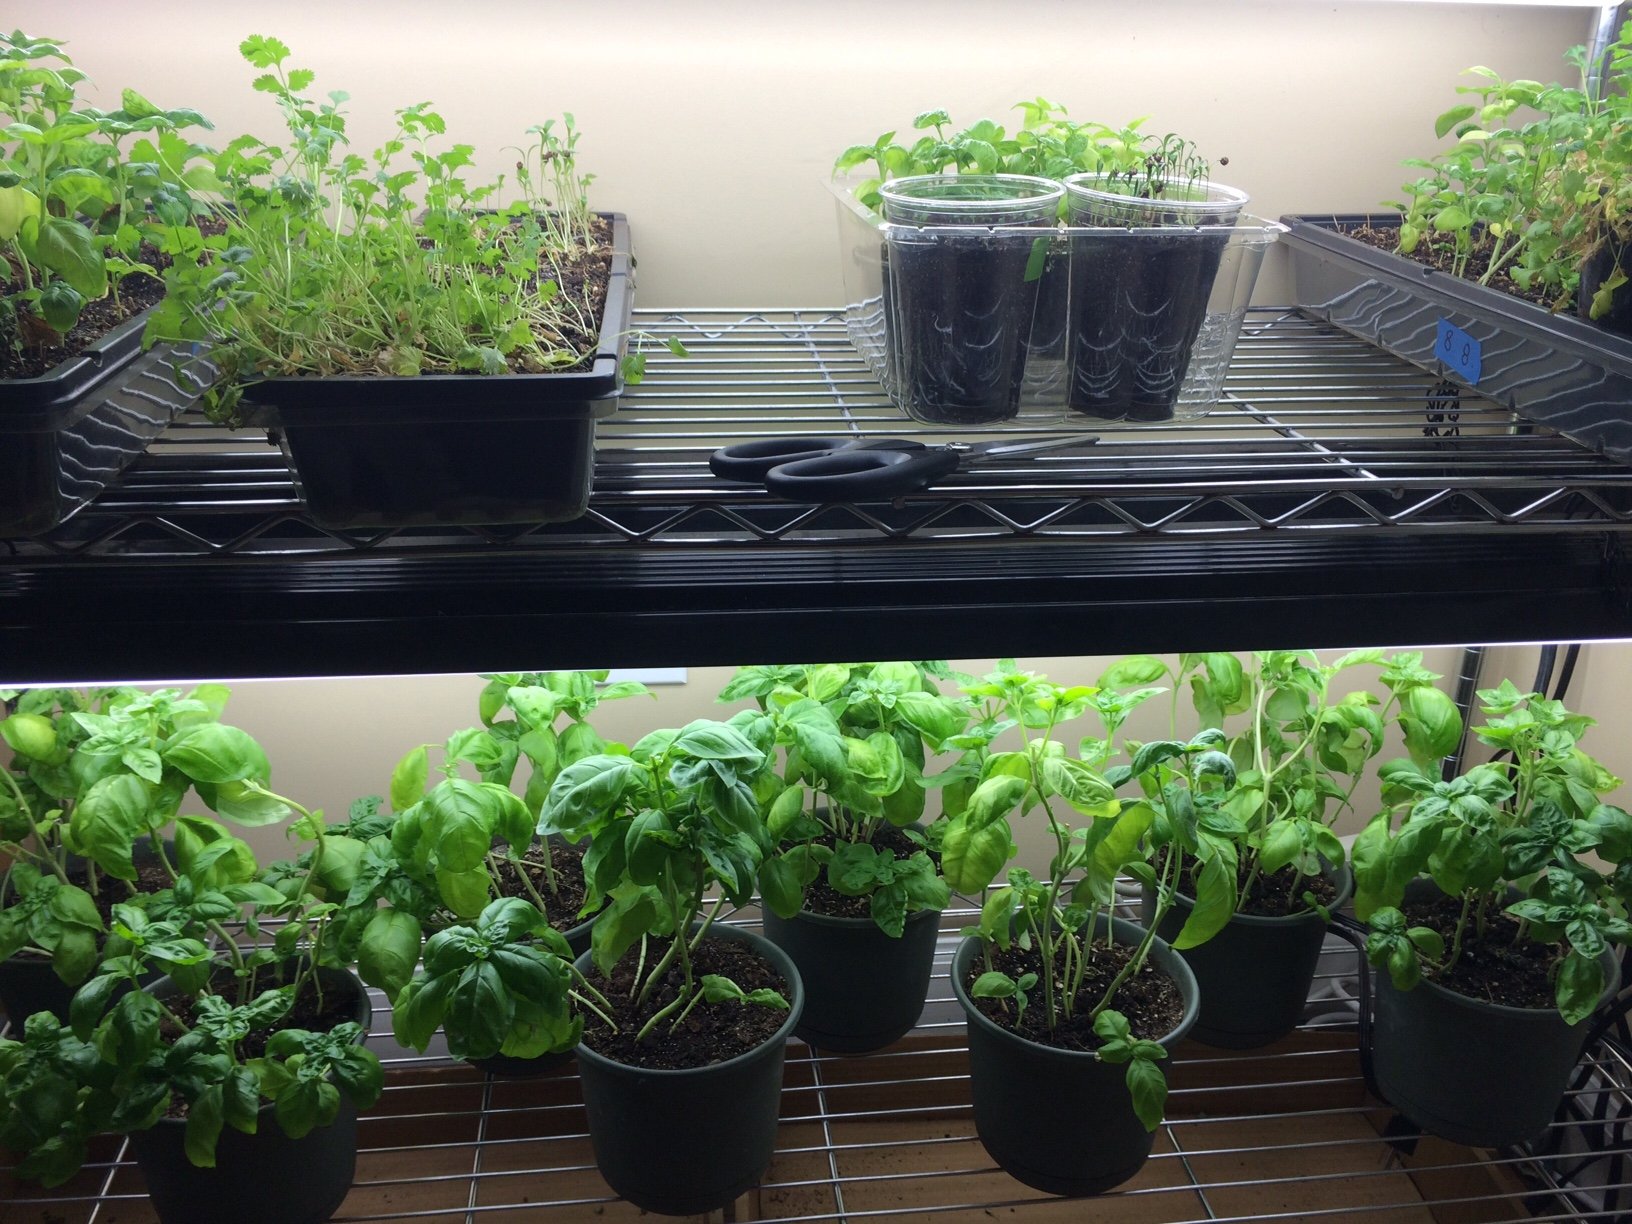 The minimal, initial investment for the equipment has more than paid for itself already and now as my garden diversifies and the number of indoor starts continue to expand each year with no additional infrastructure costs to date, I consider this money extremely well spent.Happy Spring, whenever it comes :)
Will Work For Food
The phrases urban agriculture and urban farming answer the where and the what, but not necessarily the why of food production. Some urban growers are producing for personal use (which could include sharing their excess bounty with friends, neighbors and coworkers) while other growers are producing food as part or all of their household income stream.While these two groups take very different approaches to growing, watching Curtis Stone's Profitable Urban Farming workshop intro showed me that the personal grower can learn from some of the strategies and efficiencies of the income grower. We are both working to grow food so a little cross pollination (pardon my pun) of ideas can be beneficial.In this 42 minute video he gives an overview of his commercially successful urban farm in Kelowna, BC. For income growers, there are a lot of interesting ideas presented. He has an innovative strategy for land acquisition that is essentially OPP, other people's property. He rents portions of front, back and side yards from homeowners in his city within a 1 1/4 mile of his home to grow his produce.A very interesting strategy he uses that can be adapted for personal growers is how he categorizes crops as either "quick" or "steady". Quick crops are crops that are ready to harvest in less than 60 days. Steady crops are those "cut and come again" crops that take longer but provide a more sustained harvest. With his 5 growing plots scattered across 1 1/4 mile, he grows his quick crops in the plots closest to him, since they need to be visited more often for planting, rotation and harvest. He plants his steady crops in the furthest plots to since they only need to be harvested once or twice per week.Personal growers can adapt this concept and plant their baby greens and lettuces in the part of their garden closest to the house and plant the squash and onions in the far part of the garden since they need less regular attention.For growers looking to build or expand their business, this video is packed with information. For personal growers, there are some great tips on layout, harvesting and drip irrigation that can be implemented in home gardens.In addition to this workshop intro video, he has a lot of other videos on his YouTube channel worth perusing for both income and personal growers.
A New Old Fashioned Barn Raising
I was researching a local farm that I am interested in purchasing from and ran across an article about their recent BarnRaiser.us campaign to improve the sustainability and profitability of their livelihood. I was intrigued and wanted to learn more about BarnRaiser.There are so many things to love about this artisanal food crowdfunding site:
- The name is wonderfully evocative of the end goal, a community coming together to support the needs of farmers and food artisans
- The admirable mission statement is "To put a billion dollars into the hands of food innovators as they reshape a healthy food world."
- BarnRaiser fees are based solely on fully funded goals. No goal = no fee for trying
- And like the other crowdfunding sites, the farmers and artisans looking to get funded offer up little goodies for supporting them at different levels
- Projects seeking funding are listed in a gallery format with name and photo, a status bar showing how much money has been pledged and how much money and how many days are left to fund the project and, last but not least, location for the project
- According to the FAQ, Project Creators are subject to some level of identity verification
- The site is great exposure for the farmers and food artisans whether they reach their funding goals or not
Let's go raise some barns!
Winter Growing
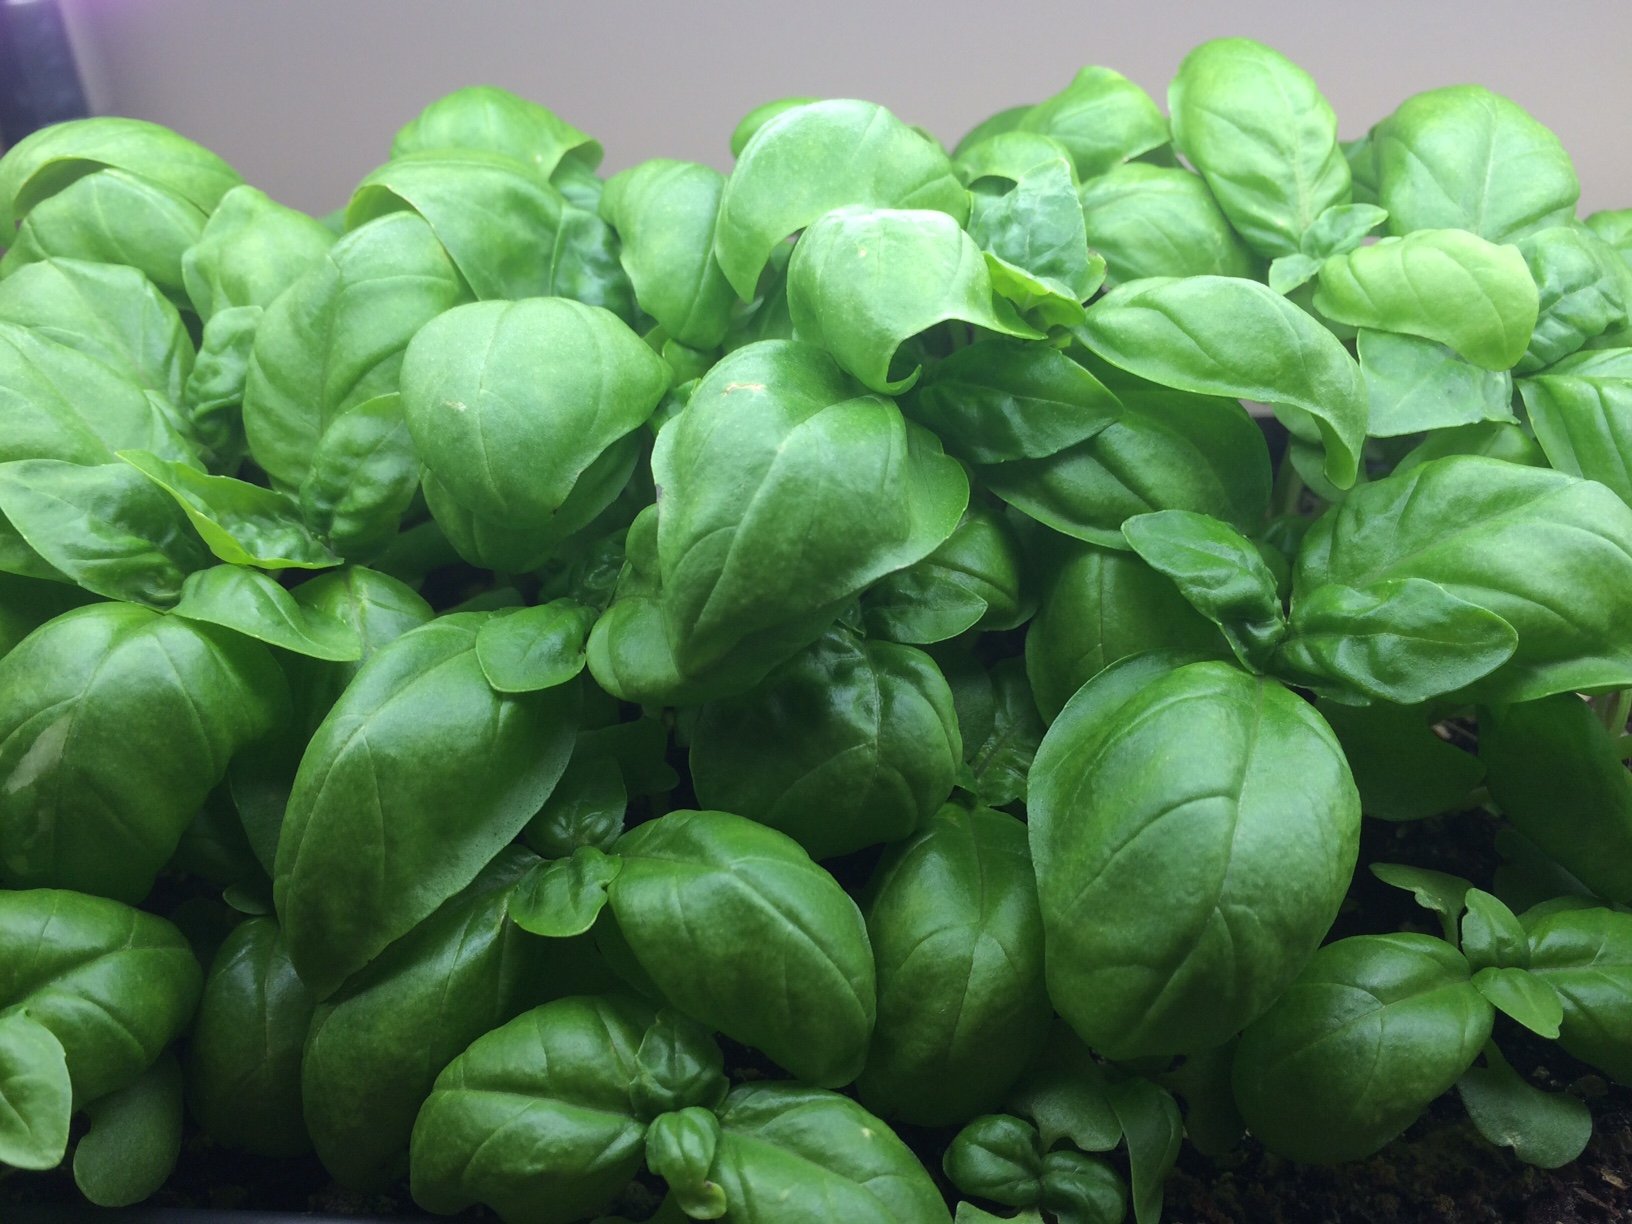 This winter there will be a lot of focus on my indoor gardens mostly because my outdoor winter garden is a bit of a bust this year. The collards and spinach I planted were just beginning to grow when an unseasonable cold-snap halted them in their tracks. I tried resowing but still don't have much of anything green going on outside. I haven't given up completely on the 3 inch tall collards that I still hope will be served on New Years, but accept that I may be buying most of my good luck meal this year instead of growing it.Right now my indoor garden consists of two trays of basil microgreens (already harvesting from the tray on the left) and 8 pots of basil that will be allowed to grow into full plants of about 8" tall and pruned a bit daily as needed for meals.
 I will be starting another 3 trays of cilantro microgreens this weekend and will do various other types of microgreens (arugula, mustard and red cabbage) off and on all winter to add some homegrown flavor and crunch to winter meals.If you are considering indoor growing, microgreens have a lot going for them. They have a very quick turn around, usually only 2-4 weeks from beginning to end which is basically instant gratification in the gardening world. And due to their fast germination to harvest cycle, they aren't usually around long enough for pests and diseases to become an issue.These little plants really do have some powerful flavor, often even more than their adult versions and growing research from reputable sources is showing that some of them are packed with up to 5x the vitamins and carotenoids found in the adult versions of the same plants.So whether or not my outdoor garden takes off with this wonderfully sunny and warm week we are having, I will be posting (and eating) fresh all winter long.
Making Hay While The Sun Shines - Part 3
The wonderful thing about being taken under the wing of a traditional southern food mentor is that in addition to the lesson at hand, there are other tantalizing tidbits sprinkled throughout the lessons like breadcrumbs, just waiting for me to pick up the trail.During my green bean pressure canning lesson, the utensil drawer was opened to look for some other object and the Norpro Wood Corn Cutter and Creamer made its debut into my life. My mentor explained that device is used to cream corn, which she does annually with Silver Queen, her favorite hybrid variety. The tool was dropped back into the drawer and the green bean lesson continued.That night I began researching the tool and process of making and preserving creamed corn. My mentor uses the "Another way" method described at the bottom of this link over at the National Center for Home Food Preservation (the online bible for how to safely preserve food). The creamer tool was so inexpensive and the corn so abundant at the NC State Farmers Market, I had to give it a try!My whopping 45.5 lbs of corn had 65 ears in it and sold for only $25 - one of the many great reasons to grow or buy abundantly in season and preserve in wholesome ways for the off season. I enlisted help from the cutest and most enthusiastic corn shucker imaginable to get through the pile.
 Once shucked, the corn was washed, trimmed of any ear worm damage and ready to be creamed. It took a little experimentation to get the cutters to the right height for the chunkiness I desired. I found compromise by setting it on a creamier height and using knife cut corn once every 8 or so ears to get nice big kernels.
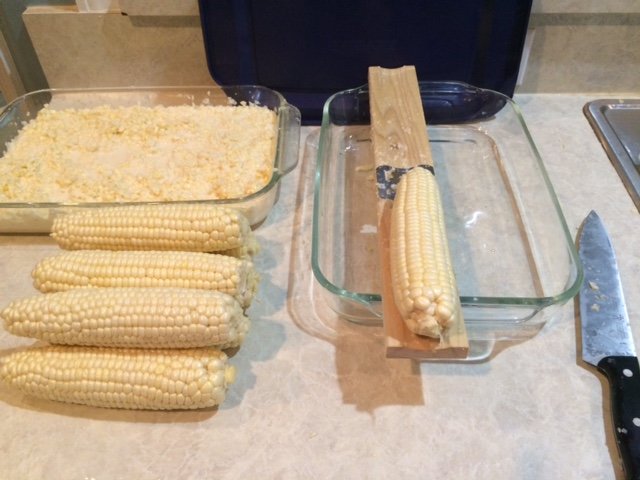 Following the instructions from my mentor and the National Center for Home Food Preservation the creamed corn was cooked in two double boilers for about 10 minutes.
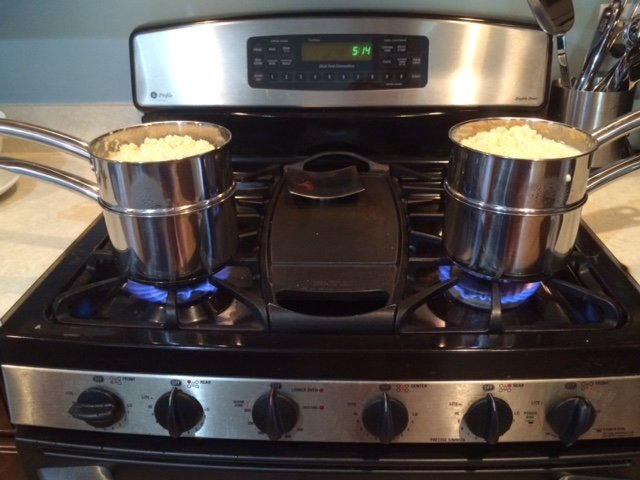 Once thickened it the pots were set in an ice bath to stop the cooking process.
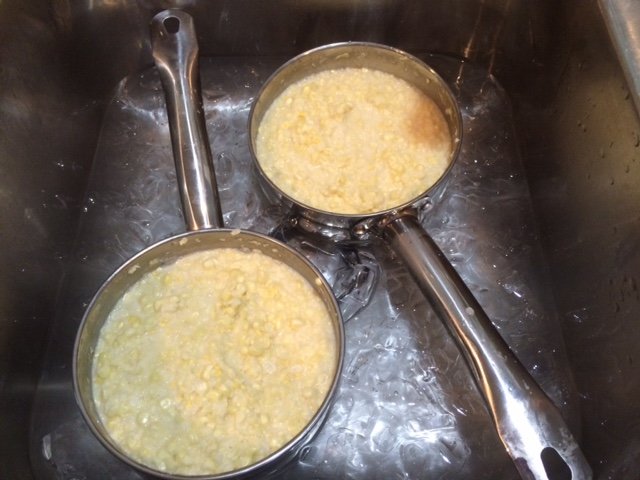 Once cooled, it was ladled into the freezer bags that work with my vacuumsealer at serving sizes of roughly 15.5oz each. They were frozen flat to take up less space then vacuumsealed.
 All in all, my 45.5lbs of corn ended up being 15.5lbs of creamed corn with much of the difference being the cobs that were cut up and added to compost so they were a gain for next year's soil also. The entire process took about 4 hours from shucking to the last batch being put in the freezer and finished with a total of 16 servings. I froze 15 of them for the months to come and made one fresh that night. I knew the project was a success (and one likely to be repeated before the end of corn season) when my little shucker took his first bite of our homemade creamed corn and asked if there was enough for seconds.
Learn As You Grow
Between now and November the most common phrase in my Google search history will be "when to harvest..." followed by the common name of a first year plant in my garden that is showing signs of being nearly there.In general, operating on a need-to-know-basis with my garden works well for me. A quick search told me that I have some time before my first year spaghetti squash will need to be harvested. But it's not without it's misses too. I mistakenly expected my first year zucchini to continue to grow at something like the rate they did from the 1" to 4" phase. One of the young zucchini shot to 11" and a whopping 1 lbs. in just two days! Researching revealed that I had missed the mark on this one and would need to watch more closely to catch them at the 6"-9" size for the best flavor and texture.
 I do look forward to the day when I have grown my staple cultivars so many times that much of it becomes second nature to me. But I will always experiment a little too, trying new plants and varieties to keep this learn-as-you-grow wonder alive.For the record, my overgrown zucchini was still delicious and I don't think it was just because it was the first one.
Garden Toy - Hod
Zucchini and squash season is just around the corner and I had been looking for a replacement for my lovely, but somewhat lightweight flower basked that I use to gather what needs picking and what's for dinner (usually the same things) each day. After a few searches for garden baskets I ran across this shiny new toy, I mean garden hod. Pros:Food-grade vinyl-covered mesh means you can hose off produce right in the hod before bringing it inside16 quart capacity means plenty of space for an evening's bountyFlat bottom is perfect for when I want to use a small bowl to separate out small itemsSturdy construction...see belowCons:Sturdy construction - this hod is 3.5 lbs. when emptyPersonally, I am okay with the one con. I garden for a number of reasons and needing to exert a little physical energy to get my food is one of them.I give my new garden hod an A+
Night Garden
My back deck has a beautiful view of the garden and is one of my favorite places to be in the evenings. A few months ago I had the idea of adding some solar lanterns to the garden beds primarily as a safety precaution against guests tripping over raised-bed edges after dark but also to add a little visual interest to the garden during my evening reveries.Since then, the soft light of the lanterns kissing the plants good night has become one of my favorite ways to view the garden. My camera of choice (and necessity) is an iPhone 5s, so it is limited in its nighttime shooting capabilities even with the myriad of apps available so I shot this one just after dusk when the lights had begun their night watch but there was still enough light to not turn out a grainy image.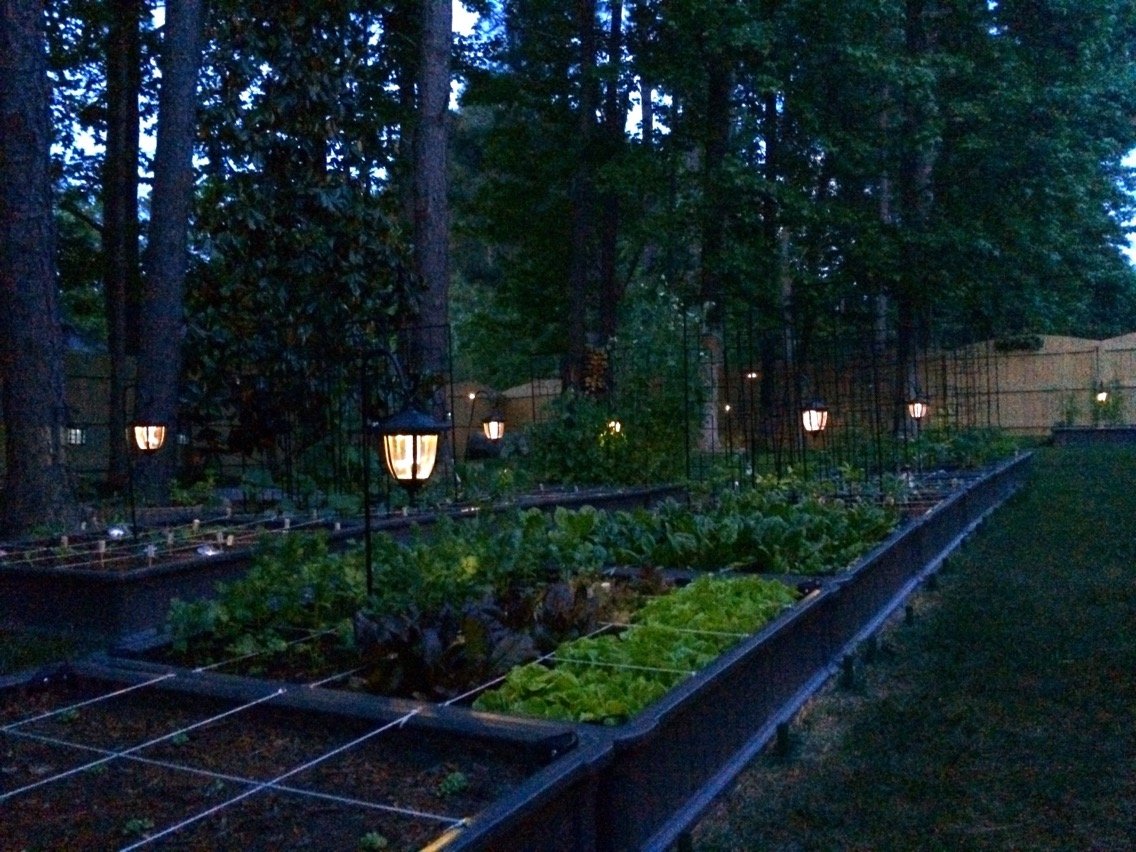
Rotation Reboot
Denial ain't just a river in Egypt - true in my Midwestern youth and true today.Last week I accidentally* ordered 4 additional garden beds instead of the 2 strictly required for my 2015 garden plan. Today, with extra garden beds waiting in the garage and a snow day in the Triangle at hand, I sat down to consider what to do about the 32 square feet of extra planting space I accidentally* acquired. As I considered whether to add new plants, expand the number of my current varieties or a combination of both, I kept thinking of this article I had run across a couple of weeks ago about crop rotation.Until now, I have done a pretty good job of refuting the quiet voice in the back of my mind talking about crop rotation with arguments like "I add compost regularly to my raised beds, so I am replacing the lost nutrients" and "my scale is to small to worry about crop rotation, and that is for monocultures anyway", but as I sat here today looking at what I had already planned and what I was planning to expand, it became harder and harder to not be a responsible steward of the soil I have made and hope to nourish my family with.At the same time I am garden planning, I am enjoying the Edible Education classes on youtube about the future of agriculture, arable land and food in America and the world.So back to the article for tips on rotations and my garden plan I went. My garden was not entirely hodgepodge, there was some method to my madness! I have a north facing backyard despite my strong preferences and best efforts when house hunting last summer, but if you can't be with the one you love, love the one you're with! So all the tall plants were planned for the back of the garden so they weren't casting shade on anyone behind them and the ones that need more sunlight hours were placed to the right of the garden which has more daylight hours before being shaded by my south facing house. Beyond those two considerations though, it probably was a bit of a hodgepodge.I started with color coding my planned plants according to the 4 main categories (leaves, fruits, roots and legumes) to see where I was - which was all over the place, then reorganized their placement into a more cohesive plan. I started at the left with the leaves and worked my way right to legumes with the idea that everything will shift to the right for 2016 and so on. I don't currently have an equal number of boxes devoted to the roots and legumes as I do for the leaves and fruits to make this work perfectly, but I am hoping that ending my denial and admitting I have a rotation problem is the first step in solving it.And since I was at it with color coding plant "types" on my Excel spreadsheet, I thought I might as well include the container plantings I had planned, the non-rotational plants (asparagus, some herbs and strawberries) I will have off-set from the Garden Proper and the Morel boxes I have in the tree line at the back of my property. And since I was going to include those, I may as well include a code for my preferred preservation techniques for each type... The red arrows are where trellis supports will be, and the 3 beds in blue will be off to the side and will not rotate from year to year. I think it is entirely likely that more beds will be added for 2016 and an effort will be made to utilize them for roots and legumes so I end up with a roughly even number for each overall type so the rotations work more uniformly.I plan to grow a handful of flower varieties with as many natives as possible to serve the local pollinators, but since I will not be eating them, I am comfortable putting them directly in the yard and not taking up precious garden space with them. Additionally I have my 5 blueberry plants, 4 fig trees (2 in the ground and 2 in containers), my Meyer Lemon and an indoor Bay Laurel.All in all, 2015 is shaping up to be a great year to grow and I am considering alternate irrigation sources now that I have cut Denial out of my garden plan.*tell me your definition of accident and I will tell you mine
The Great Indoors
The leaves are turning, the mornings are a bit crisper and all of the big box stores have hauled out their Christmas items....that can mean only one thing - its time for NHG to head indoors!As I sifted through listings looking for my Raleigh area home, the garden potential of the backyard and the indoor gardening space were priorities. I use intensive, raised bed gardening outdoors so I can grow a lot in a little space outdoors and the same is true indoors. I have set up in my indoor garden in a dormer nook in my bonus room that measures 48" deep by 74" wide. I have two 4' x 18" chrome finished utility shelves equipped with shop light fixtures to grow my herbs and tender greens. My indoor garden is great in summer months to grow lettuce and spinach that cannot tolerate the summer heat but it really comes into its own during the winter when it serves as my main source of fresh herbs and greens. What I have growing so far are:
- 13 Genovese Basils
- 3 Cilantros
- 1 Oregano
- 1 Mint (on consignment for my neighbor who wants it for a Kentucky Derby party next year)
- 4 Rosemarys
- 2 Garlic Chives
- 2 Leaf Lettuce varieties
- Basil and Cilantro microgreens
I will light up additional shelves as the season wears on to add more lettuces and more microgreens (I love arugula and mustard for salad and sandwiches) but this is the official start of the off-season garden.
There's An App For That
On a whim I went to the Apple app store and searched 'vegetable garden' to see what would come up. Currently there are 21 apps available. Some looked ho-hum but there were a few that look like they might be useful with diaries, soil and plant tips, planting and harvesting guides and even pest identification. I may have to give it a try and see if a high-tech mentor will guide me through the first year of being a back-yard gardener.