My Glass Gem Corn has been happily drying above my home office and today was the day to strip the cobs and put up the kernels for popcorn and next year's planting. If you have been following my blog for any amount of time you know that I have an abundant affection for this particular varietal which translates into an excess of photos...I stripped all the multi-color cobs leaving the two almost entirely blue cobs for last.Some of the kernels will be seed for next year and some will be popcorn, but in the meantime, they are still decorating my home office.
Read MoreBig Finish - Glass Gem Corn
The Glass Gem Corn is winding down and I will have a couple more ears to harvest over the next few weeks but today was really the big finale with 4 ears harvested and two that were almost* entirely in the blue spectrum.I plan to make some popcorn from this year's harvest, but also plan to double my planting for year's crop from saved seed. This is a exponential goal/reward because for every one corn plant I plant two black eyed pea plants to nourish the corn and climb the stalk for support and I am enjoying the still growing store of homegrown black eyed peas to cook up for good luck on New Year Day and would like to have even more for New Years 2018.*the bottom right cob has a single green kernel that only makes the rest of the cob look all the more blue.
Read MoreI Can't Even - Glass Gem Corn Harvest
Yes. It is just that beautiful!
Read MorePomodori Aplenty
I had my largest one-day harvest of Roma Tomatoes at a little over 3.5 lbs, a similar weight in Amana Orange and Mortgage Lifter Tomatoes were ready to be picked along with some cherry tomatoes, a nice bowl of figs, more black eyed peas to add to the jar and four more cobs of Glass Gem corn.I can't get over how pretty and varied the glass gem cobs are, each seems to have their own color theme.I have at least 5 more cobs to harvest and I can't wait to see their variations!
Read MoreOne Boy, Three Sisters
Me: Let me snap a picture before you plant the rest of the seeds.9yo: Sure, but let me grab the dibber first!I served in an advisory capacity last weekend as my 9 year old planted Glass Gem and Strawberry Popcorn, two beautiful heirloom varieties of flint corn he chose for his own garden crop this year. I chose California Blackeye Peas and a gift of Italian squash seeds called Zucchino Tondo Chiaro Di Nizza to be planted with the corn over the coming weeks to create our own Three Sisters planting with our crops growing together, supporting and benefiting each other.As we worked we talked about proper spacing (math), germination (biology), the magic of life held in each one of the seeds in his hand (reverence), and of the future harvest (patience).There is more growing in my garden than just food, I am growing a person.
Read MoreTrench Composting for Corn
I have never really wanted to grow corn since the small amounts I desire for home cooking are readily available at the farmer's market in season, it takes up a lot of valuable space in an already tight garden plan and it is an environmentally costly plant to grow. Corn is greedy. Really greedy.Then I promised my 8 year old that he could grow anything he wanted next year and flipping through a seed catalog he picked Strawberry Popcorn. I dutifully ordered the seeds and we were researching growing, harvesting and drying the variety online when we ran across our first glimpses of Glass Gem Corn. We marveled at the photos and videos of this varietal and were both smitten by its beautiful colors. When it appeared on the Baker Creek Heirloom cover a couple of weeks ago, I found myself suddenly preparing for two varieties of corn in spring 2016 but still didn't want corn in my garden proper.My suburban lawn is in its second year of organic management (no herbicides, pesticides or fertilizers are used) so the conundrum of what to do with the corn made me consider planting directly in the yard as a solution to the space requirements and soil depletion problems of corn. But although I don't use chemicals on the soil, that is not the same thing as having good, rich soil for growing anything. I had seen information on trench composting some time ago and decided to dig back in and learn a bit more.There are a lot of variations on trench composting from the fill it as you go style to the much more elaborate hugelkultur style installations. I opted for something closer to the style in the video below.https://www.youtube.com/watch?v=W1XmP9-RpmYI started with a trench and filled in a layer of browns. These are leaves and pine needles that have been composting for a year now. The leaves have already broken down into a rich soil structure but the pine needles take a bit longer.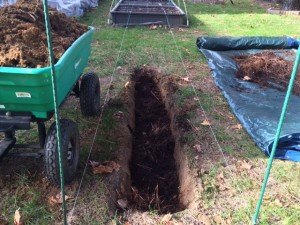 I followed the layer of browns with some rich, dark, nearly done compost from my two tumbling composters.
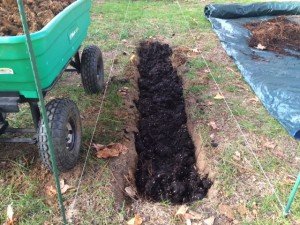 I topped the compost with another layer of the browns.
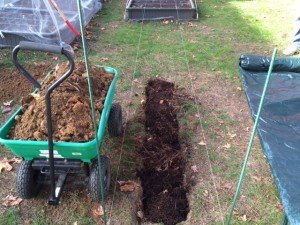 And finished it off by replacing a top layer of soil, mounding it up a bit since it will settle as the layers of browns and compost continue to biodegrade and compact.
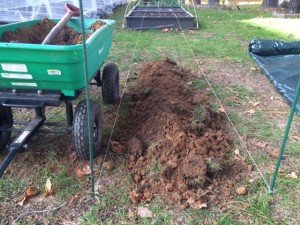 The Glass Gem Corn will be planted on either side of this trench in spring and I will need to do the same elsewhere in my yard for the Strawberry Popcorn. I hope to have a staggered planting system in years ahead where I grow on top of a trench a year and a half after it is filled with rich, organic matter that has had time to be broken down by microbial and worm activity.
Glass Gem Corn
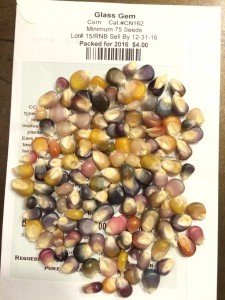 It's not often that a packet of seeds is so exciting that I cannot wait until spring to open the flap and take a peek inside. Glass Gem corn is a clear exception!The Glass Gem heirloom corn variety hit the homegrown stage a few years ago and has been offered only on a wait-list basis from very limited outlets until now. So when I saw the cover of the 2016 Baker Creek Heirloom Seeds catalog I assumed they were just highlighting a very photogenic variety for the cover. When I discovered they were actually carrying the seed, I didn't hesitate and am now planning where to plant the star of my 2016 garden!
Making Hay While The Sun Shines - Part 3
The wonderful thing about being taken under the wing of a traditional southern food mentor is that in addition to the lesson at hand, there are other tantalizing tidbits sprinkled throughout the lessons like breadcrumbs, just waiting for me to pick up the trail.During my green bean pressure canning lesson, the utensil drawer was opened to look for some other object and the Norpro Wood Corn Cutter and Creamer made its debut into my life. My mentor explained that device is used to cream corn, which she does annually with Silver Queen, her favorite hybrid variety. The tool was dropped back into the drawer and the green bean lesson continued.That night I began researching the tool and process of making and preserving creamed corn. My mentor uses the "Another way" method described at the bottom of this link over at the National Center for Home Food Preservation (the online bible for how to safely preserve food). The creamer tool was so inexpensive and the corn so abundant at the NC State Farmers Market, I had to give it a try!My whopping 45.5 lbs of corn had 65 ears in it and sold for only $25 - one of the many great reasons to grow or buy abundantly in season and preserve in wholesome ways for the off season.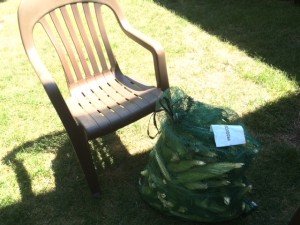 I enlisted help from the cutest and most enthusiastic corn shucker imaginable to get through the pile.
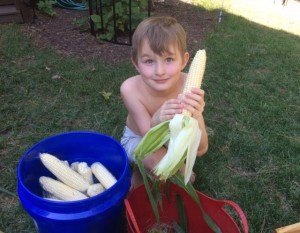 Once shucked, the corn was washed, trimmed of any ear worm damage and ready to be creamed. It took a little experimentation to get the cutters to the right height for the chunkiness I desired. I found compromise by setting it on a creamier height and using knife cut corn once every 8 or so ears to get nice big kernels.
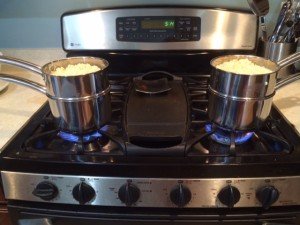
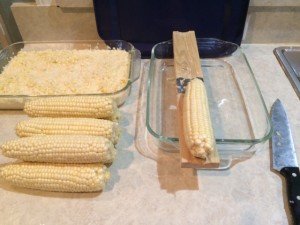 Following the instructions from my mentor and the National Center for Home Food Preservation the creamed corn was cooked in two double boilers for about 10 minutes.
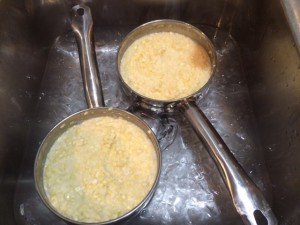
 Once thickened it the pots were set in an ice bath to stop the cooking process.
 Once cooled, it was ladled into the freezer bags that work with my vacuumsealer at serving sizes of roughly 15.5oz each. They were frozen flat to take up less space then vacuumsealed.
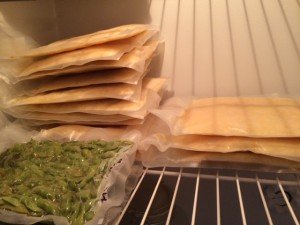 All in all, my 45.5lbs of corn ended up being 15.5lbs of creamed corn with much of the difference being the cobs that were cut up and added to compost so they were a gain for next year's soil also. The entire process took about 4 hours from shucking to the last batch being put in the freezer and finished with a total of 16 servings. I froze 15 of them for the months to come and made one fresh that night. I knew the project was a success (and one likely to be repeated before the end of corn season) when my little shucker took his first bite of our homemade creamed corn and asked if there was enough for seconds.


