It is the end of an unusually quiet summer here at NHG. A late, hard frost wiped out much of the spring plantings as well as this year's harvest of blueberries and asparagus. The figs and asparagus were late and modest. Only the herbs were undaunted by the hard freezes and have flourished their second year in their permanent bed. They have flowered and dropped seed which I hope will refresh the herb bed regularly by being able to remove the mother plants every year and allowing the next generation to take a turn.So today I began closing summer, deadheading the spent flowers and trimming back the herbs for drying.I also began the opening of fall today. Planting beds with radishes, spinach and cilantro then lightly recovering the seeds with the pine needle mulch that is a naturally occurring phenomena in my garden.Here's to a fruitful autumn!
Read MoreCooking Up A Hurricane - Mozzarella (Part 2)
As a cook (and human being) I am much more comfortable in the zone where I am critiquing past performance and looking for areas for improvement over standing on the precipice of something I have never tried. To that end, one of my favorite phrases is the French culinary phrase 'mise en place", which means "putting in place" and is a practice used in recipes that benefit from having all the ingredients measured and prepared before beginning.For my first ever adventure into home cheese making, mise en place was required...and possibly wine...Soft-cheese making is pretty straight forward (for the practiced) but with some specific temperatures serving as prompts to move to the next phase. Since this was my first go at it, that translated into me constantly monitoring temps so as not to pass or miss an important temperature window.With the first attempt at anything there are questions...are my curds curdy enough? Is the mesh in my strainer too large (or too small) that I have curds filling the holes?But then magic! I made cheese!!In the end, like any new recipe, it went mostly well with a decent and edible result. Then I begin the process of #Kaizen - constant, incremental improvement:
The cheese was a little firmer than most of the purchased mozzarellas I am familiar with - did I over work the curd?
The cheese was good, but a little on the salty side - I need to cut the salt in 1/2 for the next attempt.
My mozzarella was a little more yellow than the milky white mozzarellas I buy - is that related to the milk I purchased, something I did...I need to spend some time on google...
My favorite recipes rarely began as they are today and I am happy to add cheese-making to the list that is being constantly improved and refined until it reaches the point of second nature.
Read MoreRoma Wasn't Built In a Day
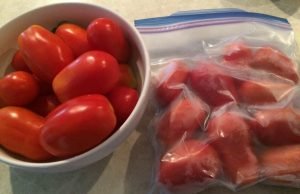
Roma math:A decent batch of homemade tomato sauce with enough to freeze or can for future use requires a minimum of 15-20 lbs of roma tomatoes.The average day on the urban farm (with 16 roma tomato plants in high season) results in anywhere from 1-3 lbs of roma tomatoes.I struggled with this math last year as I watched ripe romas edge toward over-ripeness while waiting for enough companions to be ready at roughly the same time to make a batch of sauce. Out of desperation I started searching "freezing whole tomatoes" and low and behold:Not only CAN you freeze whole tomatoes, there are a couple of benefits to doing it. Freezing, especially for short term storage doesn't have to be particularly fussy. Just clean, pop in a bag, remove most of the air and voila - a partial batch of sauce! Also, when frozen tomatoes are thawed to make sauce, the skins just slide right off, saving the blanching step.
Read MoreQuest For Fire
My tomatoes were troopers this year holding onto green romas, blue beauties and red delicious globes into early November, but I gave up and pulled the remainders two weeks ago just so I could begin cleaning the beds and preparing them for winter before heading off to a week's worth of meeting in San Diego last week.This weekend's task was to pull the rest of the serranos off before 3 consecutive nights of freezing or below temperatures hit them. My final harvest ended up being 1lb, 5oz of beautiful peppers that will warm dishes from now until next year. All were cleaned and vaccu-sealed before being frozen except for a few that will go into the Thanksgiving cornbread later this week.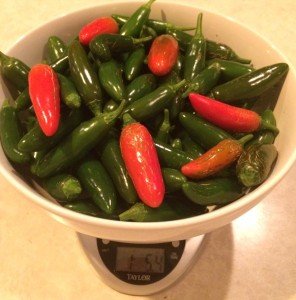 On another pepper note, a friend has some seeds that he will be sharing with me from his home country of El Salvador. I am keenly interested in growing them out next year since he doesn't know the name of them in either his native tongue or English. For now I am thinking of them as Mystery Pepper and what a fun mystery to solve!
Growing Sustainability - Part 1
 I have three 24 x 36 cork boards in my home office, devoted to helping me organize my garden. They are filled with seasonal planting guides for Zone 7, my own garden plans for seasonal and succession plantings, companion planting charts and the listings of vegetables by family that make sense of them.Interspersed between these work-a-day printouts are some of my favorite images of the WWI National War Garden Commission (1910-1920) and WWII Victory Garden (1930-1950) posters. I have long been a fan of these nostalgic images for what they represented at the time and what they represent to me* today.The images, although quaint and nostalgic now, when they were produced were part of a bold initiative that is difficult to imagine ever repeating itself in the light of 21st century politics. The world leaders at that time asked of their people to be a little more self-sufficient for a while, to do a little more for themselves and consume less, not for any immediate personal benefit for those making the sacrifices of growing and preserving their own food, but for "the greater good". They also represent a generally accepted, society endorsed back to the land movement long before the Foxfire books of the 1970s solidified in the public mind that unless you are a farmer by trade, growing a significant portion of your own food is a hallmark of an alternative lifestyle.With the War Gardens of WWI and later the Victory Gardens of WWII, ordinary households economized during rationing. They grew, ate, canned and preserved some of their own produce to nourish their families and to help the war efforts by using less of the nation's production and transportation resources so those resources would be available elsewhere.It was a time of lofty and aspirational ideals and pulling together for a purpose larger than ourselves. Some of the growing ideas and solutions promulgated during that period, particularly of WWII were a mix of good and pretty bad, but the overall concept was a good one - a decentralized food system, self-sufficient citizens and a government system that supported the bootstraps mentality that has become a hallmark of those generations.
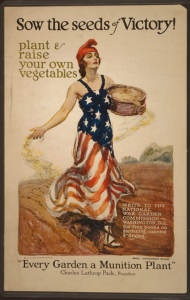 *Results may vary
Making Hay While The Sun Shines - Part 3
The wonderful thing about being taken under the wing of a traditional southern food mentor is that in addition to the lesson at hand, there are other tantalizing tidbits sprinkled throughout the lessons like breadcrumbs, just waiting for me to pick up the trail.During my green bean pressure canning lesson, the utensil drawer was opened to look for some other object and the Norpro Wood Corn Cutter and Creamer made its debut into my life. My mentor explained that device is used to cream corn, which she does annually with Silver Queen, her favorite hybrid variety. The tool was dropped back into the drawer and the green bean lesson continued.That night I began researching the tool and process of making and preserving creamed corn. My mentor uses the "Another way" method described at the bottom of this link over at the National Center for Home Food Preservation (the online bible for how to safely preserve food). The creamer tool was so inexpensive and the corn so abundant at the NC State Farmers Market, I had to give it a try!My whopping 45.5 lbs of corn had 65 ears in it and sold for only $25 - one of the many great reasons to grow or buy abundantly in season and preserve in wholesome ways for the off season.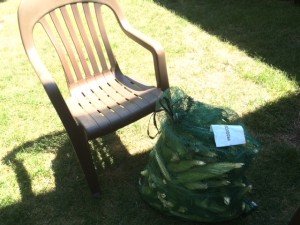 I enlisted help from the cutest and most enthusiastic corn shucker imaginable to get through the pile.
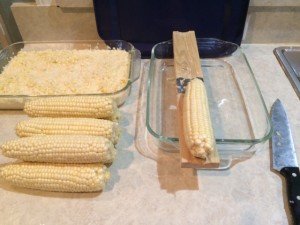
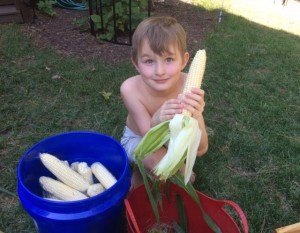 Once shucked, the corn was washed, trimmed of any ear worm damage and ready to be creamed. It took a little experimentation to get the cutters to the right height for the chunkiness I desired. I found compromise by setting it on a creamier height and using knife cut corn once every 8 or so ears to get nice big kernels.
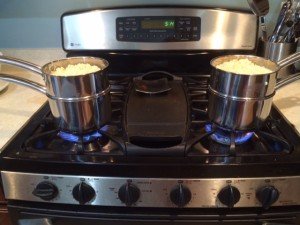
 Following the instructions from my mentor and the National Center for Home Food Preservation the creamed corn was cooked in two double boilers for about 10 minutes.
 Once thickened it the pots were set in an ice bath to stop the cooking process.
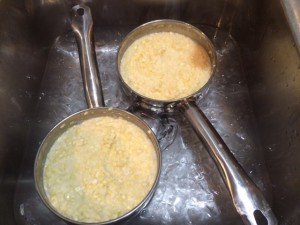 Once cooled, it was ladled into the freezer bags that work with my vacuumsealer at serving sizes of roughly 15.5oz each. They were frozen flat to take up less space then vacuumsealed.
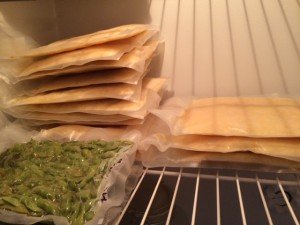 All in all, my 45.5lbs of corn ended up being 15.5lbs of creamed corn with much of the difference being the cobs that were cut up and added to compost so they were a gain for next year's soil also. The entire process took about 4 hours from shucking to the last batch being put in the freezer and finished with a total of 16 servings. I froze 15 of them for the months to come and made one fresh that night. I knew the project was a success (and one likely to be repeated before the end of corn season) when my little shucker took his first bite of our homemade creamed corn and asked if there was enough for seconds.


