One of my goals for the coming months is to find lessons for skills I want to either learn or improve upon. I had a head start a few weeks ago with a class offering by Whisk, a unique, local kitchen-everything shop in Cary (more about them in a bit).The class was Mastering Knife Skills, a two hour, hands on lesson taught by Ethan Hamme from the Messermeister company who was both knowledgeable and entertaining. The photos that follow are from another class Ethan taught and were generously provided by Whisk for my use here.One of my biggest take aways of the night was at the beginning of class when Ethan shared his thoughts on honing. You either get into the habit of doing it before you use the knife each time or you get into the habit of doing it after. He thinks it is easier to do it before, making it a step in the mise en place and therefore more likely to be remembered.The class was focused in particular on the chefs knife and its uses. We first learned proper grip and then dove right into different techniques for different vegetables.I am sure I could have found my way through my first julienne watching a YouTube video, but now I have actually done it. We then cut the julienne down to a fine dice called brunoise.An interesting component of the class was the assortment of chefs knives on the table. This afforded students the rare opportunity of taking different knives out for a test drive throughout the class and see what felt good in their hand. At the end of class I had to wait in line behind other students to check out with my two new chef/paring knives sets, so it looks like a win-win for students and store.Whisk was just opening its doors in Cary when I moved to the area a little over three years ago. By luck, I briefly met Dan, one half of the husband and wife owners, when we both spoke at the same event so I have known about and visited their site many times and knew they held regular classes. I had even looked at the class listings a year or so ago and thought, "I will have to do that sometime". And then a year went by.Let's all make 2017 be our "sometime"!
Read MoreCooking Up A Hurricane - Mozzarella (Part 2)
As a cook (and human being) I am much more comfortable in the zone where I am critiquing past performance and looking for areas for improvement over standing on the precipice of something I have never tried. To that end, one of my favorite phrases is the French culinary phrase 'mise en place", which means "putting in place" and is a practice used in recipes that benefit from having all the ingredients measured and prepared before beginning.For my first ever adventure into home cheese making, mise en place was required...and possibly wine...Soft-cheese making is pretty straight forward (for the practiced) but with some specific temperatures serving as prompts to move to the next phase. Since this was my first go at it, that translated into me constantly monitoring temps so as not to pass or miss an important temperature window.With the first attempt at anything there are questions...are my curds curdy enough? Is the mesh in my strainer too large (or too small) that I have curds filling the holes?But then magic! I made cheese!!In the end, like any new recipe, it went mostly well with a decent and edible result. Then I begin the process of #Kaizen - constant, incremental improvement:
The cheese was a little firmer than most of the purchased mozzarellas I am familiar with - did I over work the curd?
The cheese was good, but a little on the salty side - I need to cut the salt in 1/2 for the next attempt.
My mozzarella was a little more yellow than the milky white mozzarellas I buy - is that related to the milk I purchased, something I did...I need to spend some time on google...
My favorite recipes rarely began as they are today and I am happy to add cheese-making to the list that is being constantly improved and refined until it reaches the point of second nature.
Read MoreFill the Freezer
With only 7 Saturdays left before the end of the shopping season, the Apex Farmer's Market shopping season I mean, it is time to start asking my favorite protein farmers about bulk purchases before the end of season and off season sales at their farms.Carolina Catch Seafood - Seafood, part of a coastal catcher's cooperative, possible off season sales at a location in Holly SpringsHeston Farms - Beef, family farmers, will do off season sales either at their farm in Roxboro, NC or possibly meeting in Durham so it is still a good idea to stock upLittle River Eco Farm - Pork (they also sell chicken, eggs, beef, turkeys), off season sales are unlikely so I will be placing a bulk order for the Mexican Chorizo and Sweet Italian Sausage that are mainstays in my kitchenOn a related note, the Apex Farmers Market is trying to go year round, possibly one market a month during the off season, but they need an enclosed winter location. Fingers crossed they can find something!
Read MoreChef-Storian
History and the culinary arts have collided in these fantastic 18th Century Cooking videos from Jas. Townsend and Son.Half video recipe, half historical reenactment and with just a pinch of historical reproduction entrepreneurship thrown in for seasoning, I am loving learning "what's for dinner" from the early 1700s through the early 1800s and some of these look good enough to try in 2016!
Read MoreRoma Wasn't Built In a Day
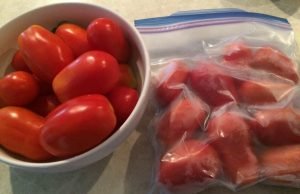
Roma math:A decent batch of homemade tomato sauce with enough to freeze or can for future use requires a minimum of 15-20 lbs of roma tomatoes.The average day on the urban farm (with 16 roma tomato plants in high season) results in anywhere from 1-3 lbs of roma tomatoes.I struggled with this math last year as I watched ripe romas edge toward over-ripeness while waiting for enough companions to be ready at roughly the same time to make a batch of sauce. Out of desperation I started searching "freezing whole tomatoes" and low and behold:Not only CAN you freeze whole tomatoes, there are a couple of benefits to doing it. Freezing, especially for short term storage doesn't have to be particularly fussy. Just clean, pop in a bag, remove most of the air and voila - a partial batch of sauce! Also, when frozen tomatoes are thawed to make sauce, the skins just slide right off, saving the blanching step.
Read More(Nearly) Nose to Tail Cooking
Chef John from Food Wishes (on YouTube and BlogSpot) has become a permanent presence on my laptop and in my kitchen over the past 6 months. In addition to being an award winning chef, he is a gifted educator and my go-to guy for recipe ideas for farmer's market finds, cooking techniques and new takes on old dishes.Recently I have made two of his recipes that were particular standouts for me. They were easy, delicious and used parts of the vegetable or animal normally thrown away without a second thought.I have been cooking with broccoli stems for years, but it is not often I see them in recipes. For his broccoli angel hair pasta recipe he calls for simmering the diced stems until soft as part of the garlic sauce and for his paella recipe, he calls for sauteing the shrimp shells to add extra flavor and body to the sauce.Briefly my results followed by Chef John's fantastic recipe videos:
Read More22+ Reasons to Love Stone Barns Center
There are many more reasons to love the Stone Barns Center for Food & Agriculture than the 22 that inspired this post, so after you have finished reading here, click on over to their site and see what the + is all about.Like so many others, I first learned of the farm at Stone Barns and the gifted Farm Director, Jack Algiere in Dan Barber's brilliant book The Third Plate, but it was not until last weekend that I actually visited the Center's website to see what I could learn about the farm itself.What I found was the truly inspired and inspiring gallery of images from each of the 22 weeks of the farm's 2015 CSA (community supported agriculture).Inspired because in addition to the beautifully photographed produce with variety labels, perfect for those of us looking to expand our varietal repertoires, the images also include a couple of lines for how to prepare them, sometimes individually and sometimes in combination with other items from that week's box, answering the ubiquitous CSA question of "Okay, I have it, now what do I do with it?".Inspiring because all the suggestions are for whole foods, so simply prepared that there are no recipes or even need of recipes.Part of the Stone Barns Center's mission is "to create a healthy and sustainable food system" and teaching a new generations of farmers how to grow healthy soil while growing healthy food is part of achieving that mission, but so is educating the consumers of that food system because it doesn't matter how healthy and sustainably food can be produced if the people shopping for food do not know what to do with a variety of fresh produce.Kudos to the Stone Barns Center for Food & Agriculture for this simple, but powerful idea to better serve their own CSA customers, but also for going a step further and making it available to anyone who might find themselves staring at a bunch of carrots (or leeks, or beets, or peppers, or kale, etc.) and wanting to make a great meal starting with whole ingredients!Click through the full 22 week gallery of their 2015 CSA and "Farm-Driven Cuisine".And a special thanks to the Stone Barns Center for allowing me to use two of the images from their gallery - in this case, a picture is worth four hundred and eleven words.
Read MoreEvery Family Has One...
Flavor Bases From Around The World In Less Than 2 Minutes!
Fired Up For Summer
I know it's a bit early to be thinking about summer and fresh from the garden salsa, but the recipe below for Fire-Roasted (Cherry) Tomato Salsa from the very entertaining Chef John Mitzewich (Food Wishes) sent me back to my garden plan to make sure I plenty of cherry tomatoes started to enjoy this salsa all summer!My favorite recipes to make have at least some portion of the ingredients coming from my own garden and this one definitely fits the bill for being NearlyHomeGrown with cherry tomatoes, cilantro, oregano and serranos substituting for jalapenos as key ingredients.
This Ain't Your Grandma's Pressure Cooker
A couple of weeks ago I was interested in understanding how pressure cookers work and I ran across this aptly titled video by America's Test Kitchen "Why Chefs Love Pressure Cookers".I was intrigued with the chefs describing how pressure cookers can cook sometimes tricky dishes to perfection and how the steam within the pressurized chamber infuses the dishes with deep flavor, but it was Tony Maws using a counter-top electric pressure cooker that completely captured my attention and sent me searching in a whole new direction.Electric pressure cookers eliminate a lot of the fear inducing factors novice pressure cooker users have about the stove top kind as well as a lot of handy features cooks of any level will love. They have a sear setting to brown meats and/or veggies before adding in liquid to finish the meal, they have food-type settings (i.e. meat, vegetables, rice, beans) to take a lot of the guesswork out of the length of time and pressure to cook with, and have redundant safety features to avoid the exploding pots some of us remember seeing in the 70s and 80s when an inattentive cook allowed the pressure to get a little too high.Fast forward a couple of weeks and dozens of viewings of pressure cooker meal recipes later and my Breville Fast Slow Pro was here and ready to be tested. I started with this simple Pot Roast recipe from Flo Lum (more on her in a minute). The meat was seared then removed from the pan to sear the carrots and onions while the pan was gently deglazed.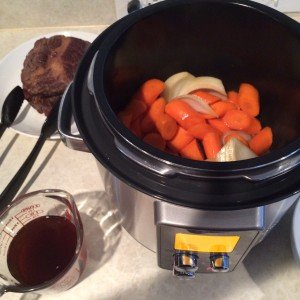 The veggies were then removed, the meat added back in and the veggies placed around it. A little thyme, salt and pepper and it was ready to cook.
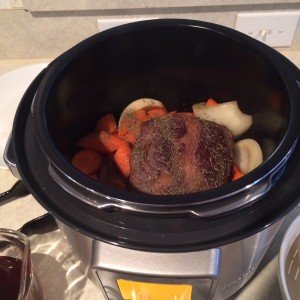 In just 50 minutes I had a delicious one-pot meal that was tender, flavorful and so easy!
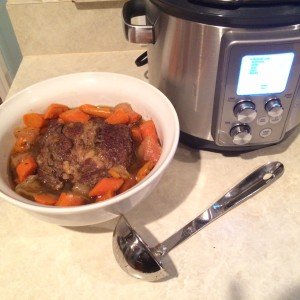 I had been accumulating recipes I wanted to try once my cooker arrived and will share some of the variety below. A disproportionate number are from Flo Lum's pressure cooker playlist because she does a great job of displaying the versatility of these counter top appliances and she has a companion blog for printable versions of her recipes.Zuppa Toscana - Risotto - Mashed Potatoes - Low Country Boil - Applesauce - Holiday Ham - Baby Back RibsAfter seeing the Zuppa Toscana recipe I had to reconsider my decision to not grow kale this year and now have some Nero Di Toscana seeds started to add some fresh, homegrown flavor to this dish when I make it later this year.
Will Work For Food
The phrases urban agriculture and urban farming answer the where and the what, but not necessarily the why of food production. Some urban growers are producing for personal use (which could include sharing their excess bounty with friends, neighbors and coworkers) while other growers are producing food as part or all of their household income stream.While these two groups take very different approaches to growing, watching Curtis Stone's Profitable Urban Farming workshop intro showed me that the personal grower can learn from some of the strategies and efficiencies of the income grower. We are both working to grow food so a little cross pollination (pardon my pun) of ideas can be beneficial.In this 42 minute video he gives an overview of his commercially successful urban farm in Kelowna, BC. For income growers, there are a lot of interesting ideas presented. He has an innovative strategy for land acquisition that is essentially OPP, other people's property. He rents portions of front, back and side yards from homeowners in his city within a 1 1/4 mile of his home to grow his produce.A very interesting strategy he uses that can be adapted for personal growers is how he categorizes crops as either "quick" or "steady". Quick crops are crops that are ready to harvest in less than 60 days. Steady crops are those "cut and come again" crops that take longer but provide a more sustained harvest. With his 5 growing plots scattered across 1 1/4 mile, he grows his quick crops in the plots closest to him, since they need to be visited more often for planting, rotation and harvest. He plants his steady crops in the furthest plots to since they only need to be harvested once or twice per week.Personal growers can adapt this concept and plant their baby greens and lettuces in the part of their garden closest to the house and plant the squash and onions in the far part of the garden since they need less regular attention.For growers looking to build or expand their business, this video is packed with information. For personal growers, there are some great tips on layout, harvesting and drip irrigation that can be implemented in home gardens.In addition to this workshop intro video, he has a lot of other videos on his YouTube channel worth perusing for both income and personal growers.
A New Old Fashioned Barn Raising
I was researching a local farm that I am interested in purchasing from and ran across an article about their recent BarnRaiser.us campaign to improve the sustainability and profitability of their livelihood. I was intrigued and wanted to learn more about BarnRaiser.There are so many things to love about this artisanal food crowdfunding site:
- The name is wonderfully evocative of the end goal, a community coming together to support the needs of farmers and food artisans
- The admirable mission statement is "To put a billion dollars into the hands of food innovators as they reshape a healthy food world."
- BarnRaiser fees are based solely on fully funded goals. No goal = no fee for trying
- And like the other crowdfunding sites, the farmers and artisans looking to get funded offer up little goodies for supporting them at different levels
- Projects seeking funding are listed in a gallery format with name and photo, a status bar showing how much money has been pledged and how much money and how many days are left to fund the project and, last but not least, location for the project
- According to the FAQ, Project Creators are subject to some level of identity verification
- The site is great exposure for the farmers and food artisans whether they reach their funding goals or not
Let's go raise some barns!
Store Bought Reboot - Regrowing Veggies
Here at NearlyHomeGrown, food scraps usually end up being frozen for future vegetable and/or chicken stocks or composted to feed the next generation of growing food. But I have been interested in the regrowing veggies craze and finally had the perfect reason to try it.The latest shiitake flush resulted in 7.7 oz of fresh mushrooms and they have been going into almost every meal in one way or another, but especially into homemade ramen noodle soup where they are a headliner ingredient. One of the other ingredients, the scallions, have been something of a philosophical splurge for this autumnal meal. They are store bought, out-of-season produce that I could live without but really didn't want to because of the flavor and color they add to the dish...and voila! The perfect vegetable to try regrowing!
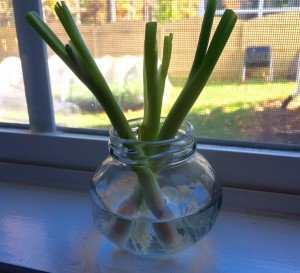 The green onion ends were pulled from the cooking scrap pile destined for stock making and put into a clear jar with fresh water and placed in a sunny window. The water will need to be changed every other day between now and spring when I will try planting them in my outdoor garden. In the meantime I can continue to steal the green tops for ramen soup and other dishes while keeping the root alive and growing.
Saving Seed - Tomatoes
One of my goals for this year's garden is to save more of my own seeds for varieties I know I will be planting year after year. Saving my own seed moves my garden a little closer to being self-sufficient and maybe more importantly, by picking the best of the crop to save seed from year after year, I will be naturalizing the seeds to the place where they are grown instead of having seeds ideally suited to growing somewhere else.It is important to note that while the seeds of hybrid varieties can be saved, what grows from those seeds will likely have little resemblance to the previous year's plants. With the heirloom varieties I grow, I should be able to save seeds with reasonably reliable results but with normal variations.I am familiar with the fermenting method of saving tomato seeds but wanted to research my options to see if another method would work. I ran across this video that shows how to save tomato seeds on a paper towel.Fermenting definitely has benefits, the fermenting process helps break down the outer coating on tomato seeds, improving germination rates the following year, but increases the amount of seed handling and well...comes with a stinky, moldy cup hanging around for a week or two.I went with the paper towel method because it is easier, cleaner and has the added bonus that the bits of paper towel that will be torn off with the seeds next year will help hold moisture next to the seeds as they start to germinate.These Roma tomatoes will be popped in the freezer until I have enough to make a big batch of sauce to can or freeze.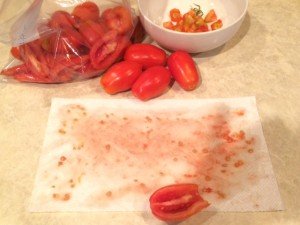 Selecting only the best specimens to save seed from and making sure to save from more than one plant to maintain genetic diversity. Each paper towel of seeds is from one tomato.
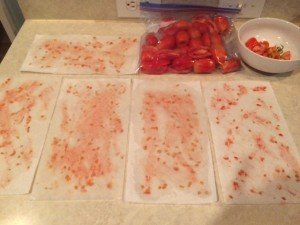 I have also been saving seed from the Amana Orange Beefsteak tomatoes.
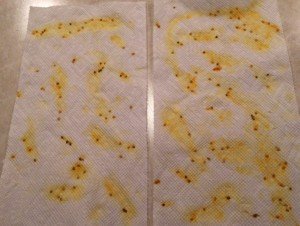 The seeds have been drying on wire shelving for a little over a week and are ready to be packaged, labeled and tucked into my seed box for next year.
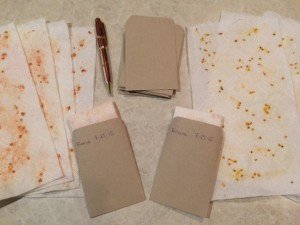 I plan to test the germination rate in late winter when there is still time to order and start seeds if this method does not prove viable. If it does work well, I will be looking to use something similar to paper towels again next year, but with recycled material that has not been bleached. Kaizen!
Canning - Green Beans
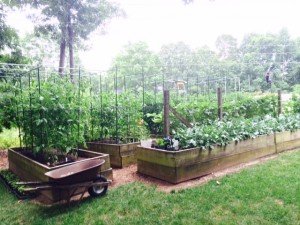
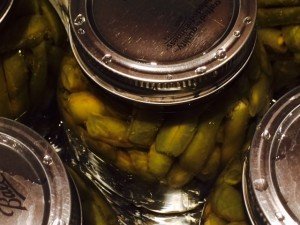 I received a wonderful offer today from a dear friend and colleague. A hands-on canning lesson with fresh Blue Lake bush beans from her husband's garden. The photo below captures about half of his very productive garden. He is growing okra, summer squash, beans, broccoli, tomatoes, eggplant, basil and I am sure I am missing at least a few more.
 The Ball canning recipe book was open on the island and 6 quarts of beans were cleaned and snapped in a large bowl. We used a colander to submerge a portion of the beans into boiling water for 5 minutes.
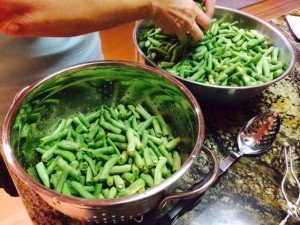 The 1 quart canning jars fresh out of a 180 degree hot water bath are started with 1 tsp. salt before being packed with freshly cooked beans to 1" from the top of the jar. The cooking liquid is then ladled in to the same 1" from the top. Long sticks are used to remove air bubbles by compressing the cooked beans inward from the jar and working all the way around it a couple of times.
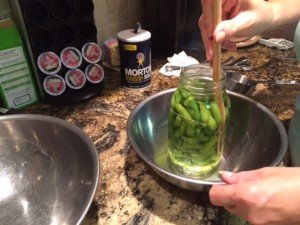 The liquid is topped off to 1" again and the neck of the jar cleaned to prepare it for being sealed.
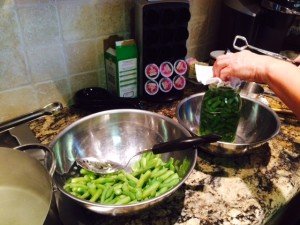 The hot lid is added fresh from the hot water bath (180 degrees) with tongs.
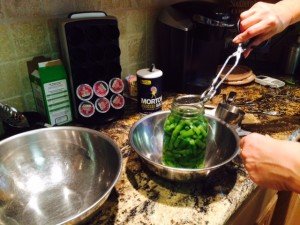 The lids are screwed on hand-tight and jars are packed into the pressure cooker.
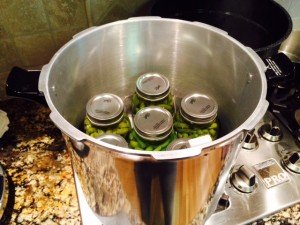 The recipe instructions for the pressure cooker are very specific. Eventually the pressure reaches 10 lbs and the beans are cooked another 25 minutes.
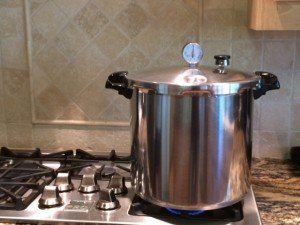 At the end of a couple of hours of wonderful company and conversation and a bit of vino, she had canned green beans and I had more experience and comfort with canning.
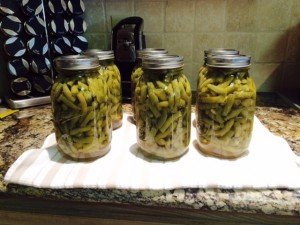 On top of the lesson, she generously shared 2 quarts of the newly canned beans as well as some of their fresh garden bounty. I thanked her by graciously inviting myself to an upcoming tomato canning :)
Temperate Permaculture
Every revisit to the documentary The Fruit Hunters sends me researching what fruit and nut trees are adapted to my hardiness zone to plan my future orchard. This exercise always begins with a self-reminder that the majority of exotic fruit grows in tropical climates but contains the hope that this time I will discover some forgotten native treasures or cultivars that are not commercially viable for my temperate climate.This time, rather than searching by hardiness zone which brings up a predictable list of cultivars on sale from nurseries, I searched for the climate zone and found an intriguing list that included kiwi, medlars, pawpaws, persimmons and quince at the Temperate Climate Permaculture blog.John Kitsteiner is the blogger and owner of the farm, Bauernhof Kitsteiner in Bull's Gap, TN, roughly 5 hours west of Raleigh. I started watching the videos in his vlog and was excited to see that the most recent video was from just two days ago. It will be cool to watch his farm evolve in real time.
Learn As You Grow
Between now and November the most common phrase in my Google search history will be "when to harvest..." followed by the common name of a first year plant in my garden that is showing signs of being nearly there.In general, operating on a need-to-know-basis with my garden works well for me. A quick search told me that I have some time before my first year spaghetti squash will need to be harvested.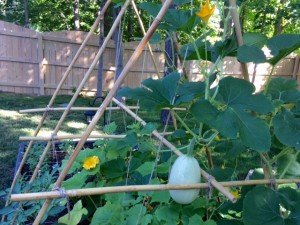 But it's not without it's misses too. I mistakenly expected my first year zucchini to continue to grow at something like the rate they did from the 1" to 4" phase. One of the young zucchini shot to 11" and a whopping 1 lbs. in just two days! Researching revealed that I had missed the mark on this one and would need to watch more closely to catch them at the 6"-9" size for the best flavor and texture.
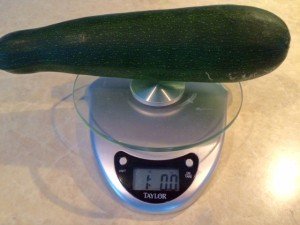 I do look forward to the day when I have grown my staple cultivars so many times that much of it becomes second nature to me. But I will always experiment a little too, trying new plants and varieties to keep this learn-as-you-grow wonder alive.For the record, my overgrown zucchini was still delicious and I don't think it was just because it was the first one.
Good Companions, Bad Companions
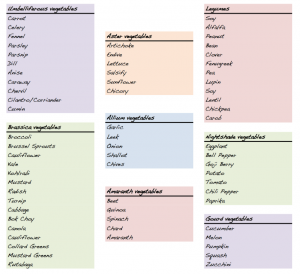
"It is better to travel alone than with a bad companion"~ African ProverbGardening can be as simple or as complex as we chose to make it and the results will echo our intentions. An inclination to grow a few things will result in exactly that, a few things coming up. A desire to grow food will involve a bit more planning, time and effort to consider which items to grow and how best to grow them. A serious intention to grow as much food as possible within the space available on a continual basis will require careful planning, including crop rotations (which I discussed in a previous post), companion planting considerations (which I will discuss here) and strategic succession plantings to create a rolling harvest.Plants are a bit like dinner guests, there are some that seated side by side will find great pleasure in the symbiotic company and will make new friends while others that if placed in close proximity will antagonize each other. This is mostly related to nutrient and root/leaf space needs of different plant families but can also due to how some plants interact with their proximity (ex: alliums exude a chemical that inhibits the growth in legumes).You don't have to hit the botany books to steer clear of the antagonistic relationships or deduce which plants would make good companions - there are plenty of companion planting charts available online ranging from the very simple to the very complex. A little planning will increase your plants happiness and your harvest. Or you could just wing it ;)
It's Not Goodbye
Six times a year for the past 4 years, pure happiness has been delivered to my mailbox in the form of Urban Farm Magazine. I didn't notice the little green banner at the top of the cover on my May/June 2015 issue so I was unprepared when I read Editor, Roger Sipe's farewell from the final print edition EVER!Thankfully, Roger did not leave his fans in suspense long and in the first paragraph assured us that Urban Farm Online will continue digitally (Urban Farm Online, Facebook, Twitter, Pintrest,) with new content as he transitions to Hobby Farms and Chicken magazines.Thank you Roger and crew for continuing to share, inspire and mentor us!


