The threat of winter weather pushed right up to the last frost date for my area this year. Add in my hectic schedule the past few weeks and the result is a late start on my spring garden, and some corners looking to be cut.These colorful lettuce varieties would normally be carefully planned and planted in their own distinct areas.This year I am deploying what I am calling a laissez-faire farming method of "mixed lettuces" saving a lot of time and proving that even lackadaisical farming sounds better in french.Seeding and watering these 9 square feet (around 100 plants) was the work of 5 minutes.I have to give a quick shout out to the oregano photo bombing the picture above (bottom and right of garden bed). This now feral oregano self seeded the area around it two years ago when I had the herb planted in this box. It is so thick and lovely year round that I am tempted to use it as a ground cover along paths.For the rest of my garden, this year I am doing a lot more grouping than normal, with all of a bed planted with spinach or radishes or edamame, allowing me to broadcast seeds and get everything started a little faster.Au revoir!
Read MoreGetting Wired in the Garden
Early this spring I had high hopes when I reworked my square foot grids with outdoor nylon rope. It lasted only 2 seasons.The needles and leaves are a results of Hurricane Hermine's winds coming through earlier this weekend, but the nylon grid had disintegrated well before the storm.I spent some time in Lowe's yesterday finding what I hope will be the last grid material I need. I have tried coated wire before, but the wire was purchased for supports for climbing squash and was too stiff in the garden. This wire has a great blend of sturdy but flexible.This wire also marks a change in direction for grid color. I have always marked out my grids in white, liking the crisp contrast. This time I went with black, to blend into the soil visually.A note if you decide to use wire in your beds for grids or anything else - I specifically wanted a coated wire because uncoated may get pretty hot in the summer sun and burn the plants that brush up against it.Now that I am back on the grid (again), time to get my fall lettuce and spinach seeds planted!
Read MoreRoma Wasn't Built In a Day
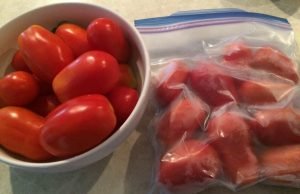
Roma math:A decent batch of homemade tomato sauce with enough to freeze or can for future use requires a minimum of 15-20 lbs of roma tomatoes.The average day on the urban farm (with 16 roma tomato plants in high season) results in anywhere from 1-3 lbs of roma tomatoes.I struggled with this math last year as I watched ripe romas edge toward over-ripeness while waiting for enough companions to be ready at roughly the same time to make a batch of sauce. Out of desperation I started searching "freezing whole tomatoes" and low and behold:Not only CAN you freeze whole tomatoes, there are a couple of benefits to doing it. Freezing, especially for short term storage doesn't have to be particularly fussy. Just clean, pop in a bag, remove most of the air and voila - a partial batch of sauce! Also, when frozen tomatoes are thawed to make sauce, the skins just slide right off, saving the blanching step.
Read MoreGetting More From Morels
In mid-April I had to concede defeat in my attempt to grow morel mushrooms and turned my attention to procuring dried morels instead. After a lot of price shopping I decided to try LifeGourmetShop.com and while I waited for my package to arrive, I started researching how to use dehydrated morels in place of fresh ones.The available information on rehydrating morels is generally straightforward with a few notable exceptions. Mushrooms should be placed in a liquid for around 20 minutes. What type of liquid is at the discretion of the chef, but most agree that water is just fine. Some people recommend hot water while other say that hot water will pull more of the morel flavor from the mushroom to the water.Taking the more conservative approach, I have used cold water with great effect and based on the heavy morel perfume and coloring of the cold water after a 20 minute soak, I think cold is the best approach. For the past month I have been enjoying morels that look, feel and taste *almost* like fresh morels in everything from omelets and pasta sauce to mixing them in with ground beef for hamburgers and stir fries. But what to do about all that mushroomy goodness left in the water they were soaked in?Luckily, one of the sites I searched had a great tip - filter the morel water and use it as a partial or whole replacement for water or stock in recipes that would be complimented with a bit of umami.A paper towel tucked over the opening of a container makes a great strainer to remove any grit or debris that may have been tucked into the folds of the morel for fresh uses (next 2 days). Strain and pour into ice cube trays, then pop out the cubes and place in a freezer safe bag for a longer shelf life.Since learning this trick I have been using the golden liquor to replace potions of chicken, beef and vegetable stock as well as added to water for boiling pasta. It's a great way to stretch my borrowed harvest for this year into many more dishes and over a longer period.My 6th grade Home Ec teacher would be proud!
Read MoreAvant Garden
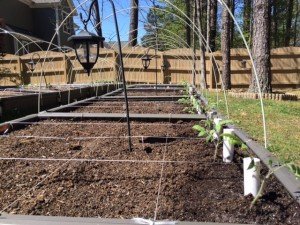
The single, yellowed leaf I found on one of my paste tomatoes at the end of February was actually the opening shot of a fungal tug-of-war that will likely continue for the whole of 2016's growing season. The Septoria Leaf Spot fungus which can cause damage to tomatoes by defoliation leading to sunburned fruit has been mostly contained by removal of affected leaves and regular use of a homemade organic fungicide (1 gallon of water, 2 TBS vegetable oil and 2 TBS baking soda) but the close proximity of the plants to each other while they are stuck in my indoor grow room was almost certainly encouraging the spread of the fungus.With about a week to go before the last frost date for my area, I have been obsessively checking the 15 day weather forecast for the past few days to determine whether I could risk putting the tomatoes out a little early to give them some much needed space, fresh breezes and sanitizing sunshine to inhibit the fungus from spreading. Today I rolled the dice and moved them to the great outdoors!The PVC tubes that my bamboo tomato supports fit into are already in place so the plant roots will not be disturbed later in the season when they are necessary and the tomatoes have been hardened off.Last year I had a handful of tomatoes that had blossom end rot so I saved eggshells all winter and crushed them into a powder to provide more calcium to the plants. Tomatoes are a vine plant that will root along their stem, so mine were laid down in the channel I dug rather than placed upright. Eggshells were spread beneath and on top of the root area.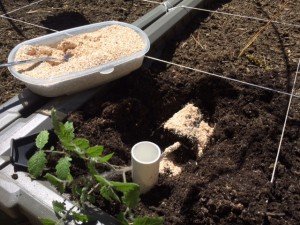 The stem is gently bent at a 90 degree angle several inches up from the top of the soil line from the starter cup. Roots will develop along this stem and according to Charles H. Wilbur, more roots will result in more tomatoes.
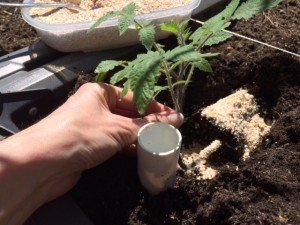 Soil is patted down over the tomato root and around the bent stem and any leaves touching or near ground level are removed to avoid splash up from the soil leading to new and exciting fungal infections.
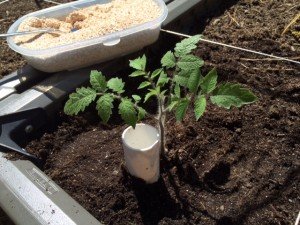 Repeat 37 more times then relax and start compiling fabulous tomato recipes like this one while you wait for the fruits of summer to appear!
Flavor Bases From Around The World In Less Than 2 Minutes!
Don't Blink
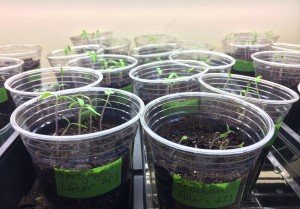
During the past week of business travel my indoor plant starts have grown with the vigor of youth into a verdant and slightly unruly bunch of tweens.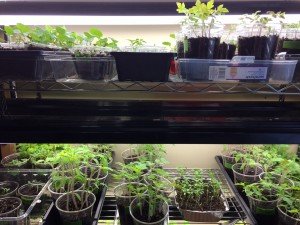 The tomatoes from my saved seed are particularly in need of thinning. I seeded them a little more thickly since I did not know what my germination rate would be. While they initially lagged about week behind fermented seeds I purchased this year, the germination rate for my saved seed looks to be close to 100%.
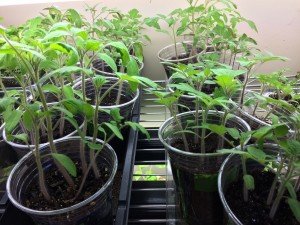 Pro Tip - always use scissors to snip off the plants you are thinning to avoid disturbing the roots of chosen specimen.
Tender Beginnings
While winter is having it's (hopefully) last hurrah outside, I am prepping my indoor garden to be without me for a week while I travel for work.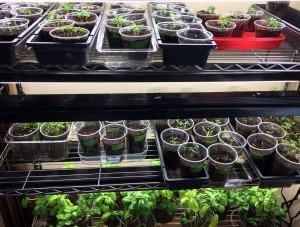 After trying first newspaper pots then peat pots for last year's starts and having them disintegrate before I was ready to transplant to the garden, this year I am using Siloé Oliveira's technique of drilling holes in smooth plastic cups that can be reused year after year.All of my starts are doing well but the ones I am happiest about are my saved seed from the Paste and Amana tomatoes I grew last year. They sprouted a few days behind the new varieties I purchased seed for this year, but since I did not ferment the saved seed I knew they would lag a bit.
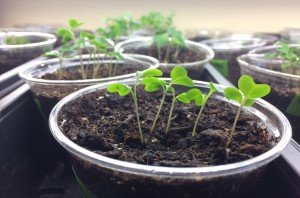
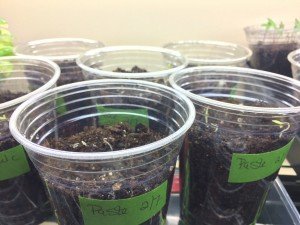 And gratuitous pics of some of the collards and other tomato varieties starts just because they are so pretty...
Store Bought Reboot - Regrowing Veggies
Here at NearlyHomeGrown, food scraps usually end up being frozen for future vegetable and/or chicken stocks or composted to feed the next generation of growing food. But I have been interested in the regrowing veggies craze and finally had the perfect reason to try it.The latest shiitake flush resulted in 7.7 oz of fresh mushrooms and they have been going into almost every meal in one way or another, but especially into homemade ramen noodle soup where they are a headliner ingredient. One of the other ingredients, the scallions, have been something of a philosophical splurge for this autumnal meal. They are store bought, out-of-season produce that I could live without but really didn't want to because of the flavor and color they add to the dish...and voila! The perfect vegetable to try regrowing!
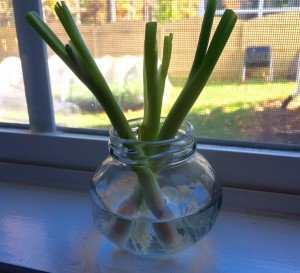 The green onion ends were pulled from the cooking scrap pile destined for stock making and put into a clear jar with fresh water and placed in a sunny window. The water will need to be changed every other day between now and spring when I will try planting them in my outdoor garden. In the meantime I can continue to steal the green tops for ramen soup and other dishes while keeping the root alive and growing.
Vinegared Cucumbers
 As my Marketmore and Chinese Yellow cucumbers swing into full production I have been looking for a recipe that I recall from childhood. I have heard them called refrigerator pickles, cucumber salad, marinated cucumbers and vinegared cucumbers, though there are multiple meanings to some of those monikers so I am sticking with calling them vinegared cucumbers.Pro Tip - when picking cucumbers, bring them in and pop them into an ice bath to remove the "field heat" and cool them down quickly. They will keep better for longer with this trick.There are many variations on this recipe and I tried a couple before cobbling together this one that comes closest to the crisp, bright taste I remember in my grandmother's vinegared cucumbers:2 cucumbers with the skin peeled in strips then sliced to preferred thickness3/4 cup apple cider vinegar1 1/2 cups waterA few slices of red onion (optional)Pack cucumber slices into two 1/2 pint canning jars (or whatever you have that you can put a lid on), packing red onion along sides and top. Mix together vinegar and water and pour over until cucumbers are covered. Close jar and marinate in the refrigerator for at least 12 hours.


