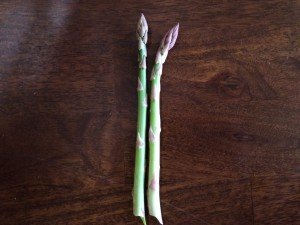
This post comes after more than a year of researching every way I can think of and completely failing to find anything related to the matter at hand. The matter at hand is the second growth of asparagus spears in the early fall, long after the asparagus crowns have been allowed to grow the long, bushy fronds they need in order to feed the crown for next year's growth and more specifically, whether or not a small portion of the second growth can be harvested.Unable to find any information either for or against sneaking a few of these late season spears, I have had to reason this out for myself for the past two years and while the result is probably entirely predictable (Garden fresh asparagus in fall? Yes please!), I like to think my reasoning well rooted in a layman's pseudo-botany. The rationale goes something like this: the individual asparagus crowns have been photosynthesizing since May, and of the new spears coming up in September/October I am only taking about 1 out of every 3 of the new growth spears and then only off of crowns that already have more than 3 stems that have fully grown out and are working hard to supply nourishment to the crown to take it through winter and make a stronger growth next year.With 16 crowns all together (8 Jersey Knight and 8 Purple Passion) all of which are enjoying a youthful resurgence right now, this equals out to around 4-5 spears per week that are coming indoors and leading to some interesting, not-normally-on-the-same-plate combinations. This afternoon for lunch, I sauteed some asparagus picked 30 minutes earlier along with some Italian kale harvested at the same time.But my favorite has been adding asparagus to my Whatever Is Fresh Scrambles!This one featured rehydrated morels, 4 spears of asparagus, 4 cherry tomatoes and 2 red serrano peppers - all from the garden except for the morels. I saute all ingredients except the more delicate tomatoes in butter with a little olive oil until the asparagus is just shy of done.When the asparagus has softened, add scrambled eggs to the mix then fold in the quartered cherry tomatoes.When the eggs have finished cooking, plate with a little shredded cheese of your choosing - I have used both colby-jack and mozzarella and both have worked wonderfully. Top with your choice of fresh herb (I alternate between basil and dill) and voila - delicious and nutritious meal in just a few minutes!
Read MoreEasy Decision Dinner
Egg scrambles for dinner with almost any leftover veggies in the fridge is a quick and easy decision for nights that lack a dinner plan.I had a small bunch of kale leftover after an Italian soup earlier in the week so I chopped it up and sauteed with some rehydrated morels. Add in scrambled eggs and herbs/seasoning of choice (I used fresh tarragon and a little cayenne), top with a little cheese and viola - a delicious, nutritious and frugal dinner!As a side note on a side dish - a couple of weekends ago I processed 15lbs of my Roma Tomatoes into sauce. 2lbs of sauce to be exact. I divvied up the sauce into freezer bags and started looking for other uses for the Romas I am growing. I have diced them up into tomato salads along side the slicing and cherry tomatoes and lately I have been working on pan roasted tomatoes (above). They taste delicious but the skins are a bit like tough paper after the roasting...still a work in progress.
Read MoreGetting More From Morels
In mid-April I had to concede defeat in my attempt to grow morel mushrooms and turned my attention to procuring dried morels instead. After a lot of price shopping I decided to try LifeGourmetShop.com and while I waited for my package to arrive, I started researching how to use dehydrated morels in place of fresh ones.The available information on rehydrating morels is generally straightforward with a few notable exceptions. Mushrooms should be placed in a liquid for around 20 minutes. What type of liquid is at the discretion of the chef, but most agree that water is just fine. Some people recommend hot water while other say that hot water will pull more of the morel flavor from the mushroom to the water.Taking the more conservative approach, I have used cold water with great effect and based on the heavy morel perfume and coloring of the cold water after a 20 minute soak, I think cold is the best approach. For the past month I have been enjoying morels that look, feel and taste *almost* like fresh morels in everything from omelets and pasta sauce to mixing them in with ground beef for hamburgers and stir fries. But what to do about all that mushroomy goodness left in the water they were soaked in?Luckily, one of the sites I searched had a great tip - filter the morel water and use it as a partial or whole replacement for water or stock in recipes that would be complimented with a bit of umami.A paper towel tucked over the opening of a container makes a great strainer to remove any grit or debris that may have been tucked into the folds of the morel for fresh uses (next 2 days). Strain and pour into ice cube trays, then pop out the cubes and place in a freezer safe bag for a longer shelf life.Since learning this trick I have been using the golden liquor to replace potions of chicken, beef and vegetable stock as well as added to water for boiling pasta. It's a great way to stretch my borrowed harvest for this year into many more dishes and over a longer period.My 6th grade Home Ec teacher would be proud!
Read MoreBatting 500
Umami in Progress
Oh sure, we can call it my shiitake block from 100th Monkey Mushroom Farm, but fresh, delicious umami in progress is what it really is and it is a bumper crop this time!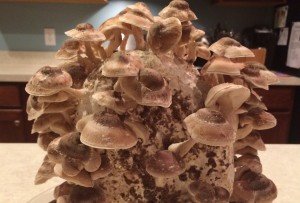
A Fungus Among Us
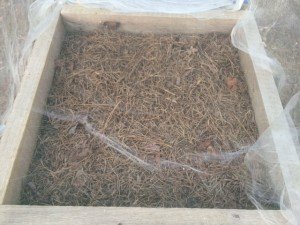
It is the time of year when harvests from the garden begin to taper off, Halloween decorations go up and a girl's thoughts turn to fungus. It was this time last year that I was trying my hand at growing shiitakes on my breakfast bar.With the success of last year's shiitakes under my belt, I wanted to expand my repertoire this year and grow some Elm Oyster Mushrooms also.My first grow out of my box kit was productive and I am resting the kit for it's second grow now.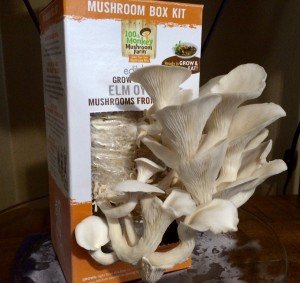 The 'grow your own mushrooms from a kit market' has exploded in the past couple of years and there are many great vendors out there, but I have to give a shout out to the wonderful and personal customer service from 100th Monkey Mushrooms. I love the helpful videos, the quick and helpful response via email for questions and their outstanding customer service - when I placed my order online for my Shiitake blocks and the Elm Oyster box a couple of weeks ago, Jimm called to let me know that the Shiitakes would not ship for another month and to see if I wanted to receive them together or separately.I am still waiting to see what (if anything) will happen with the 2 morel kits I ordered from Gourmet Mushrooms last fall. The information on the website and included with the kits' instructions said to not really expect a harvest until the second year which is finally less than six months away! I have been diligently adding compostable organic material to their separate 2'x2' raised beds to feed the mycelium for a year and a half and have my fingers crossed that in spring 2016 I will have the Holy Grail of forage mushrooms growing in my backyard!
Full Spring Ahead
This morning the blueberry bushes were loaded with plumping berries, as well as a new crop of blooms.
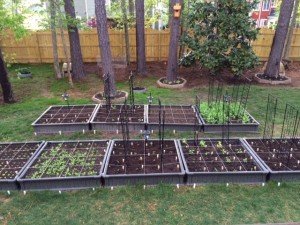
 The beds are looking more green than brown with each passing day.
 This afternoon the rain is the gardener so I am catching up on indoor projects. I started my first Elm Oyster Kit experimenting with a cloche instead of the humidity tent that comes with the kit. I really liked the Shiitake Blocks and plan to do them again soon but I wanted to learn more about the Elm Oysters because they are a forage mushroom in NC.
Rotation Reboot
Denial ain't just a river in Egypt - true in my Midwestern youth and true today.Last week I accidentally* ordered 4 additional garden beds instead of the 2 strictly required for my 2015 garden plan. Today, with extra garden beds waiting in the garage and a snow day in the Triangle at hand, I sat down to consider what to do about the 32 square feet of extra planting space I accidentally* acquired. As I considered whether to add new plants, expand the number of my current varieties or a combination of both, I kept thinking of this article I had run across a couple of weeks ago about crop rotation.Until now, I have done a pretty good job of refuting the quiet voice in the back of my mind talking about crop rotation with arguments like "I add compost regularly to my raised beds, so I am replacing the lost nutrients" and "my scale is to small to worry about crop rotation, and that is for monocultures anyway", but as I sat here today looking at what I had already planned and what I was planning to expand, it became harder and harder to not be a responsible steward of the soil I have made and hope to nourish my family with.At the same time I am garden planning, I am enjoying the Edible Education classes on youtube about the future of agriculture, arable land and food in America and the world.So back to the article for tips on rotations and my garden plan I went. My garden was not entirely hodgepodge, there was some method to my madness! I have a north facing backyard despite my strong preferences and best efforts when house hunting last summer, but if you can't be with the one you love, love the one you're with! So all the tall plants were planned for the back of the garden so they weren't casting shade on anyone behind them and the ones that need more sunlight hours were placed to the right of the garden which has more daylight hours before being shaded by my south facing house. Beyond those two considerations though, it probably was a bit of a hodgepodge.I started with color coding my planned plants according to the 4 main categories (leaves, fruits, roots and legumes) to see where I was - which was all over the place, then reorganized their placement into a more cohesive plan. I started at the left with the leaves and worked my way right to legumes with the idea that everything will shift to the right for 2016 and so on. I don't currently have an equal number of boxes devoted to the roots and legumes as I do for the leaves and fruits to make this work perfectly, but I am hoping that ending my denial and admitting I have a rotation problem is the first step in solving it.And since I was at it with color coding plant "types" on my Excel spreadsheet, I thought I might as well include the container plantings I had planned, the non-rotational plants (asparagus, some herbs and strawberries) I will have off-set from the Garden Proper and the Morel boxes I have in the tree line at the back of my property. And since I was going to include those, I may as well include a code for my preferred preservation techniques for each type... The red arrows are where trellis supports will be, and the 3 beds in blue will be off to the side and will not rotate from year to year. I think it is entirely likely that more beds will be added for 2016 and an effort will be made to utilize them for roots and legumes so I end up with a roughly even number for each overall type so the rotations work more uniformly.I plan to grow a handful of flower varieties with as many natives as possible to serve the local pollinators, but since I will not be eating them, I am comfortable putting them directly in the yard and not taking up precious garden space with them. Additionally I have my 5 blueberry plants, 4 fig trees (2 in the ground and 2 in containers), my Meyer Lemon and an indoor Bay Laurel.All in all, 2015 is shaping up to be a great year to grow and I am considering alternate irrigation sources now that I have cut Denial out of my garden plan.*tell me your definition of accident and I will tell you mine
'Shrooms Abound
I have a couple of mushroom projects going on.Shiitake - I am on my second round of growing Shiitakes that I ordered from 100th Monkey Mushroom Farm. I had been wanting to try growing them for a couple of reasons. They grow well indoors, I am using Shiitake all the time in my homemade ramen noodle soup and what a conversation piece!I ended up ordering from this company because I loved the tutorial videos with Jim on their YouTube channel. The Shiitake video gives tips on getting 3 full growing rounds out of the block which costs $33 (before shipping) for an estimated total harvest of 2-3 lbs.My first round with the Shiitake blocks (I ordered and grew two of them) resulted in 10.2 oz fairly split between the two.
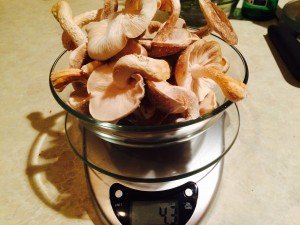 The second round is a bit more asymmetrical with Block B doing well and Block A (which slightly outperformed Block B in the first round) doing nothing so far.
 Time will tell and I am looking forward to the third round when I will layer the block medium along with straw into a plastic planter with holes drilled in the sides for the final opportunity to grow and harvest.Before I started this project I made note of what I was purchasing Shiitakes for ($1.10 oz) to compare my $33 investment to the retail costs. I have a ways to go to make this project actually be a money saver, but it has been fun and I know the mushrooms I am enjoying are fresh, well grown and harvested within 5 days of use making the monetary aspect more of a fun side project.Next on my list to try are the Elm Oyster Mushrooms from this same company. As soon as I figure out which recipes to use them in, I will be ordering a box kit.Morels - my other mushroom project is one that mushroom enthusiasts have long thought impossible - cultivating morels! These elusive and highly prized forage mushrooms have proven impossible to cultivate for decades, but a couple of companies believe they have cracked the code and are now selling morel spawn along with cultivating instructions.This is more of a long term project since the instructions specify that real production is not expected until the second spring after bed preparations. I purchased my kits from Gourmet Mushrooms and I started two 4 square foot beds about 20 feet apart to try this for myself. I grew up hunting morels in spring and have found them at the Farmer's Market selling for upwards of $20 lb. in the past few years. They are a wonderful, seasonal treat and the idea of harvesting them from my back yard for years to come was well worth the $33 per kit. Due to the time involved and the weekly compost feeding required, this project is not for everyone but if you are dedicated to the idea of having a ready supply of morels in an easy to harvest location, it might be worth your while.


