I have two spring perennials that required a 2 year latency before the first harvest: Last night I harvested my first two spears of asparagus, one each of Jersey Knight and Purple Passion.But my morel boxes...
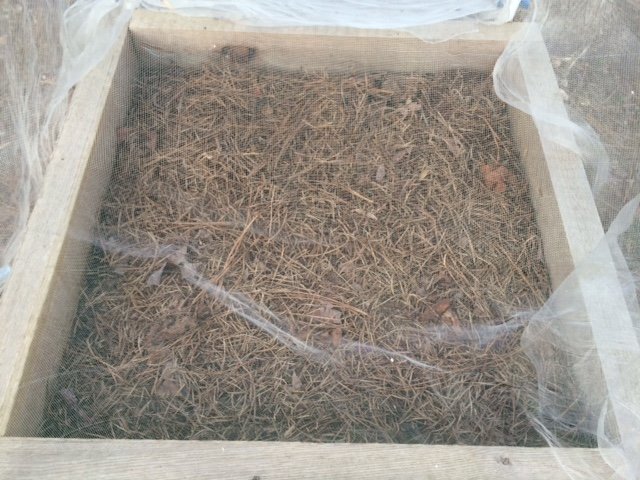 only contain mulch and hope so far. Fingers still crossed...
Then There Was One
This morning I did my final pass thinning the tomatoes, peppers, collards, cabbage and kale down to a single plant in each starter cup and then I crossed my fingers that no fungi or pests find my singletons between now and when they move outside.For now the 38 tomato plants are vigorous and hale and I am excited that fully half of them are from my own saved seed.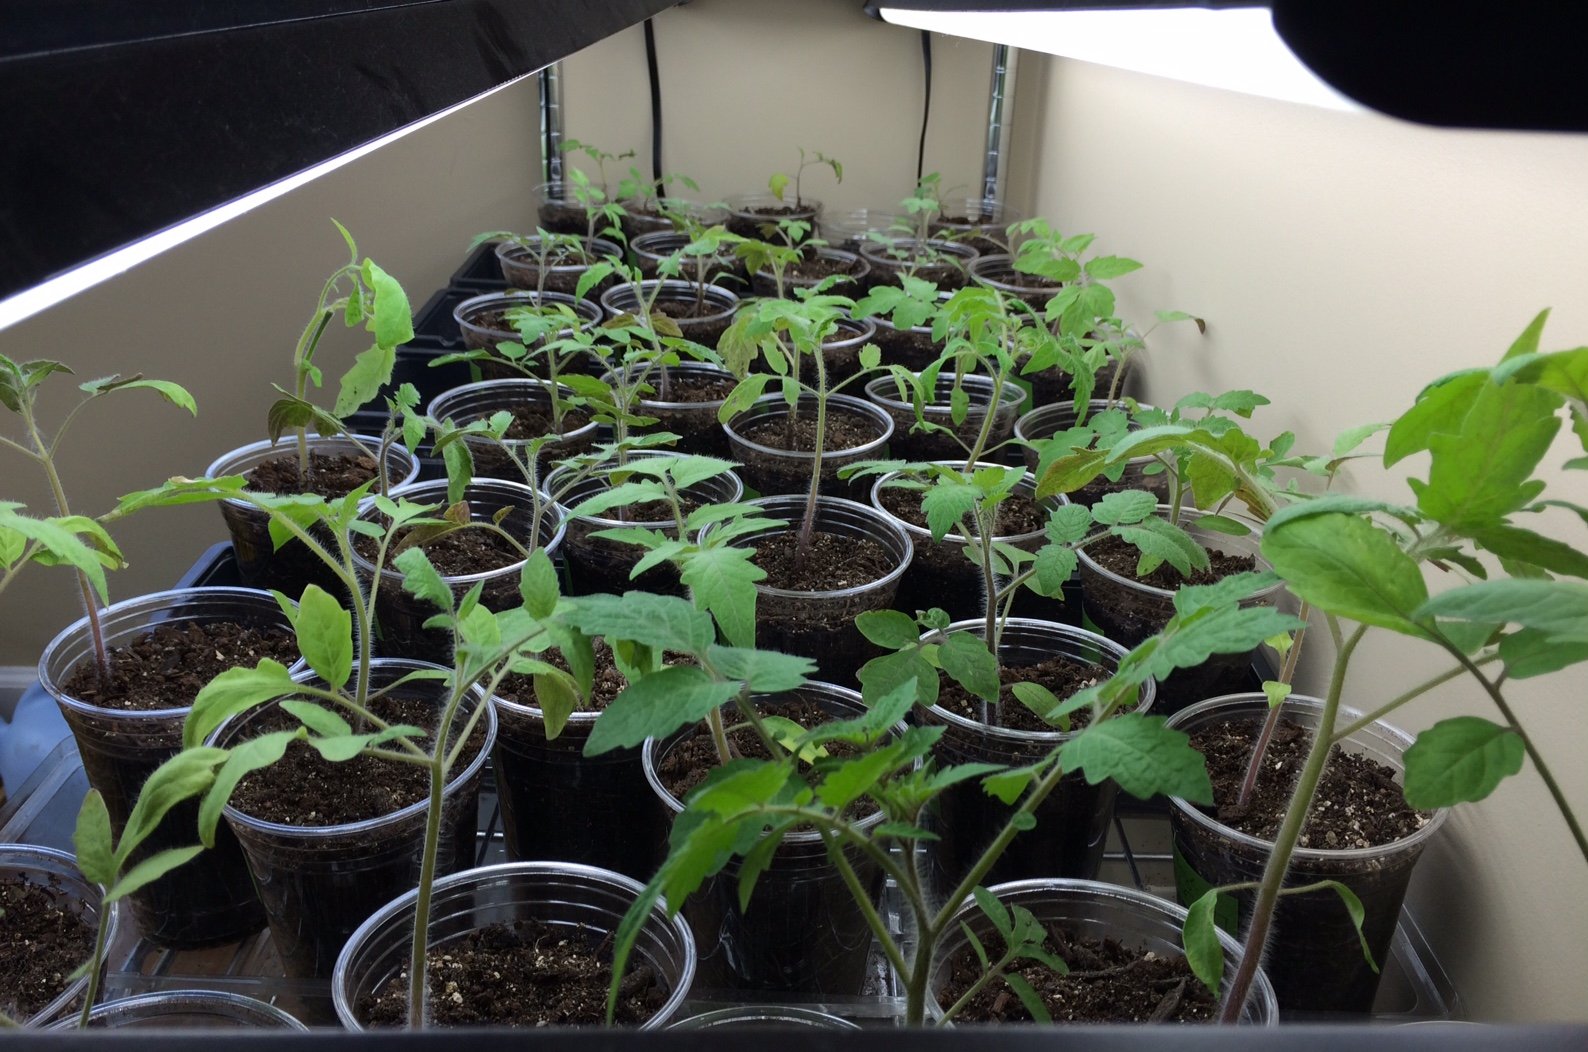 I added a few new varieties this year of both slicing and cherry tomatoes and plan to save seed from all I want to grow again next year.The cabbage and collards are nearly ready to be hardened off and will join the lettuce, spinach and leeks I will be direct sowing this weekend.
 Now that the 2 week forecast has no nighttime temps below freezing it is time to get the spring garden into full swing!
Don't Blink
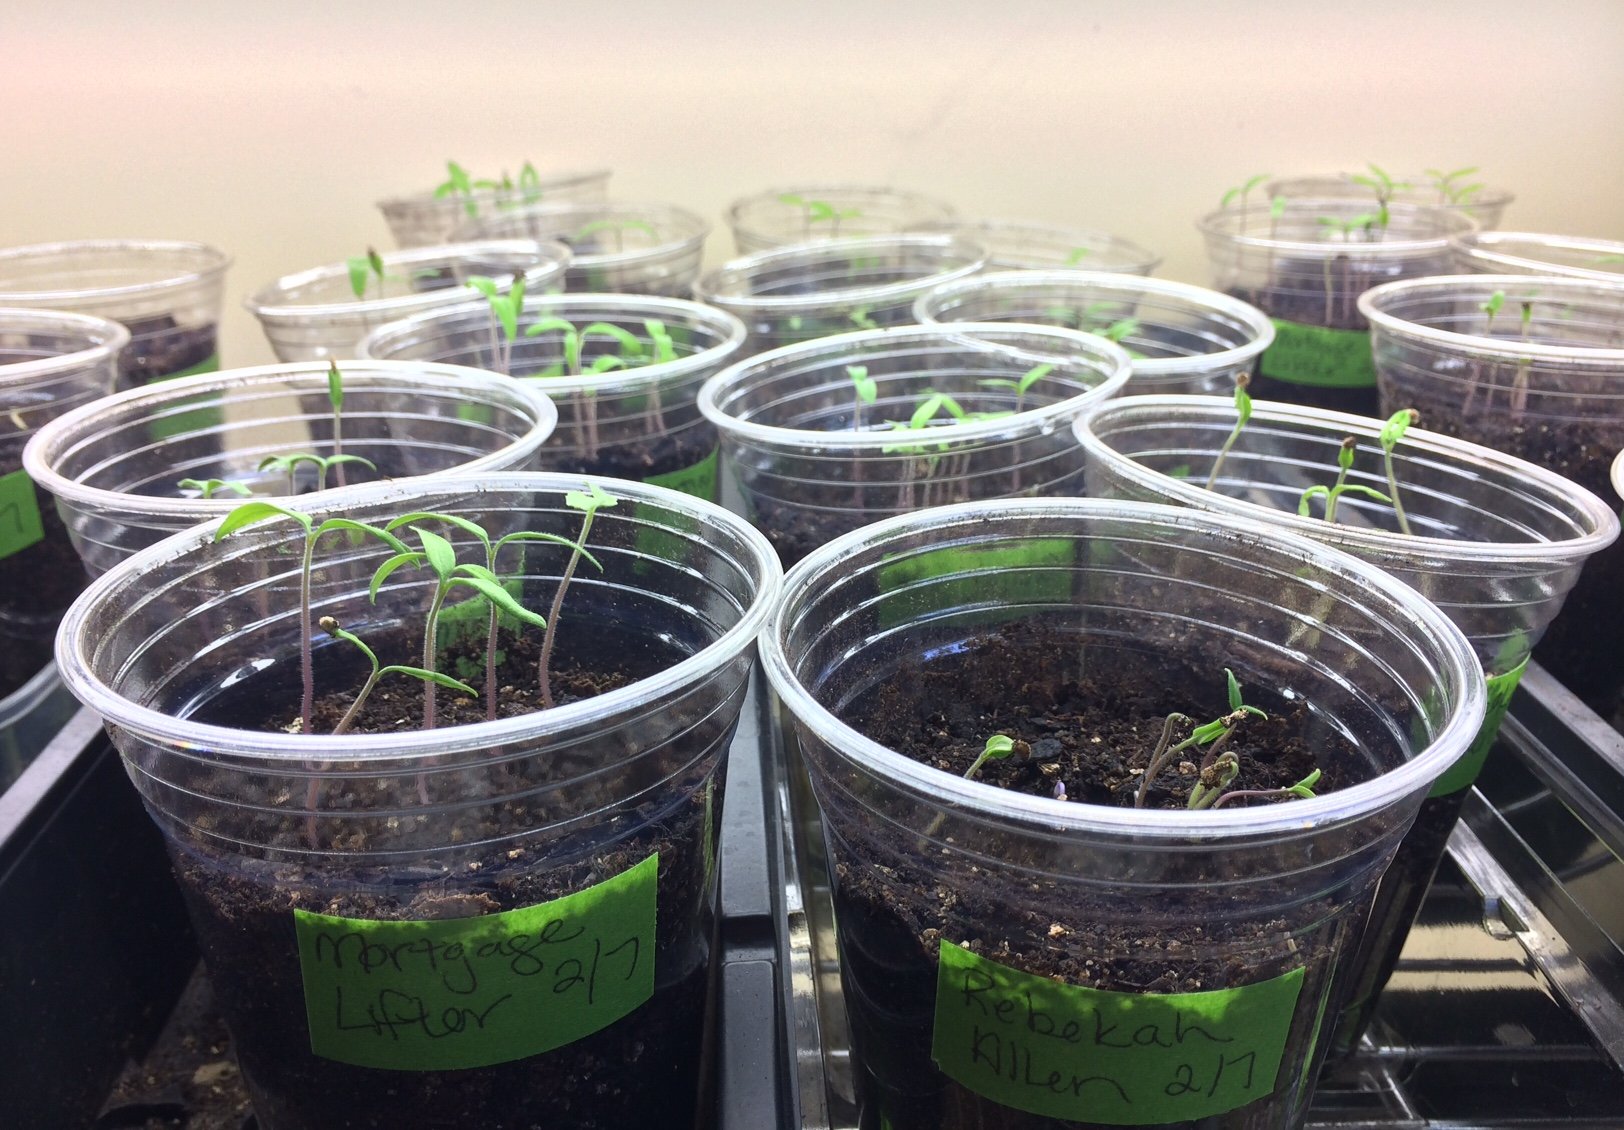
During the past week of business travel my indoor plant starts have grown with the vigor of youth into a verdant and slightly unruly bunch of tweens.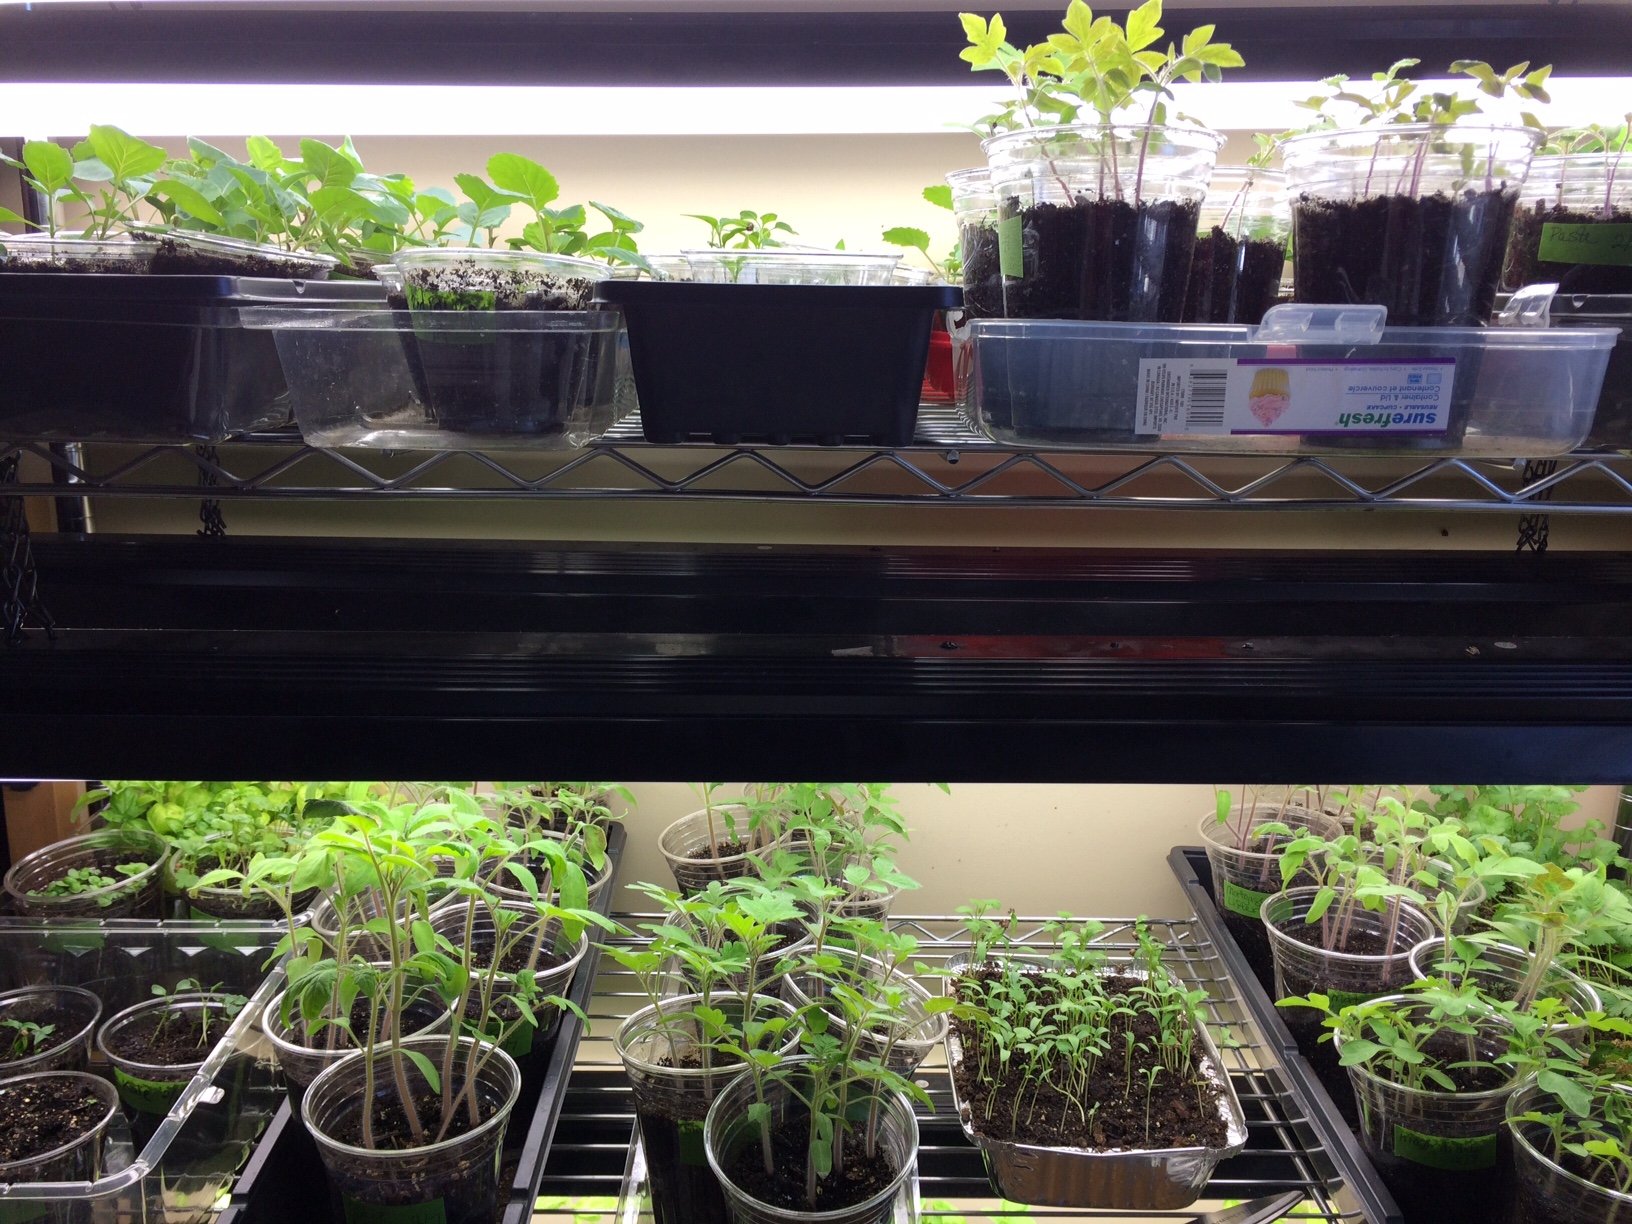 The tomatoes from my saved seed are particularly in need of thinning. I seeded them a little more thickly since I did not know what my germination rate would be. While they initially lagged about week behind fermented seeds I purchased this year, the germination rate for my saved seed looks to be close to 100%.
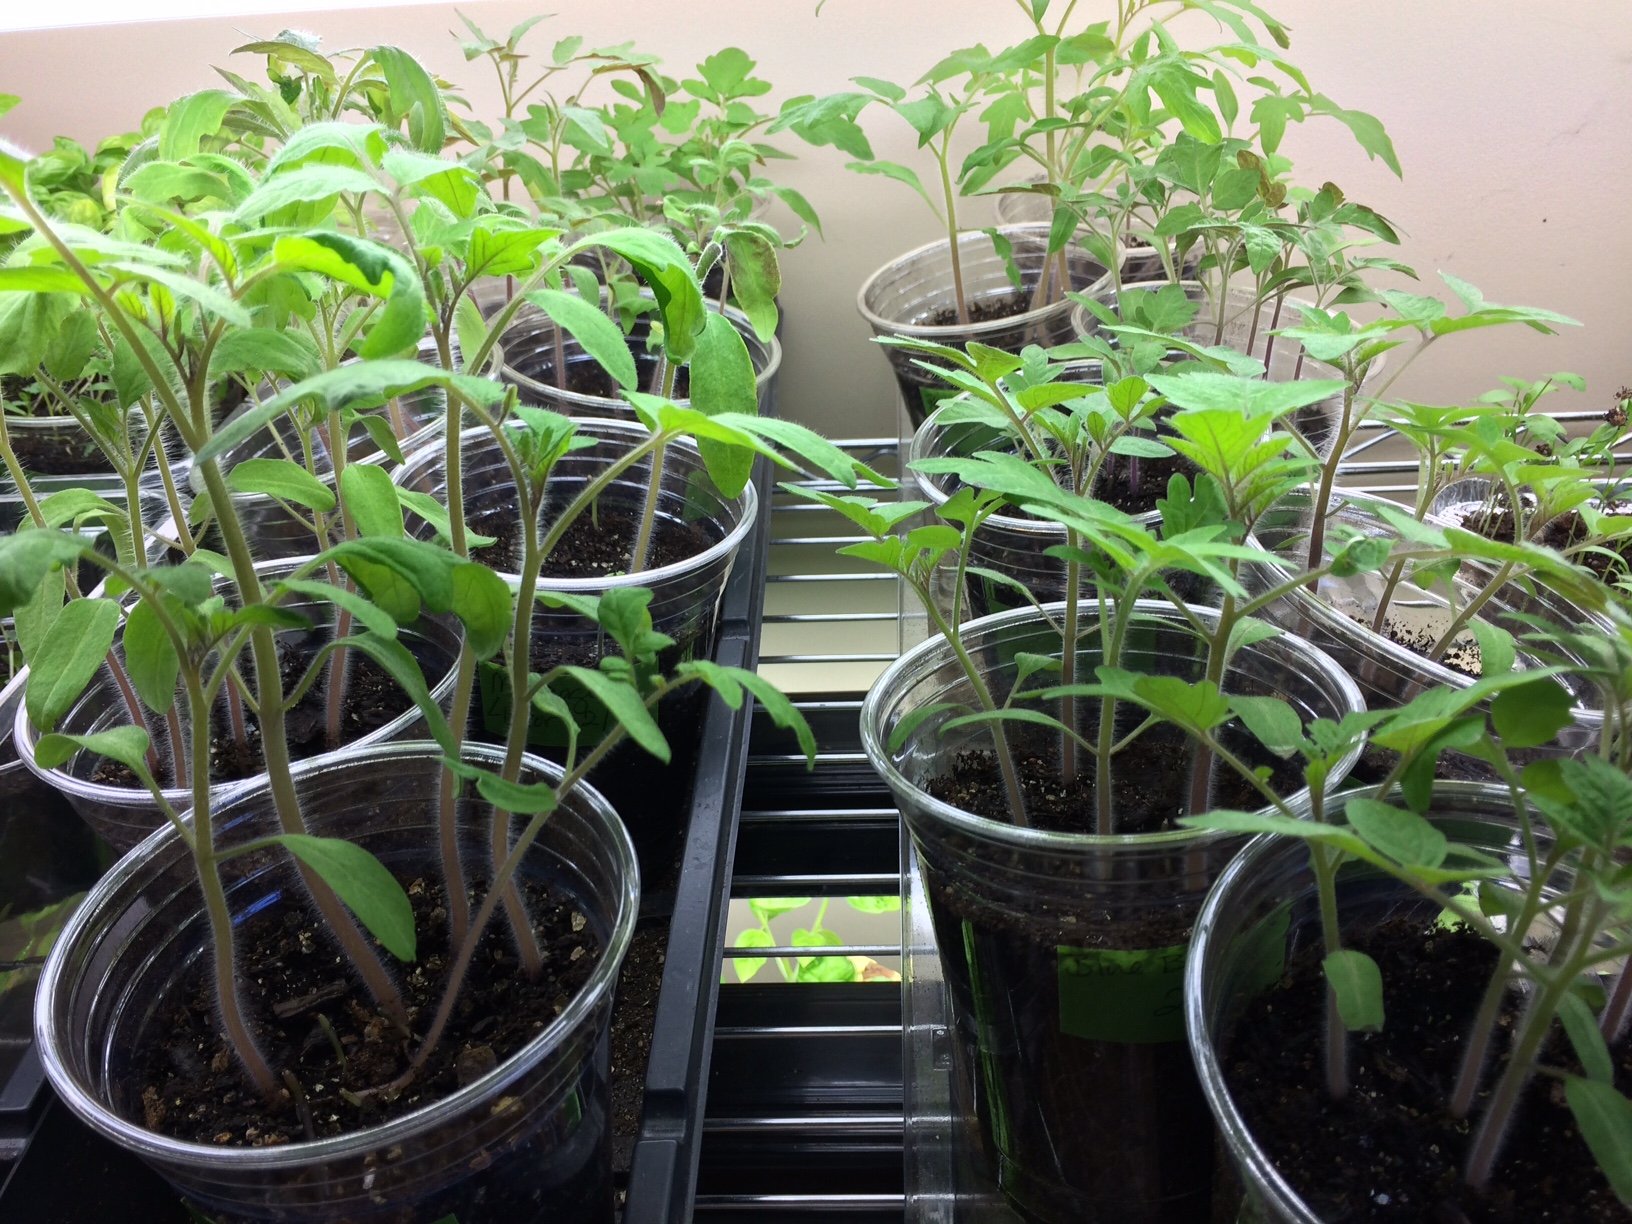 Pro Tip - always use scissors to snip off the plants you are thinning to avoid disturbing the roots of chosen specimen.
Tender Beginnings
While winter is having it's (hopefully) last hurrah outside, I am prepping my indoor garden to be without me for a week while I travel for work.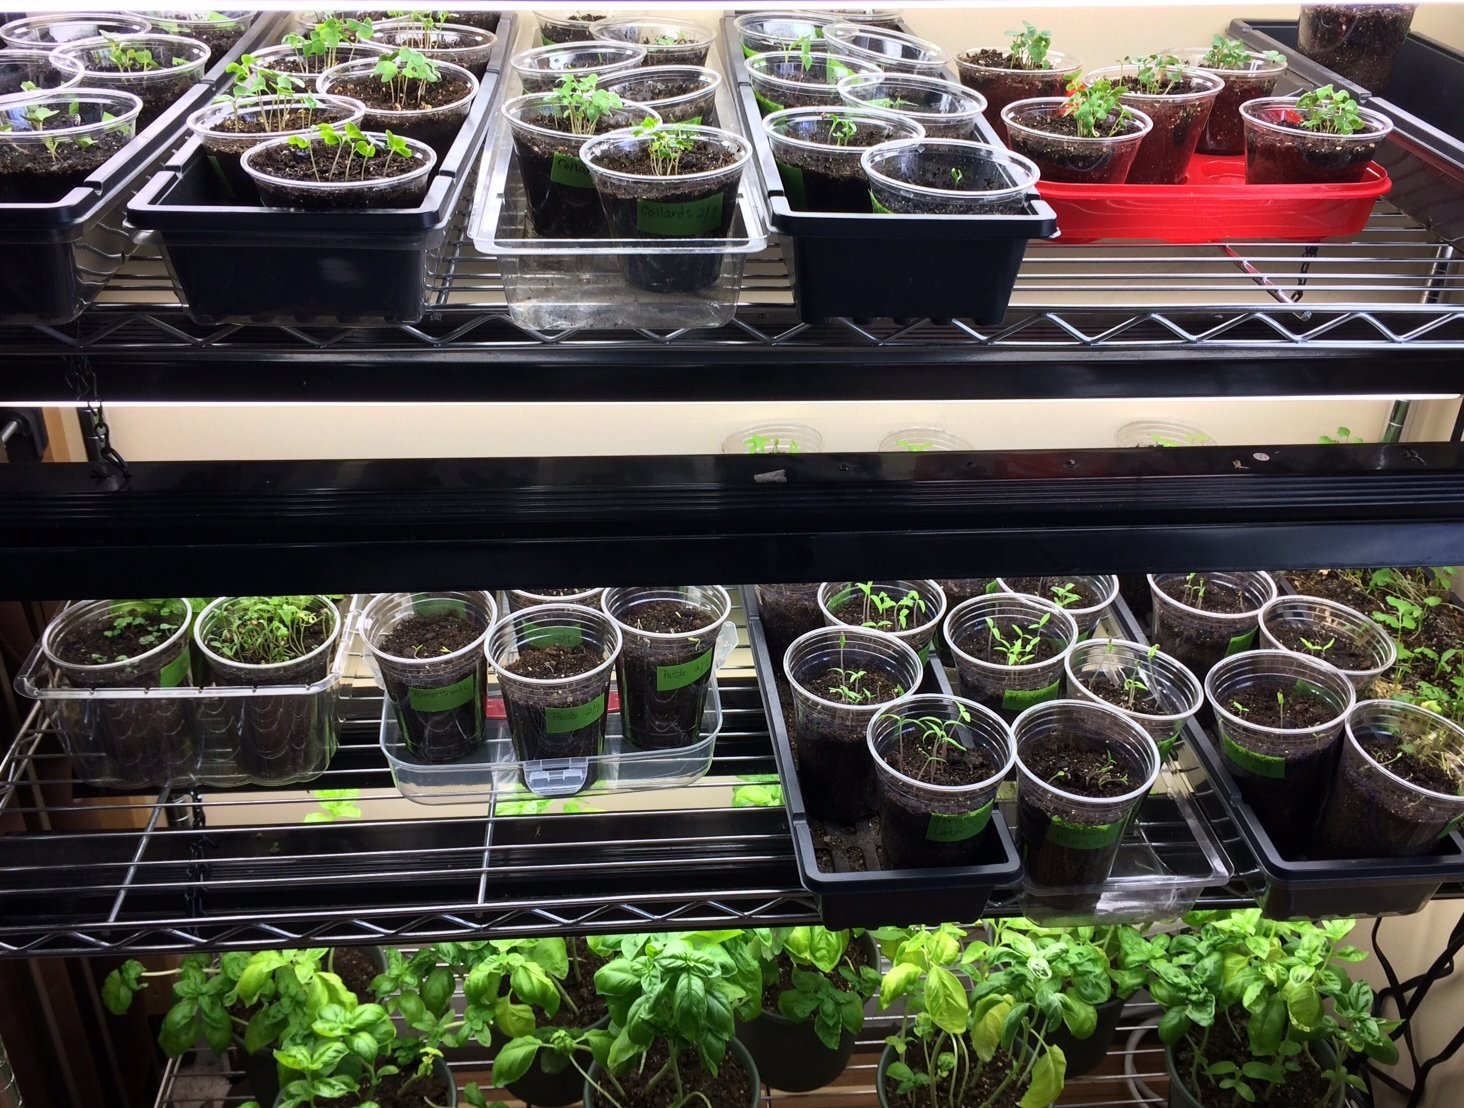 After trying first newspaper pots then peat pots for last year's starts and having them disintegrate before I was ready to transplant to the garden, this year I am using Siloé Oliveira's technique of drilling holes in smooth plastic cups that can be reused year after year.All of my starts are doing well but the ones I am happiest about are my saved seed from the Paste and Amana tomatoes I grew last year. They sprouted a few days behind the new varieties I purchased seed for this year, but since I did not ferment the saved seed I knew they would lag a bit.
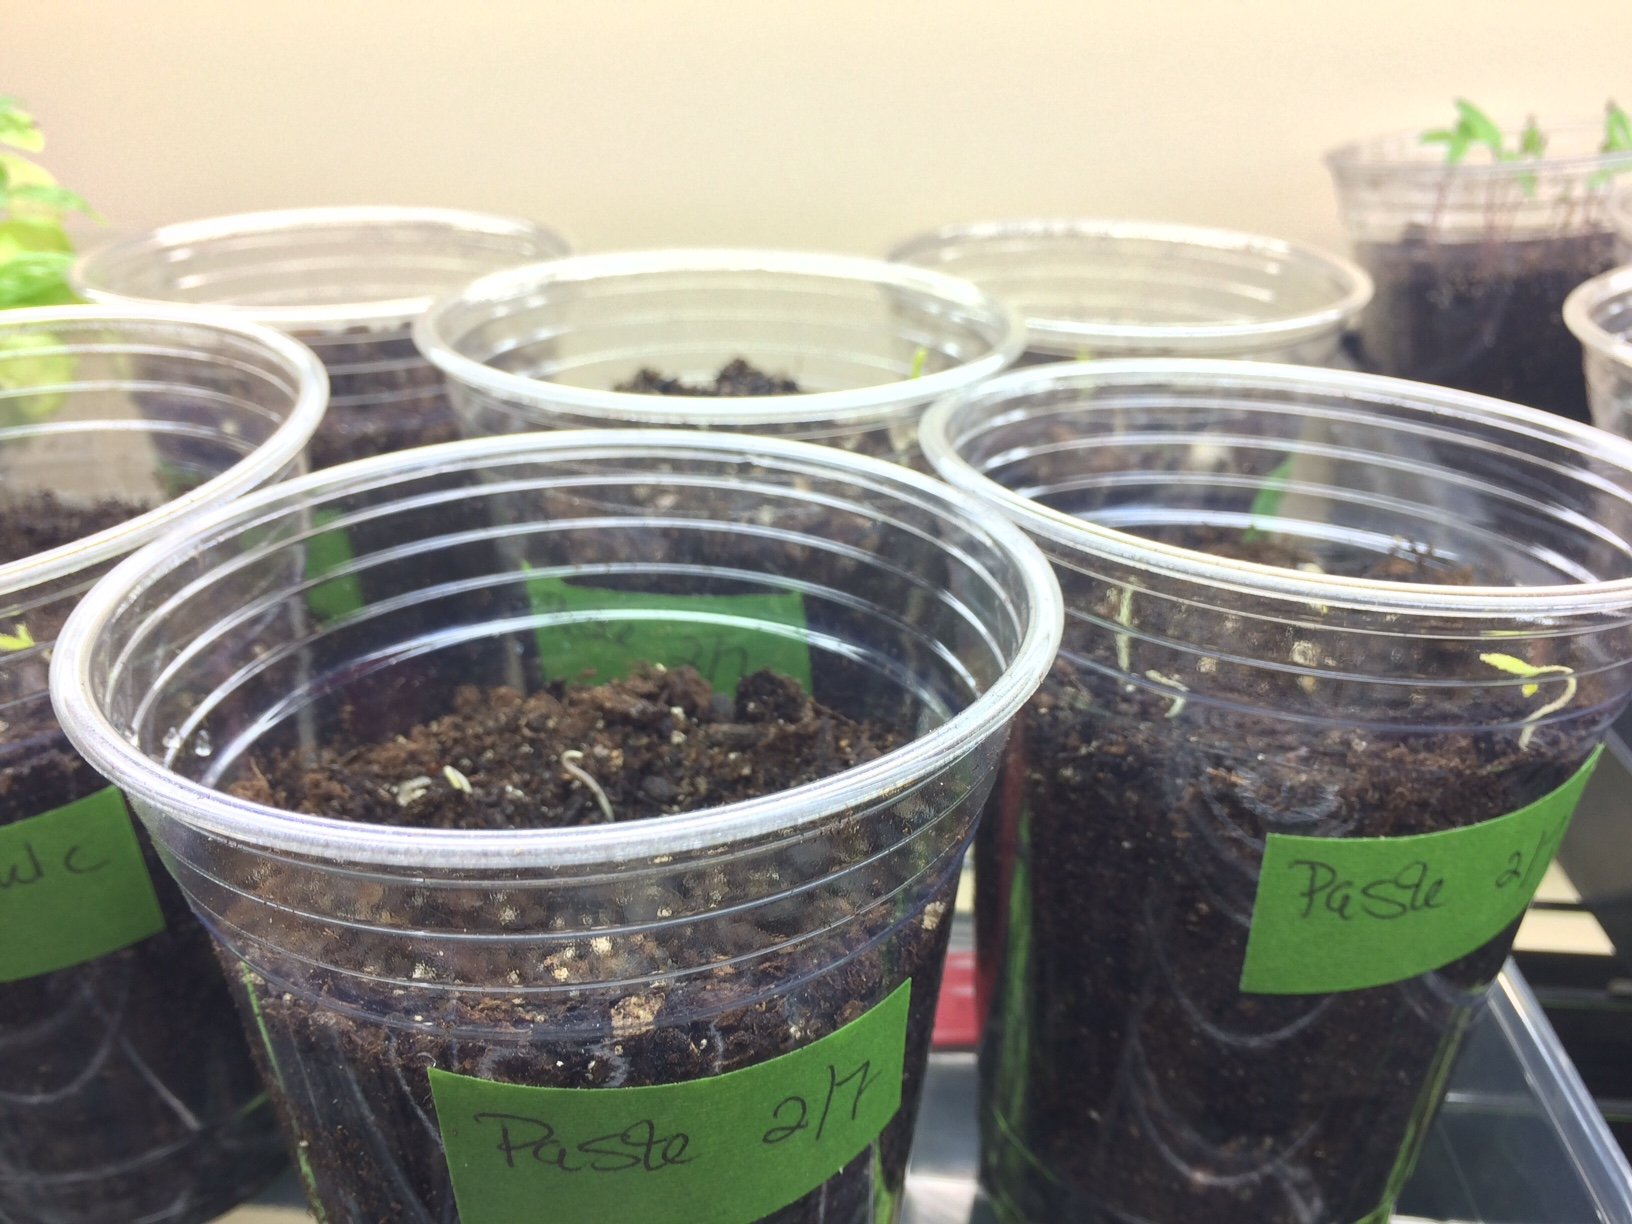 And gratuitous pics of some of the collards and other tomato varieties starts just because they are so pretty...
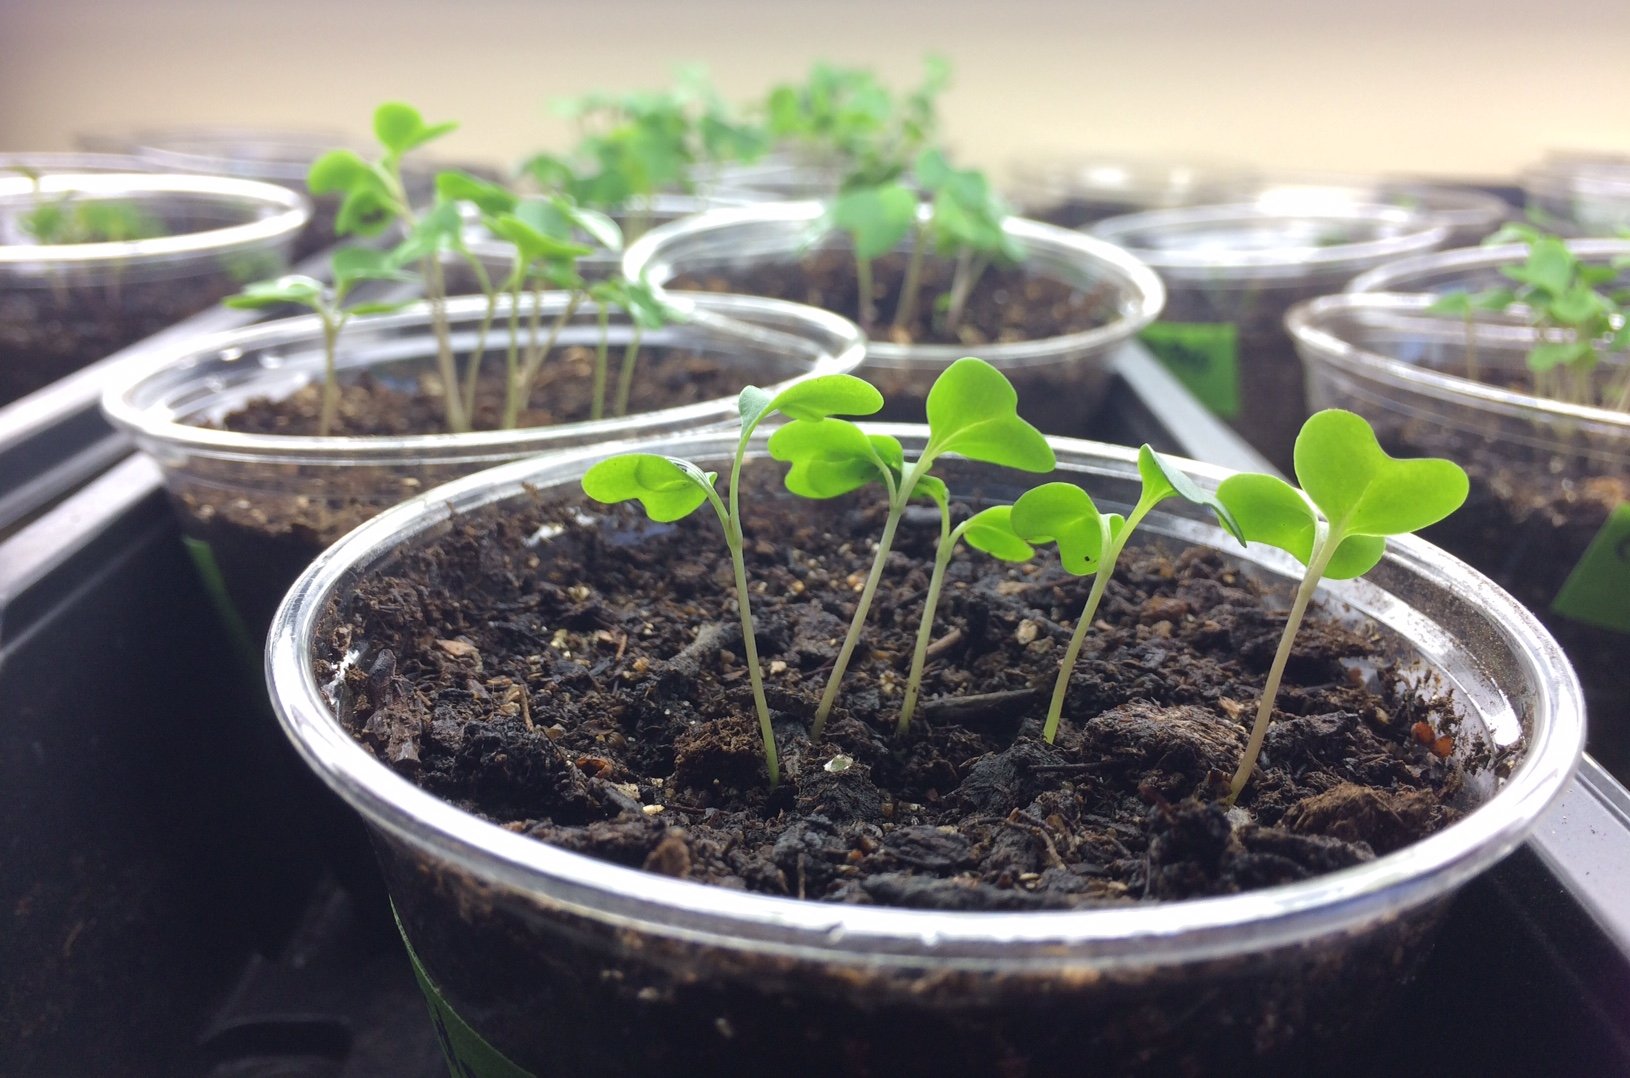
Countdown to Garden 2016
Even before presents are unwrapped, the countdown is on with less than a month to go before indoor starts of cabbage, leeks and rosemary get going in the first part of January with peppers (hot and bell) just behind.So I've been making my list and checking it twice this week to see what varieties will make it into my 219 square foot of garden space for 2016.I am making heavy use of containers for herbs (and one lettuce I just couldn't resist) and also using two composted trenches in the yard to grow The Three Sisters: corn, blackeyed peas and decorative squash. I currently have 8 1x1 boxes for cucurbits, but will be adding in 3 more before spring to hold all the zucchini, squash and cucumbers on my list. Despite planning 52 different varieties of annuals for next year, my 2016 seed order (including shipping) came in under $42. This economy was mostly due to saving more of my own seed this year than ever before and having plenty of unused 2015 seed for most of what I plan to grow next year - Square Foot Gardening makes better use of individual seeds than row gardening so more seeds are conserved for future use.
 One of my splurge purchases for this year was the Slo-Bolt Cilantro. I am still drawing down the huge supply of cilantro/coriander seeds saved from my 2012 garden. They still have a high germination rate so I have been using them for both outdoor garden and microgreen plantings since then. If the slo-bolt lives up to its name, my 2012 cilantro has had its last reproductive cycle and will be only for microgreens and I will switch to saving the slo-bolt seed.Next I will start plotting out the placement of these plantings on my garden map. 2015 was my first full garden cycle in Raleigh and the biggest lesson was that maximizing light has to be a priority for north facing gardens further complicated by some tree shade. To that end, I added a height column with each plant ranked Short, Medium or Tall to plan my garden for next year. Tallest plants in to the north and shortest plants to the south has always been the rule of thumb but is now a requirement for my future garden plans which will make crop rotations a little more challenging.It is damp, but in the low-mid 70's this weekend, so I will also spend some time putting in new grids into my raised beds. I have been using kitchen string for the past few years but the cottony string only lasts one year before stretching, breaking and needing to be replaced. This year I am going to try a white nylon string that is made for outdoor use and hope it holds up better.Here's to a wonderful close to 2015 and a bright start to 2016! Happy Holidays!
Trench Composting for Corn
I have never really wanted to grow corn since the small amounts I desire for home cooking are readily available at the farmer's market in season, it takes up a lot of valuable space in an already tight garden plan and it is an environmentally costly plant to grow. Corn is greedy. Really greedy.Then I promised my 8 year old that he could grow anything he wanted next year and flipping through a seed catalog he picked Strawberry Popcorn. I dutifully ordered the seeds and we were researching growing, harvesting and drying the variety online when we ran across our first glimpses of Glass Gem Corn. We marveled at the photos and videos of this varietal and were both smitten by its beautiful colors. When it appeared on the Baker Creek Heirloom cover a couple of weeks ago, I found myself suddenly preparing for two varieties of corn in spring 2016 but still didn't want corn in my garden proper.My suburban lawn is in its second year of organic management (no herbicides, pesticides or fertilizers are used) so the conundrum of what to do with the corn made me consider planting directly in the yard as a solution to the space requirements and soil depletion problems of corn. But although I don't use chemicals on the soil, that is not the same thing as having good, rich soil for growing anything. I had seen information on trench composting some time ago and decided to dig back in and learn a bit more.There are a lot of variations on trench composting from the fill it as you go style to the much more elaborate hugelkultur style installations. I opted for something closer to the style in the video below.https://www.youtube.com/watch?v=W1XmP9-RpmYI started with a trench and filled in a layer of browns. These are leaves and pine needles that have been composting for a year now. The leaves have already broken down into a rich soil structure but the pine needles take a bit longer.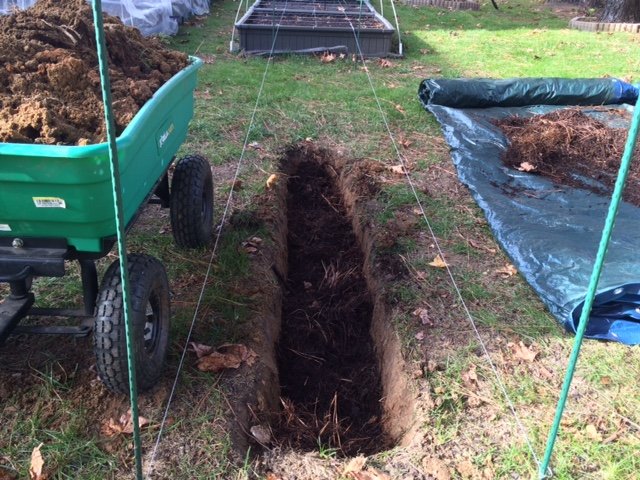 I followed the layer of browns with some rich, dark, nearly done compost from my two tumbling composters.
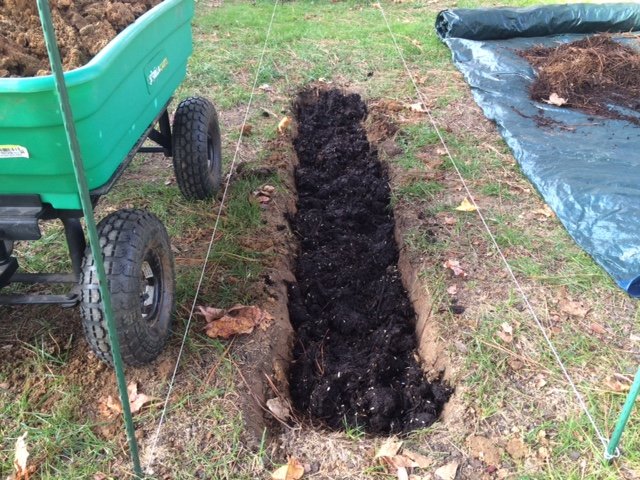 I topped the compost with another layer of the browns.
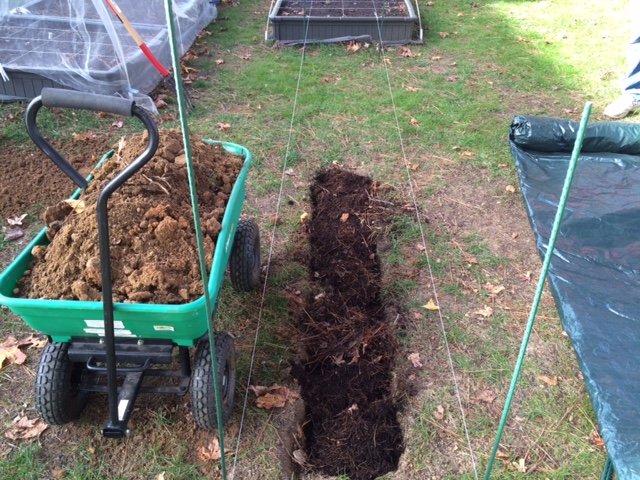 And finished it off by replacing a top layer of soil, mounding it up a bit since it will settle as the layers of browns and compost continue to biodegrade and compact.
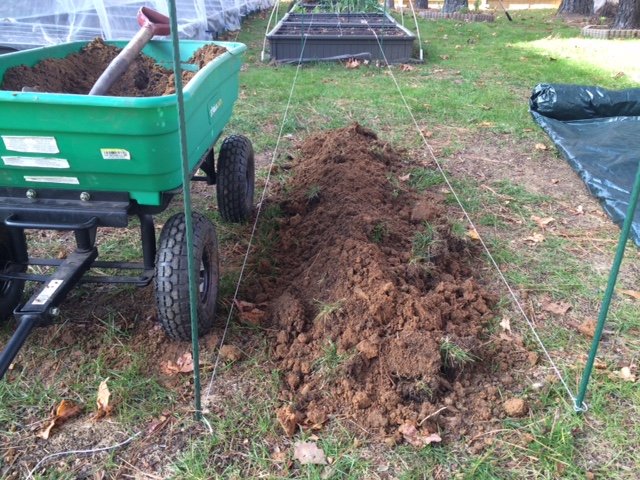 The Glass Gem Corn will be planted on either side of this trench in spring and I will need to do the same elsewhere in my yard for the Strawberry Popcorn. I hope to have a staggered planting system in years ahead where I grow on top of a trench a year and a half after it is filled with rich, organic matter that has had time to be broken down by microbial and worm activity.
Winter Growing
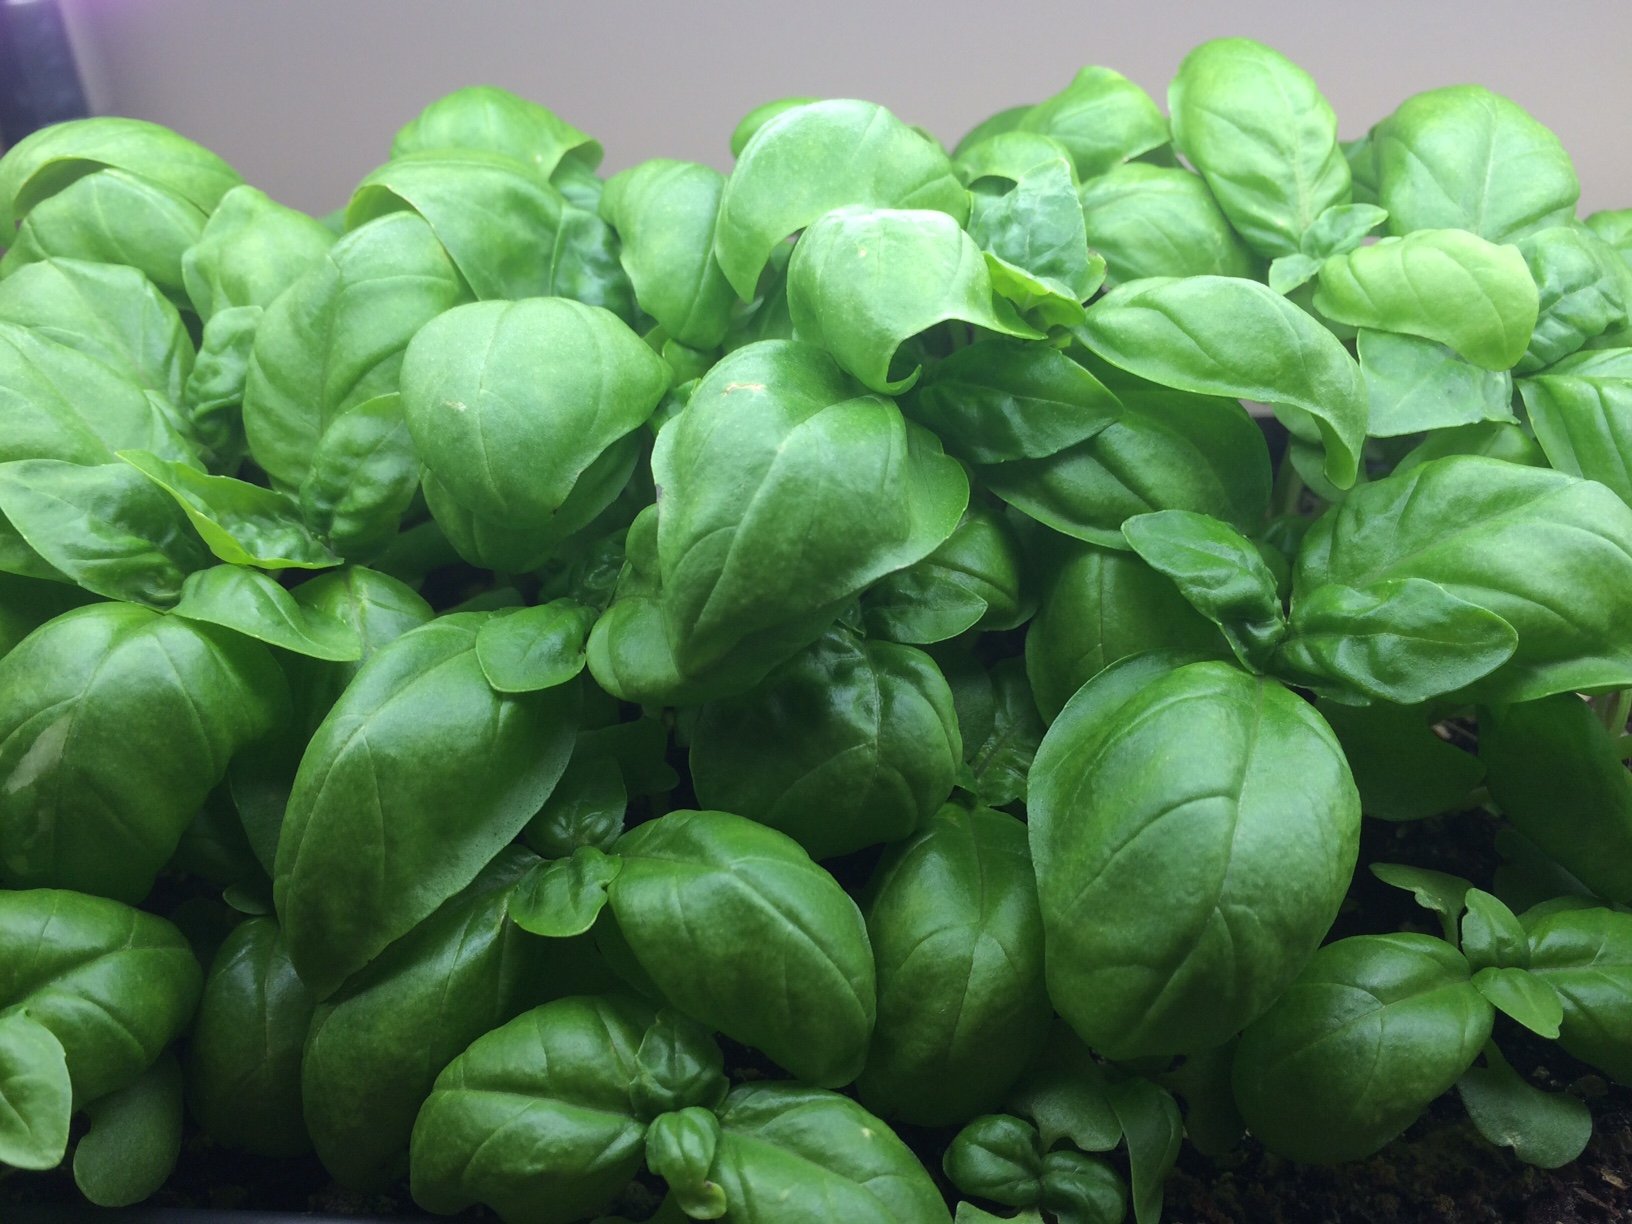 This winter there will be a lot of focus on my indoor gardens mostly because my outdoor winter garden is a bit of a bust this year. The collards and spinach I planted were just beginning to grow when an unseasonable cold-snap halted them in their tracks. I tried resowing but still don't have much of anything green going on outside. I haven't given up completely on the 3 inch tall collards that I still hope will be served on New Years, but accept that I may be buying most of my good luck meal this year instead of growing it.Right now my indoor garden consists of two trays of basil microgreens (already harvesting from the tray on the left) and 8 pots of basil that will be allowed to grow into full plants of about 8" tall and pruned a bit daily as needed for meals.
 I will be starting another 3 trays of cilantro microgreens this weekend and will do various other types of microgreens (arugula, mustard and red cabbage) off and on all winter to add some homegrown flavor and crunch to winter meals.If you are considering indoor growing, microgreens have a lot going for them. They have a very quick turn around, usually only 2-4 weeks from beginning to end which is basically instant gratification in the gardening world. And due to their fast germination to harvest cycle, they aren't usually around long enough for pests and diseases to become an issue.These little plants really do have some powerful flavor, often even more than their adult versions and growing research from reputable sources is showing that some of them are packed with up to 5x the vitamins and carotenoids found in the adult versions of the same plants.So whether or not my outdoor garden takes off with this wonderfully sunny and warm week we are having, I will be posting (and eating) fresh all winter long.
Glass Gem Corn
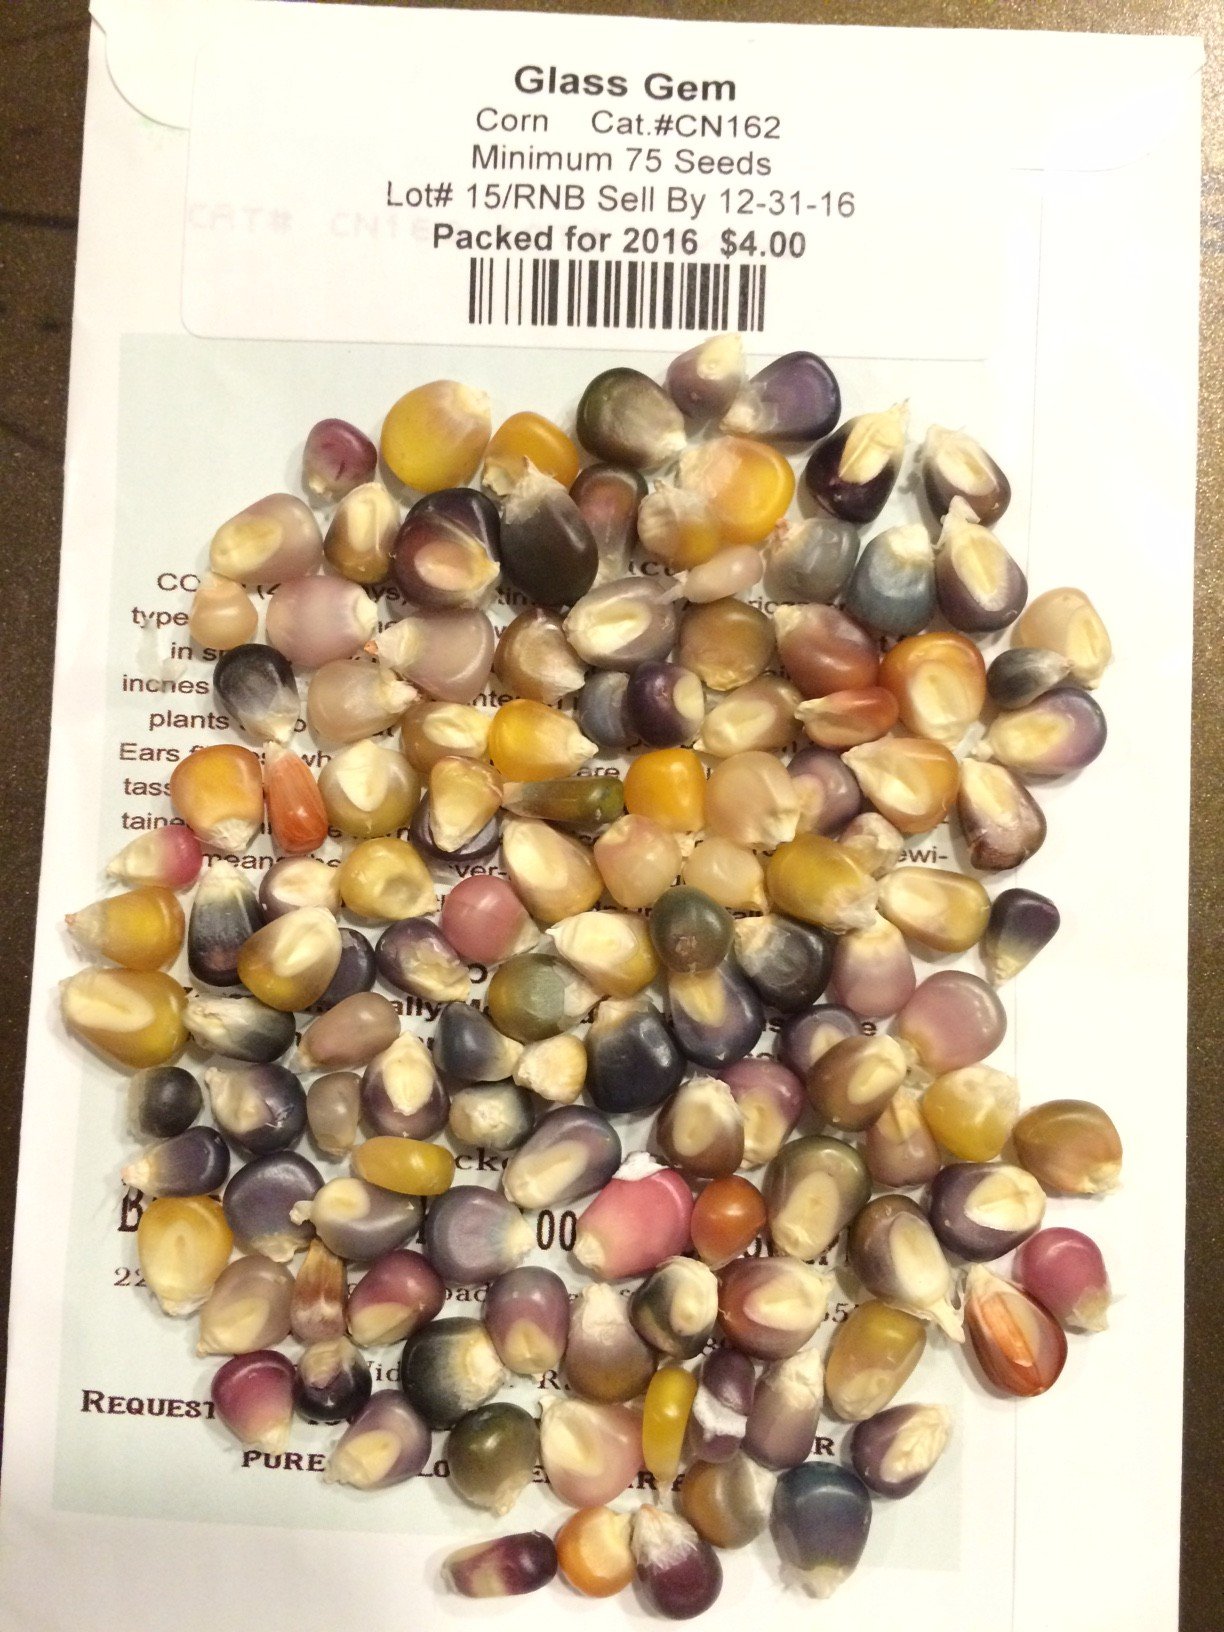 It's not often that a packet of seeds is so exciting that I cannot wait until spring to open the flap and take a peek inside. Glass Gem corn is a clear exception!The Glass Gem heirloom corn variety hit the homegrown stage a few years ago and has been offered only on a wait-list basis from very limited outlets until now. So when I saw the cover of the 2016 Baker Creek Heirloom Seeds catalog I assumed they were just highlighting a very photogenic variety for the cover. When I discovered they were actually carrying the seed, I didn't hesitate and am now planning where to plant the star of my 2016 garden!
Quest For Fire
My tomatoes were troopers this year holding onto green romas, blue beauties and red delicious globes into early November, but I gave up and pulled the remainders two weeks ago just so I could begin cleaning the beds and preparing them for winter before heading off to a week's worth of meeting in San Diego last week.This weekend's task was to pull the rest of the serranos off before 3 consecutive nights of freezing or below temperatures hit them. My final harvest ended up being 1lb, 5oz of beautiful peppers that will warm dishes from now until next year. All were cleaned and vaccu-sealed before being frozen except for a few that will go into the Thanksgiving cornbread later this week. On another pepper note, a friend has some seeds that he will be sharing with me from his home country of El Salvador. I am keenly interested in growing them out next year since he doesn't know the name of them in either his native tongue or English. For now I am thinking of them as Mystery Pepper and what a fun mystery to solve!
Umami in Progress
Oh sure, we can call it my shiitake block from 100th Monkey Mushroom Farm, but fresh, delicious umami in progress is what it really is and it is a bumper crop this time!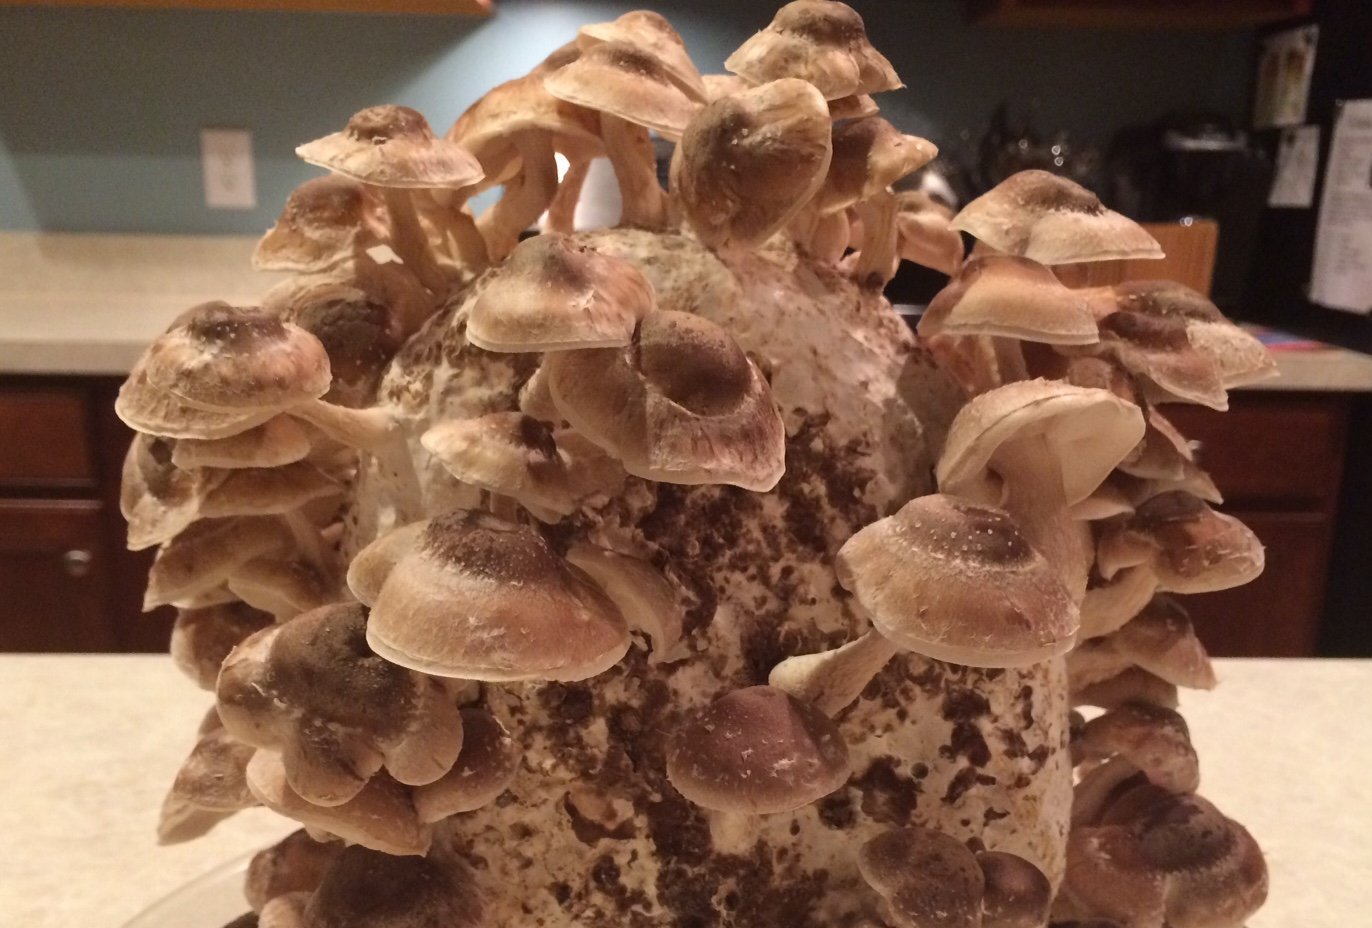
Fall Cleaning
Unlike houses that only gently admonish us once a year with the expression "Spring Cleaning", gardens ask that twice a year we get down and dirty and work until our backs and legs are singing to bring a temporary order before allowing nature to rule for another half-year.This weekend I have begun the Fall Cleaning in earnest. After a year of unmolested growth and rooting, it was time to cut back the asparagus and the strawberry runners and bed them down for the winter.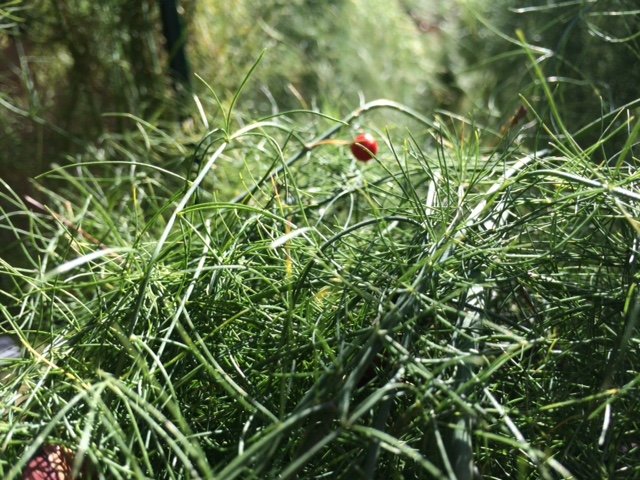 The 5' asparagus plants looked like little Christmas trees even before the seeds turned bright red two months ago and mimicked ornaments. In the past couple of weeks some of the green growth had started to yellow and then brown, signaling the time to remove the above ground part so the underground crowns could prepare themselves for winter.Asparagus has a long and storied history going back at least 5,000 years to Egyptian times and has the rare distinction of appearing in one of the oldest known recipe books De re coquinaria ("On the Subject of Cooking") from the 4th or early 5th century AD.
 My Jersey Knight and Purple Passion asparagus crowns were transplanted into my garden in the earliest part of 2015 meaning that I could not harvest anything this first year and could only watch as the tender shoots grew to and then beyond edibility stage and finally into the fern like growth above.Although I could not eat the shoots this year, nothing goes to waste in my garden and the green growth that had fed and nurtured the crowns all year were cut into 2-3" sections to be composted and feed future growth.
 Once the asparagus and strawberry beds were cleaned up they were fitted with low hoops and covered with water and light permeable mesh that will hopefully keep the squirrels and pine needles out until spring.I have been looking into organic mulching options and ran across Leaf & Limb Tree Service's site that offered free wood chips delivered to your home (with some caveats). An inquiry has been sent and hopefully soon I will have my crowns bedded down for winter and am already looking forward to getting to harvest some of my own asparagus shoots next year!
A Fungus Among Us
It is the time of year when harvests from the garden begin to taper off, Halloween decorations go up and a girl's thoughts turn to fungus. It was this time last year that I was trying my hand at growing shiitakes on my breakfast bar.With the success of last year's shiitakes under my belt, I wanted to expand my repertoire this year and grow some Elm Oyster Mushrooms also.My first grow out of my box kit was productive and I am resting the kit for it's second grow now. The 'grow your own mushrooms from a kit market' has exploded in the past couple of years and there are many great vendors out there, but I have to give a shout out to the wonderful and personal customer service from 100th Monkey Mushrooms. I love the helpful videos, the quick and helpful response via email for questions and their outstanding customer service - when I placed my order online for my Shiitake blocks and the Elm Oyster box a couple of weeks ago, Jimm called to let me know that the Shiitakes would not ship for another month and to see if I wanted to receive them together or separately.I am still waiting to see what (if anything) will happen with the 2 morel kits I ordered from Gourmet Mushrooms last fall. The information on the website and included with the kits' instructions said to not really expect a harvest until the second year which is finally less than six months away! I have been diligently adding compostable organic material to their separate 2'x2' raised beds to feed the mycelium for a year and a half and have my fingers crossed that in spring 2016 I will have the Holy Grail of forage mushrooms growing in my backyard!
Haystack of Needles
It has been raining two things since Thursday night. Raindrops and pine needles. Going into my second fall as a North Carolina gardener, I have started calling them Piedmont sand because they are a pain to clean up and get into absolutely everything!Last year I made a leaf composting bin to reduce yard waste and build soil with all the sweet gumball leaves that fall into my backyard. With each infusion of leaves, pine needles inevitably found their way into the bin also and they take much longer to break down. After a year of compositing and being filled to the brim with leaves no less than 4 times, I am left with a small pile of garden gold mixed in with a small haystack of needles.
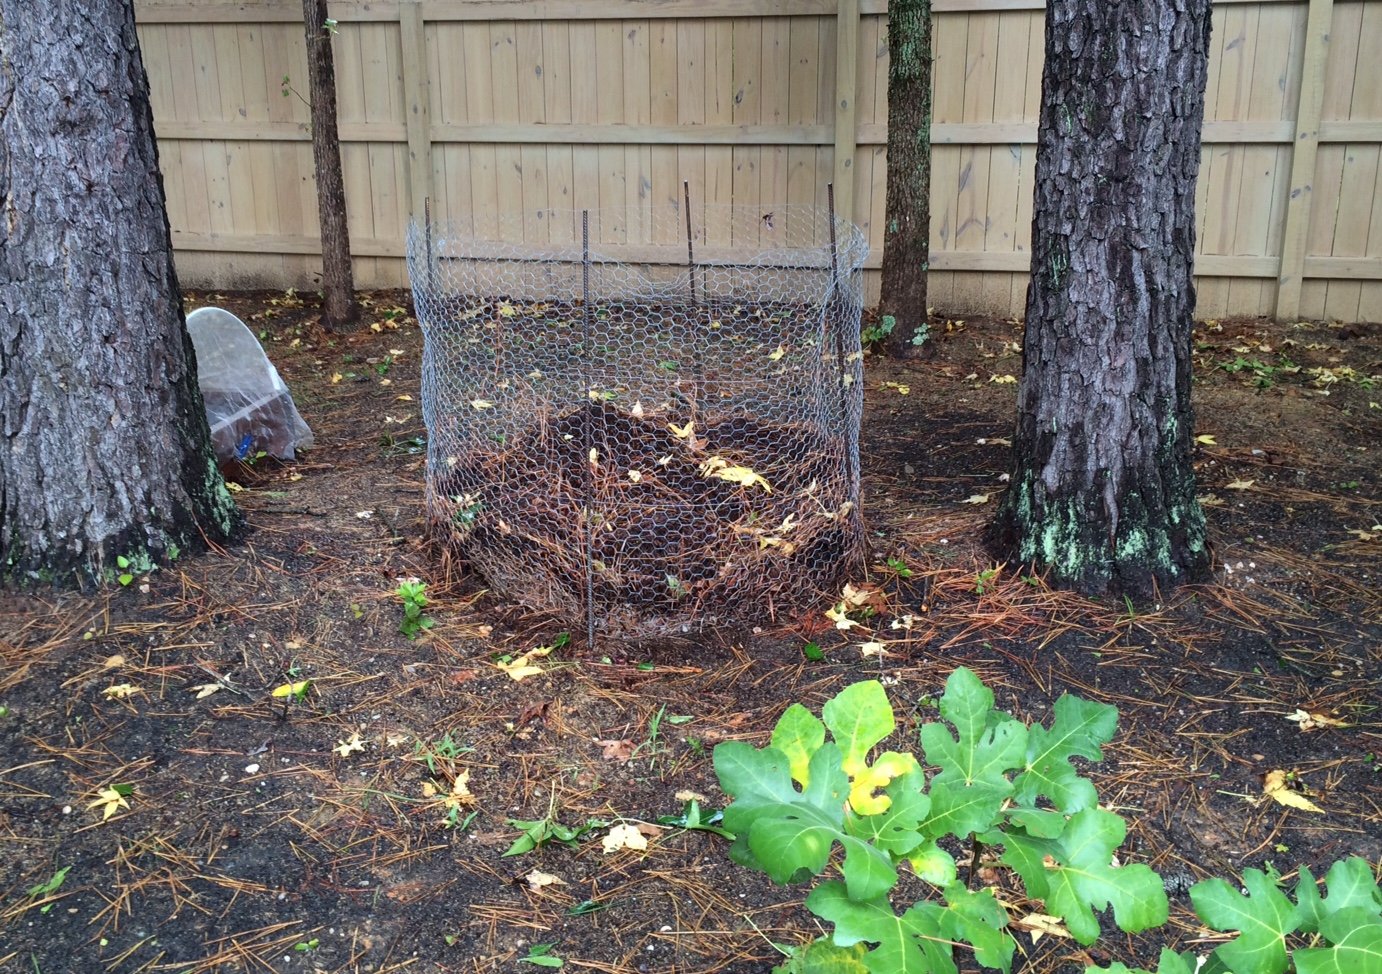 There is conflicting information on whether pine needles add a significant amount of acidity to the soil as they break down or not so to be safe, this mixture will be used to compost around my acidity loving blueberry bushes.I am reasonably certain that the 8 pine trees in my backyard are Pinus taeda, the loblolly pine. They will shed needles almost continuously from now until spring. This year's needles will be used to mulch around the magnolia tree, which also likes a bit of acidity, after being broken down a bit with a weed wacker to speed up the decomposition.I hope to find a happy balance between the amount of needles the trees can produce in a two year span and the amount of pine needle compost/mulch I can use.
Fall Garden 2015
As I plan and finish planting my fall garden this weekend I have to give a shout out to the tomatoes, red bell peppers and serrano peppers that don't seem to care that it is the middle of September and are continuing to bloom and set fruit in earnest.Working around these summer hold-overs is a little easier with the addition this weekend of the last two 4-x-4 beds I had planned to add. I have also added 8 1-x-1 boxes that will be used for summer squash next year but are mostly available for planting now.I am trying a non-dwarf variety of collards this fall and trying parsnips for the first time. I have added permanent supports along the back portions of beds (blue lines on garden plan) by way of 6' metal fence stakes hung with rungs of coated wire to act as a ladder for climbing plants. It also works well as support for triangle shaped row covers.
 If all goes well I will be serving spinach at Christmas and collards on New Years all fresh from the garden!
Nature v Nature
 I planted a second run of squash and zucchini in early August and they are faring much better against squash vine borers and squash bugs but two of the plants, the acorn and spaghetti squash have an aphid problem.I have used ladybugs on an indoor aphid infestation before with excellent results. The ladybugs did not explore the house but stayed at the all you can eat buffet of aphids on my indoor spinach and lettuce. Within a few days the greens were completely aphid free and the ladybugs died off as their food dwindled, but not before starting a second generation.In the cool of this overcast morning I released 1,500 ladybugs on my squash, with the heaviest concentration on the acorn and spaghetti.
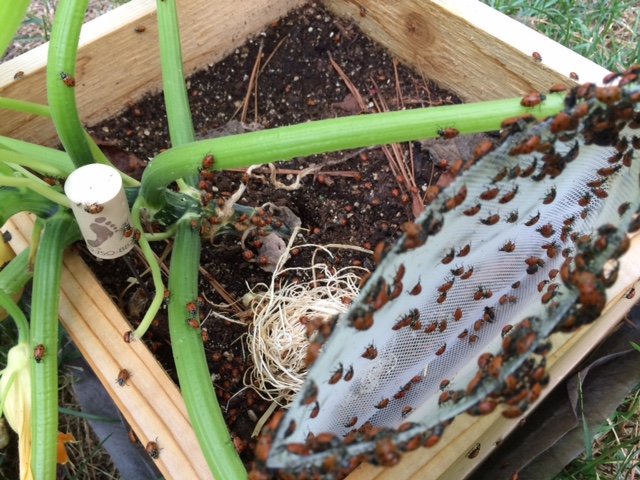 The ladybugs fanned out over the squash plant, honing in on the aphid colonies which seem to like gumming up unopened blossoms in particular.
Vinegared Cucumbers
 As my Marketmore and Chinese Yellow cucumbers swing into full production I have been looking for a recipe that I recall from childhood. I have heard them called refrigerator pickles, cucumber salad, marinated cucumbers and vinegared cucumbers, though there are multiple meanings to some of those monikers so I am sticking with calling them vinegared cucumbers.Pro Tip - when picking cucumbers, bring them in and pop them into an ice bath to remove the "field heat" and cool them down quickly. They will keep better for longer with this trick.There are many variations on this recipe and I tried a couple before cobbling together this one that comes closest to the crisp, bright taste I remember in my grandmother's vinegared cucumbers:2 cucumbers with the skin peeled in strips then sliced to preferred thickness3/4 cup apple cider vinegar1 1/2 cups waterA few slices of red onion (optional)Pack cucumber slices into two 1/2 pint canning jars (or whatever you have that you can put a lid on), packing red onion along sides and top. Mix together vinegar and water and pour over until cucumbers are covered. Close jar and marinate in the refrigerator for at least 12 hours.
Making Hay While The Sun Shines - Part 2
Even before the surprise bounty of figs arrived on my doorstep Saturday morning, I had a hefty agenda for my first full weekend back home in my garden in 3 weeks.Serranos - picking them at both the green and red stages, sharing some with friends and preserving the rest. My favorite methods for enjoying serranos in the off season are vacuum packing them fresh and whole and freezing or else sliced in half, seeded, roasted on the grill and then vacuum packed.
 (roasted, vacuum sealed and frozen)
Cucurbits - I needed to put out 8 new 1'x1' boxes for the fall planting of cucumbers and summer and winter squashes to keep them from shading their neighbors in the garden as well as giving them a bit more room to spread out as well.
 I will be making an A-frame trellis out of bamboo poles and chicken wire this weekend to provide a climbing structure for the back/north-most row that will have cucumbers and spaghetti squash. I am planting 4 varieties of zucchini on the front, south-most row which include 3 new variates in addition to the Black Beauty that have done well despite the invasion of squash vine borers.
I also removed the herbs from the middle garden bed in the above shot to make room to double my strawberry patch into a second box for next year with the prolific runners from this year's plants that I have been rooting in containers.
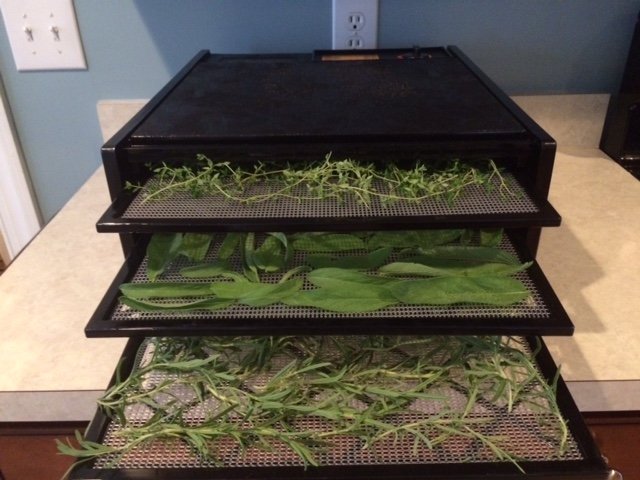
The most handsome specimens of rosemary, sage, parsley and thyme were put into terracotta containers and the rest were dried in the inaugural run of my food dehydrator, crushed and stored in spice jars.
 To me, the expression 'making hay while the sun shines' means thinking about where the food on my table in January will come from when I am drowning in the abundance of summer.
Inadvertent Homage
...to Scarborough Fair on my deck. Companion planting 1670 style! Here is the Simon and Garfunkel version if you need to get the song unstuck from your head.
Saving Seed - Tomatoes
One of my goals for this year's garden is to save more of my own seeds for varieties I know I will be planting year after year. Saving my own seed moves my garden a little closer to being self-sufficient and maybe more importantly, by picking the best of the crop to save seed from year after year, I will be naturalizing the seeds to the place where they are grown instead of having seeds ideally suited to growing somewhere else.It is important to note that while the seeds of hybrid varieties can be saved, what grows from those seeds will likely have little resemblance to the previous year's plants. With the heirloom varieties I grow, I should be able to save seeds with reasonably reliable results but with normal variations.I am familiar with the fermenting method of saving tomato seeds but wanted to research my options to see if another method would work. I ran across this video that shows how to save tomato seeds on a paper towel.Fermenting definitely has benefits, the fermenting process helps break down the outer coating on tomato seeds, improving germination rates the following year, but increases the amount of seed handling and well...comes with a stinky, moldy cup hanging around for a week or two.I went with the paper towel method because it is easier, cleaner and has the added bonus that the bits of paper towel that will be torn off with the seeds next year will help hold moisture next to the seeds as they start to germinate.These Roma tomatoes will be popped in the freezer until I have enough to make a big batch of sauce to can or freeze.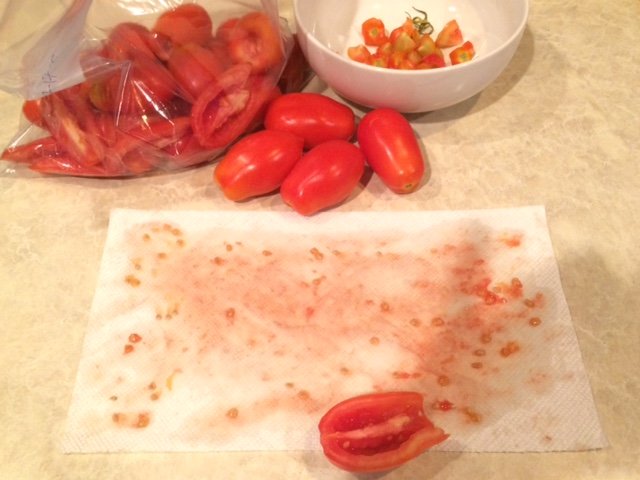 Selecting only the best specimens to save seed from and making sure to save from more than one plant to maintain genetic diversity. Each paper towel of seeds is from one tomato.
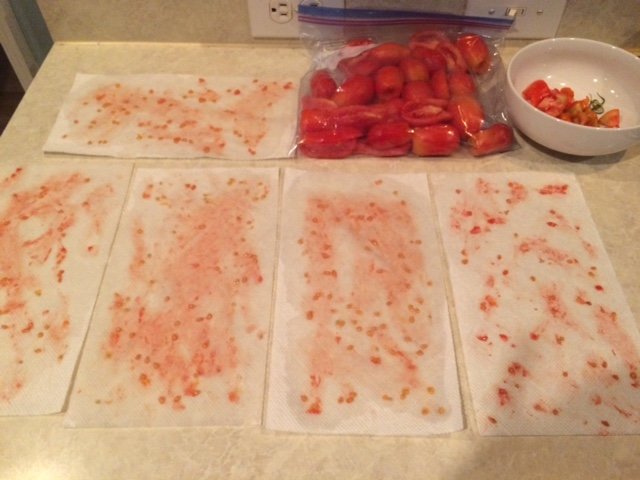 I have also been saving seed from the Amana Orange Beefsteak tomatoes.
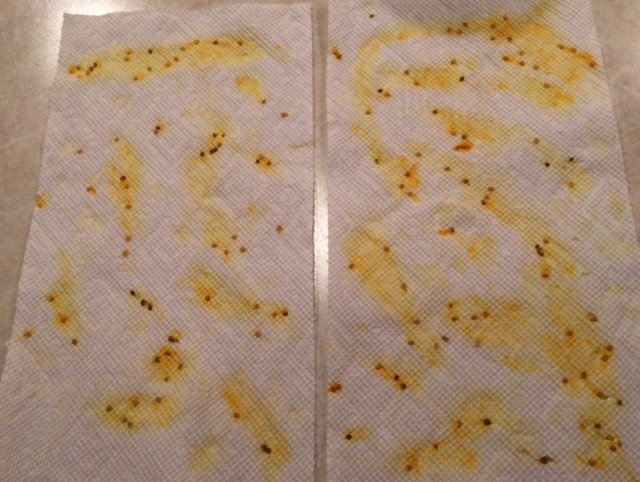 The seeds have been drying on wire shelving for a little over a week and are ready to be packaged, labeled and tucked into my seed box for next year.
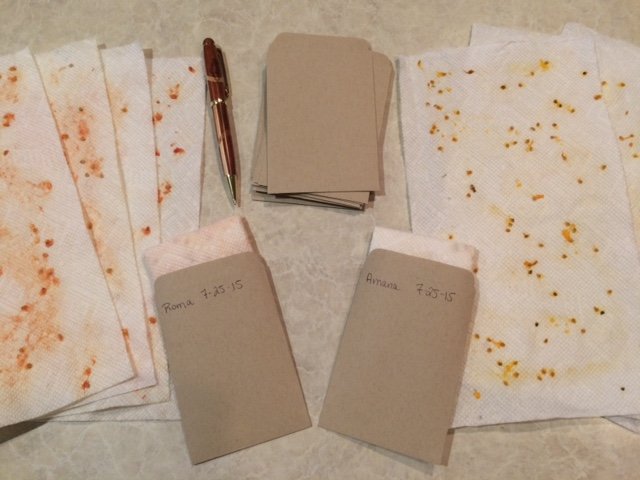 I plan to test the germination rate in late winter when there is still time to order and start seeds if this method does not prove viable. If it does work well, I will be looking to use something similar to paper towels again next year, but with recycled material that has not been bleached. Kaizen!
Green With Envy
Last fall when I decided that edamame would be a fun and delicious addition to the garden, the only seed variety available through Baker Creek Heirloom Seeds was a variety called Envy.The spring crop consisted of roughly 130 plants in a 4'x4' bed. When the spinach and lettuce bolted in mid-May, I used some of the left over seeds to cover crop those areas until fall when I can replant leafy greens and start my fall planting of the soybeans.Earlier this month I harvested the official crop with a weigh in of 1lb, 6oz of pods. The cover crop plants are producing just as vigorously as the spring crop so it looks like I will have a bonus mid-summer harvest of Envy.Envy soybeans which average 2 beans per pod are on the smallish side for those of us used to restaurant edamame with its typical 3 and 4 beans. I did not use soil inoculants and relied on the native bacteria population in my soil to create a symbiotic relationship with the plants and form the nodules that help fix nitrogen. The nodules were stripped from the roots and worked back into the soil as I harvested the plants.
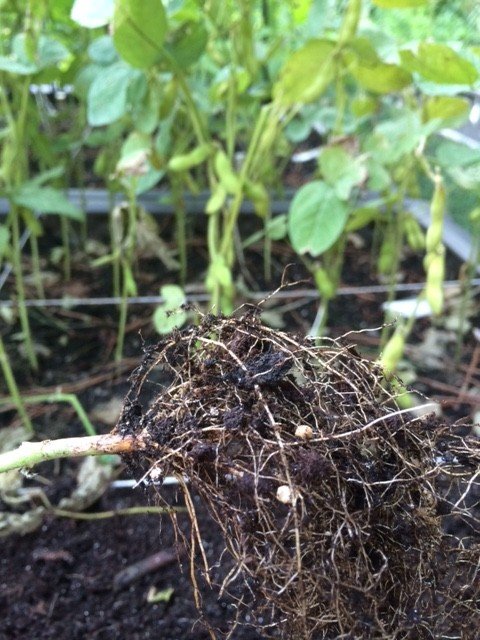 The pods were washed and blanched for 3 minutes, then plunged into ice water to stop the cooking process inside. They were dried by being spread on a towel then blotted with a second towel before being divvied into 3 freezer bags of about 7.3oz each.
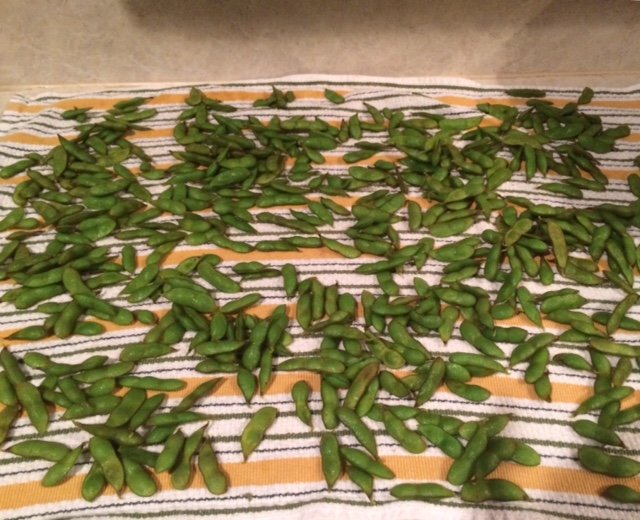 I waited about 2 weeks before preparing one of the packages to assess the entire enterprise.
 Lessons learned:1. Baker Creek has since added two other soybean varieties one of which averages 3 beans and I want to try it for my fall planting and compare the total pods/weight produced. The Envy were delicious and I am looking forward to preparing my cover crop harvest in a few weeks.2. Of the entire harvest, only a handful of beans had the fibrous taste and texture of being on the plant a little too long. I count this as a success since it was my first year growing and the harvest instructions say things like "harvest before the pods have a hint of yellow color". This is the sort of advice that only works AFTER they have a hint of yellow.3. The 7+oz servings were a little large, so next time I will prepare in 5oz packages.4. Edamame will now be a permanent fixture in my garden.