As I plan and finish planting my fall garden this weekend I have to give a shout out to the tomatoes, red bell peppers and serrano peppers that don't seem to care that it is the middle of September and are continuing to bloom and set fruit in earnest.Working around these summer hold-overs is a little easier with the addition this weekend of the last two 4-x-4 beds I had planned to add. I have also added 8 1-x-1 boxes that will be used for summer squash next year but are mostly available for planting now.I am trying a non-dwarf variety of collards this fall and trying parsnips for the first time. I have added permanent supports along the back portions of beds (blue lines on garden plan) by way of 6' metal fence stakes hung with rungs of coated wire to act as a ladder for climbing plants. It also works well as support for triangle shaped row covers.
 If all goes well I will be serving spinach at Christmas and collards on New Years all fresh from the garden!
Nature v Nature
 I planted a second run of squash and zucchini in early August and they are faring much better against squash vine borers and squash bugs but two of the plants, the acorn and spaghetti squash have an aphid problem.I have used ladybugs on an indoor aphid infestation before with excellent results. The ladybugs did not explore the house but stayed at the all you can eat buffet of aphids on my indoor spinach and lettuce. Within a few days the greens were completely aphid free and the ladybugs died off as their food dwindled, but not before starting a second generation.In the cool of this overcast morning I released 1,500 ladybugs on my squash, with the heaviest concentration on the acorn and spaghetti.
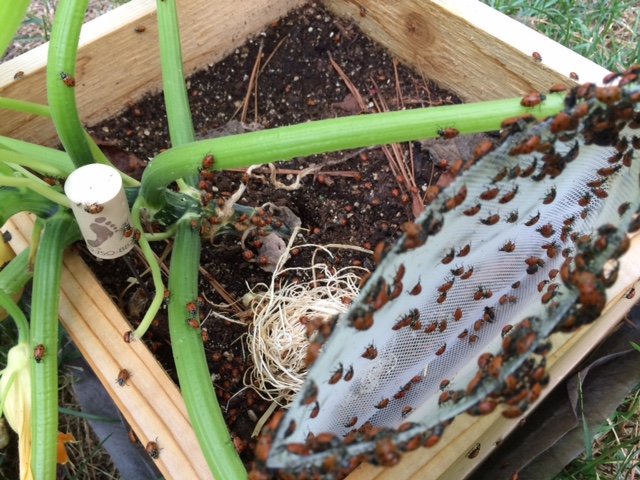 The ladybugs fanned out over the squash plant, honing in on the aphid colonies which seem to like gumming up unopened blossoms in particular.
Farming the Burbs
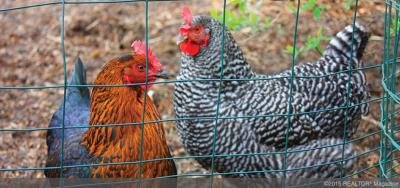
Two of my great passions collided earlier this week when a colleague forwarded a recent REALTOR® Magazine, July/August 2015 issue article about the "emerging real estate niche" of backyard agriculture. My day job that I absolutely love is in the real estate industry where we like distinct categories for types of real estate. Properties are classified as either Residential or Farm, but never as Residential Farm. The effect of these categories makes it appear that houses are only incidental on farm land and that land (and its growing capacity) is only incidental to residential properties.
It warmed my heart to see REALTOR® Magazine run such an excellent, in-depth article on urban agriculture. The Rise of the Backyard Farm is both extremely well written and very timely. It is time for these two passions to collide - in real estate we talk about how owning property helps grow wealth over time, but when real estate and suburban agriculture meet additional dividends are paid seasonally.
Growing Sustainability - Part 1
 I have three 24 x 36 cork boards in my home office, devoted to helping me organize my garden. They are filled with seasonal planting guides for Zone 7, my own garden plans for seasonal and succession plantings, companion planting charts and the listings of vegetables by family that make sense of them.Interspersed between these work-a-day printouts are some of my favorite images of the WWI National War Garden Commission (1910-1920) and WWII Victory Garden (1930-1950) posters. I have long been a fan of these nostalgic images for what they represented at the time and what they represent to me* today.The images, although quaint and nostalgic now, when they were produced were part of a bold initiative that is difficult to imagine ever repeating itself in the light of 21st century politics. The world leaders at that time asked of their people to be a little more self-sufficient for a while, to do a little more for themselves and consume less, not for any immediate personal benefit for those making the sacrifices of growing and preserving their own food, but for "the greater good". They also represent a generally accepted, society endorsed back to the land movement long before the Foxfire books of the 1970s solidified in the public mind that unless you are a farmer by trade, growing a significant portion of your own food is a hallmark of an alternative lifestyle.With the War Gardens of WWI and later the Victory Gardens of WWII, ordinary households economized during rationing. They grew, ate, canned and preserved some of their own produce to nourish their families and to help the war efforts by using less of the nation's production and transportation resources so those resources would be available elsewhere.It was a time of lofty and aspirational ideals and pulling together for a purpose larger than ourselves. Some of the growing ideas and solutions promulgated during that period, particularly of WWII were a mix of good and pretty bad, but the overall concept was a good one - a decentralized food system, self-sufficient citizens and a government system that supported the bootstraps mentality that has become a hallmark of those generations.
 *Results may vary
Making Hay While The Sun Shines - Part 2
Even before the surprise bounty of figs arrived on my doorstep Saturday morning, I had a hefty agenda for my first full weekend back home in my garden in 3 weeks.Serranos - picking them at both the green and red stages, sharing some with friends and preserving the rest. My favorite methods for enjoying serranos in the off season are vacuum packing them fresh and whole and freezing or else sliced in half, seeded, roasted on the grill and then vacuum packed.
 (roasted, vacuum sealed and frozen)
Cucurbits - I needed to put out 8 new 1'x1' boxes for the fall planting of cucumbers and summer and winter squashes to keep them from shading their neighbors in the garden as well as giving them a bit more room to spread out as well.
 I will be making an A-frame trellis out of bamboo poles and chicken wire this weekend to provide a climbing structure for the back/north-most row that will have cucumbers and spaghetti squash. I am planting 4 varieties of zucchini on the front, south-most row which include 3 new variates in addition to the Black Beauty that have done well despite the invasion of squash vine borers.
I also removed the herbs from the middle garden bed in the above shot to make room to double my strawberry patch into a second box for next year with the prolific runners from this year's plants that I have been rooting in containers.
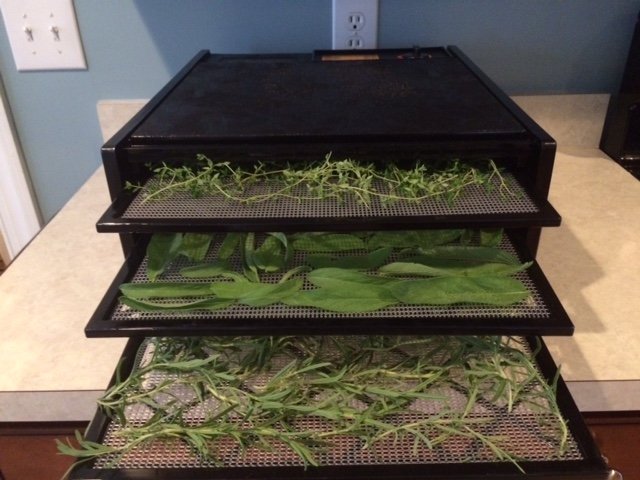
The most handsome specimens of rosemary, sage, parsley and thyme were put into terracotta containers and the rest were dried in the inaugural run of my food dehydrator, crushed and stored in spice jars.
 To me, the expression 'making hay while the sun shines' means thinking about where the food on my table in January will come from when I am drowning in the abundance of summer.
Making Hay While The Sun Shines - Part 1
After three weeks of much longer than normal hours during the week and attending conferences on the weekends in service to my day job, I had a two whole days at home with my garden this weekend. I found it doing very well despite my glancing harvests and prunings, but also in need of some more thoughtful attention so I started on a prioritized list of what needed to be done...and then the doorbell rang. Earlier this year I had struck up a conversation about fig trees with one of my subdivision neighbors after he noticed my 2nd year trees that are a lot more potential than production even at this point. He had shared with me how productive his established tree was with quantities that sounded more fantasy than fact compared to the 25 or so figs I expected off of my 4 immature trees. He arrived at my door on Saturday morning with a bag full of figs, the third such of the morning he told me!Most of the figs were at the peak of ripeness, but a few were so soft that even the weight of figs on top of them in the bag distorted and split them. I popped the bag into the fridge to firm up the softest of them and stop the ripening of the freshest and went online to see what my options were.Canning jam and/or preserves was the resounding result, despite changing search terms several times and going 4 search results pages deep. I did not feel ready to do canning on my own and hadn't purchased a hot water bath canner yet, but there was this unexpected bounty to deal with...An hour and multiple recipes later, I was ready to make my first fig jam. The recipe was simple:8 cups quartered figs3.5 cups sugar3 TBS lemon juice
 It was an easy recipe and the figs smelled and tasted heavenly as they and the sugar slowly caramelized on my stove top. I was nervous about the canning part but made an emergency phone-a-friend to my canning mentor to ask a few questions and by the end was more focused on saving every drop of this delicious concoction than thinking of all the ways the canning portion might go wrong.
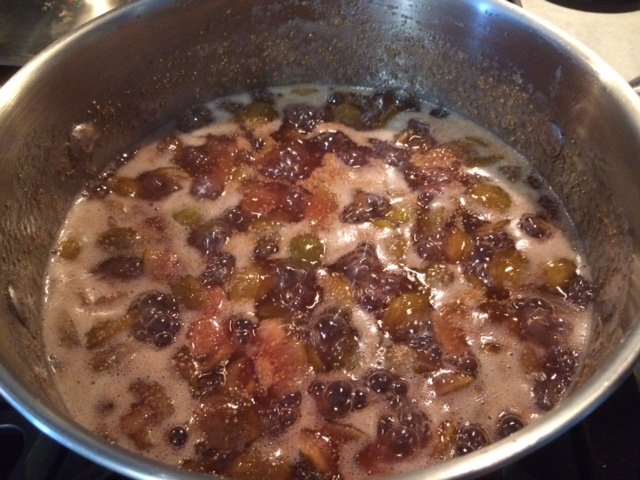 I ladled the preserved into 5 half-pint jars and prepared my first hot water bath.
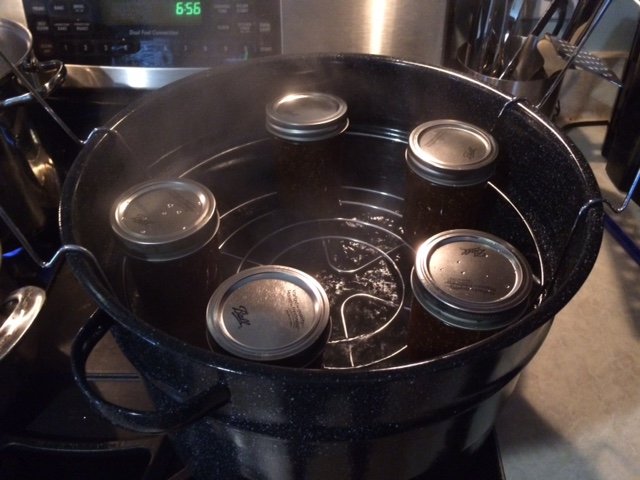 They cooked for 10 minutes in the hot water bath after it returned to a boil. I set the jars on cooking cooling racks to increase the air circulation and was pleased to hear my first *pop* of a sealing jar not long after.
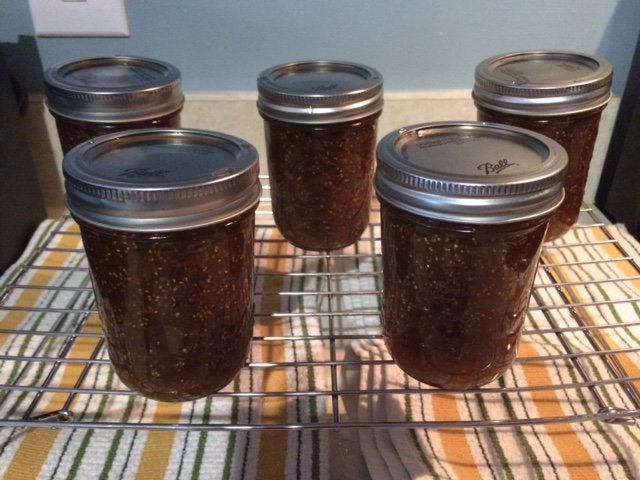 All 5 jars popped within 3o minutes of coming out of the bath and are now labeled and in my pantry.The title of this post is about doing what needs to be done when the opportunity exists - trying a new fig jam recipe and canning for the first time were not on my to-do list, but I couldn't let this unexpected windfall go from overripe to compost in my refrigerator without at least trying my hand at canning to preserve the bounty.As a postscript, I had enough jam for 5 3/4 jars and since the 6th jar did not meet the headspace requirements for the canning recipe, I sealed it the same as the others but put into the refrigerator immediately after it too popped. Tonight's desert was a french bread smothered in this homemade jam and it was wonderful!
Saving Seed - Tomatoes
One of my goals for this year's garden is to save more of my own seeds for varieties I know I will be planting year after year. Saving my own seed moves my garden a little closer to being self-sufficient and maybe more importantly, by picking the best of the crop to save seed from year after year, I will be naturalizing the seeds to the place where they are grown instead of having seeds ideally suited to growing somewhere else.It is important to note that while the seeds of hybrid varieties can be saved, what grows from those seeds will likely have little resemblance to the previous year's plants. With the heirloom varieties I grow, I should be able to save seeds with reasonably reliable results but with normal variations.I am familiar with the fermenting method of saving tomato seeds but wanted to research my options to see if another method would work. I ran across this video that shows how to save tomato seeds on a paper towel.Fermenting definitely has benefits, the fermenting process helps break down the outer coating on tomato seeds, improving germination rates the following year, but increases the amount of seed handling and well...comes with a stinky, moldy cup hanging around for a week or two.I went with the paper towel method because it is easier, cleaner and has the added bonus that the bits of paper towel that will be torn off with the seeds next year will help hold moisture next to the seeds as they start to germinate.These Roma tomatoes will be popped in the freezer until I have enough to make a big batch of sauce to can or freeze.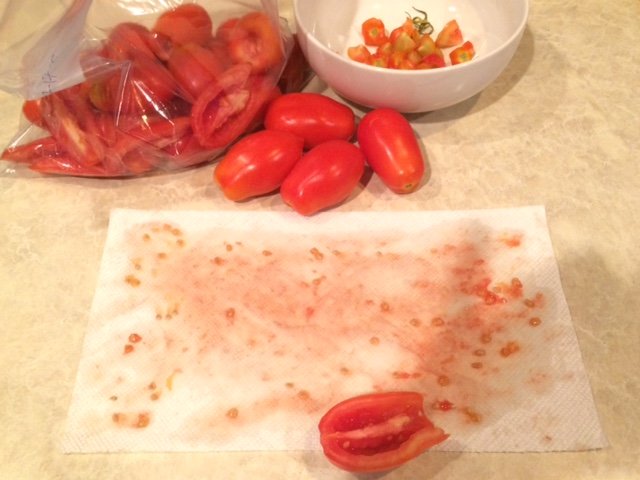 Selecting only the best specimens to save seed from and making sure to save from more than one plant to maintain genetic diversity. Each paper towel of seeds is from one tomato.
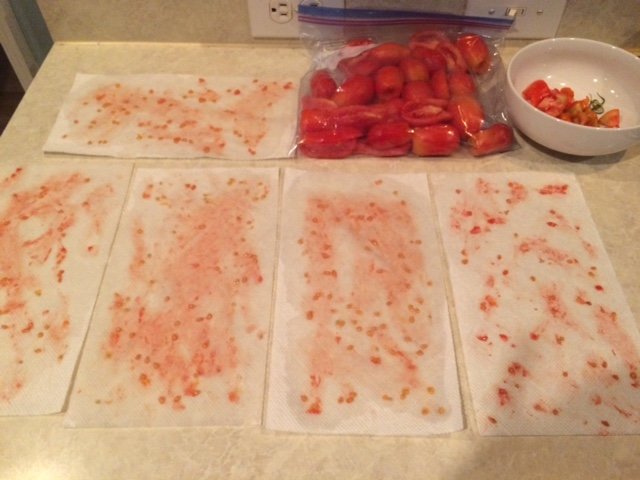 I have also been saving seed from the Amana Orange Beefsteak tomatoes.
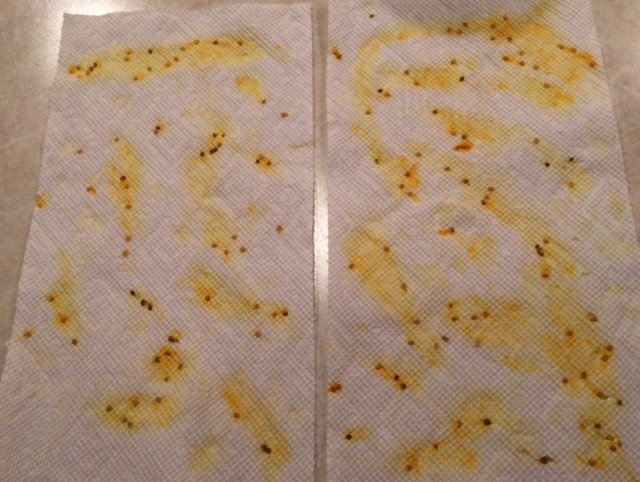 The seeds have been drying on wire shelving for a little over a week and are ready to be packaged, labeled and tucked into my seed box for next year.
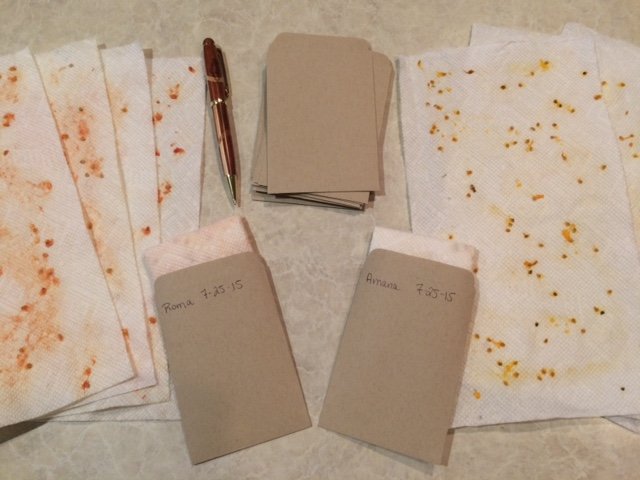 I plan to test the germination rate in late winter when there is still time to order and start seeds if this method does not prove viable. If it does work well, I will be looking to use something similar to paper towels again next year, but with recycled material that has not been bleached. Kaizen!
Green With Envy
Last fall when I decided that edamame would be a fun and delicious addition to the garden, the only seed variety available through Baker Creek Heirloom Seeds was a variety called Envy.The spring crop consisted of roughly 130 plants in a 4'x4' bed. When the spinach and lettuce bolted in mid-May, I used some of the left over seeds to cover crop those areas until fall when I can replant leafy greens and start my fall planting of the soybeans.Earlier this month I harvested the official crop with a weigh in of 1lb, 6oz of pods. The cover crop plants are producing just as vigorously as the spring crop so it looks like I will have a bonus mid-summer harvest of Envy.Envy soybeans which average 2 beans per pod are on the smallish side for those of us used to restaurant edamame with its typical 3 and 4 beans. I did not use soil inoculants and relied on the native bacteria population in my soil to create a symbiotic relationship with the plants and form the nodules that help fix nitrogen. The nodules were stripped from the roots and worked back into the soil as I harvested the plants.
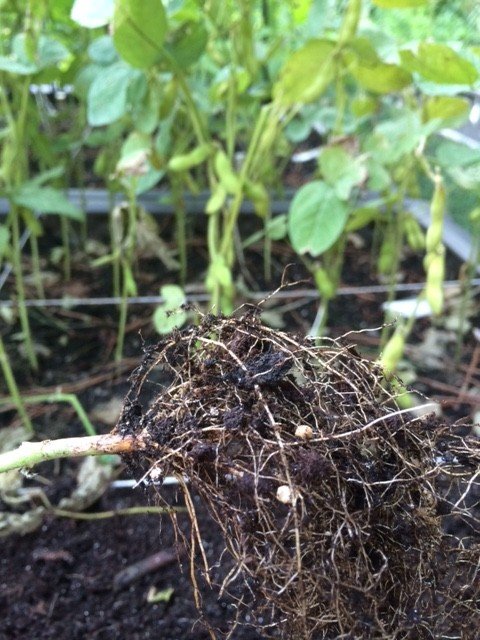 The pods were washed and blanched for 3 minutes, then plunged into ice water to stop the cooking process inside. They were dried by being spread on a towel then blotted with a second towel before being divvied into 3 freezer bags of about 7.3oz each.
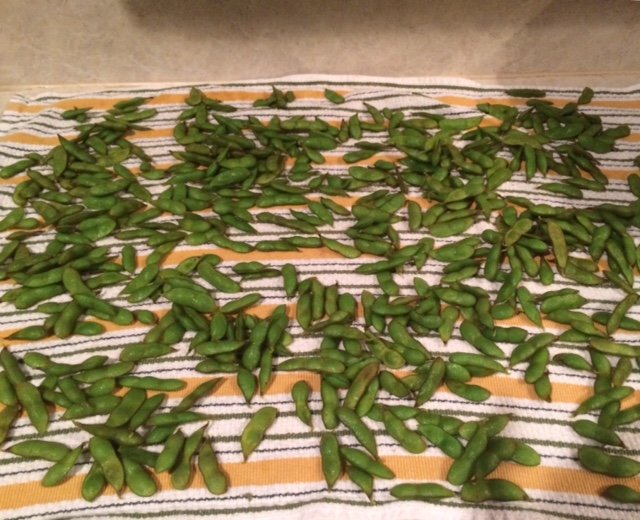 I waited about 2 weeks before preparing one of the packages to assess the entire enterprise.
 Lessons learned:1. Baker Creek has since added two other soybean varieties one of which averages 3 beans and I want to try it for my fall planting and compare the total pods/weight produced. The Envy were delicious and I am looking forward to preparing my cover crop harvest in a few weeks.2. Of the entire harvest, only a handful of beans had the fibrous taste and texture of being on the plant a little too long. I count this as a success since it was my first year growing and the harvest instructions say things like "harvest before the pods have a hint of yellow color". This is the sort of advice that only works AFTER they have a hint of yellow.3. The 7+oz servings were a little large, so next time I will prepare in 5oz packages.4. Edamame will now be a permanent fixture in my garden.
Canning - Green Beans
 I received a wonderful offer today from a dear friend and colleague. A hands-on canning lesson with fresh Blue Lake bush beans from her husband's garden. The photo below captures about half of his very productive garden. He is growing okra, summer squash, beans, broccoli, tomatoes, eggplant, basil and I am sure I am missing at least a few more.
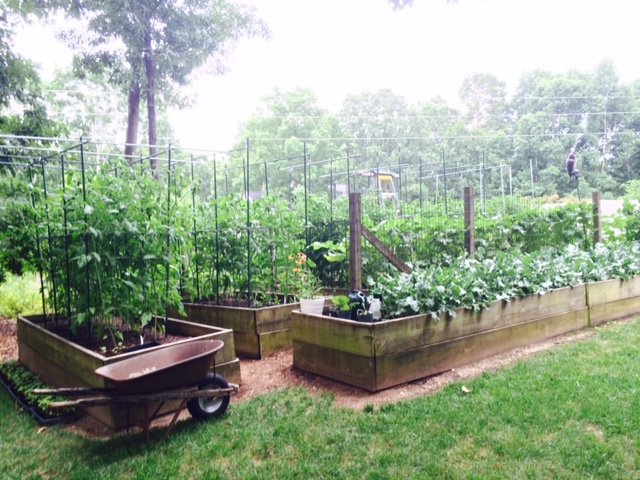 The Ball canning recipe book was open on the island and 6 quarts of beans were cleaned and snapped in a large bowl. We used a colander to submerge a portion of the beans into boiling water for 5 minutes.
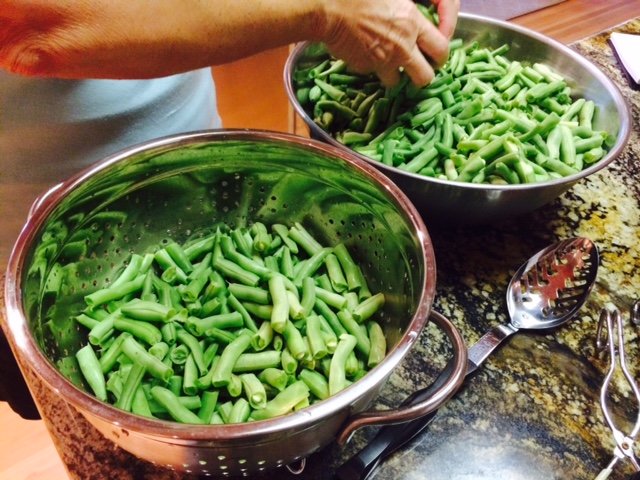 The 1 quart canning jars fresh out of a 180 degree hot water bath are started with 1 tsp. salt before being packed with freshly cooked beans to 1" from the top of the jar. The cooking liquid is then ladled in to the same 1" from the top. Long sticks are used to remove air bubbles by compressing the cooked beans inward from the jar and working all the way around it a couple of times.
 The liquid is topped off to 1" again and the neck of the jar cleaned to prepare it for being sealed.
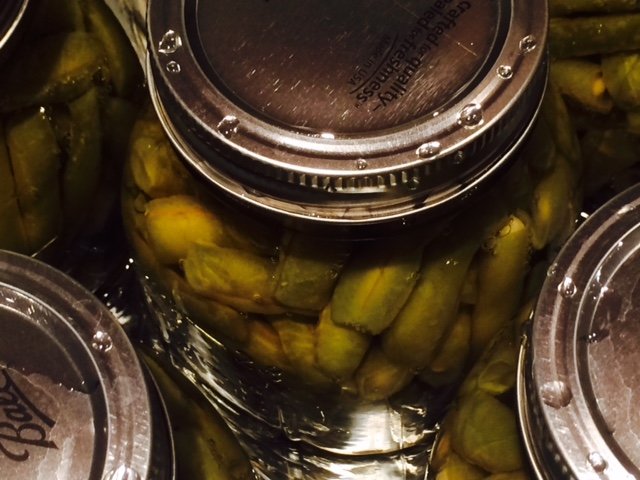
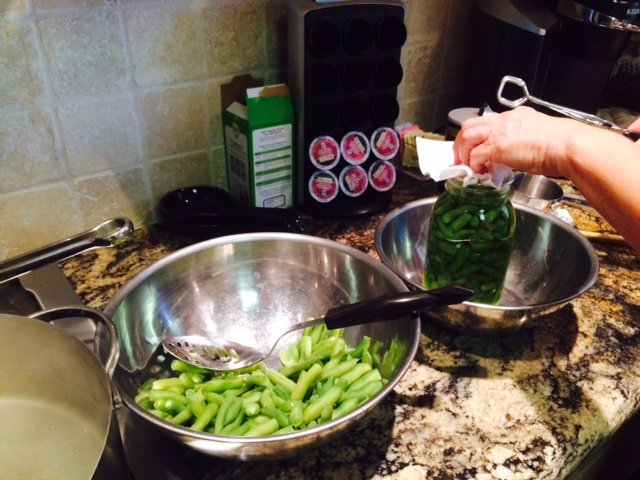 The hot lid is added fresh from the hot water bath (180 degrees) with tongs.
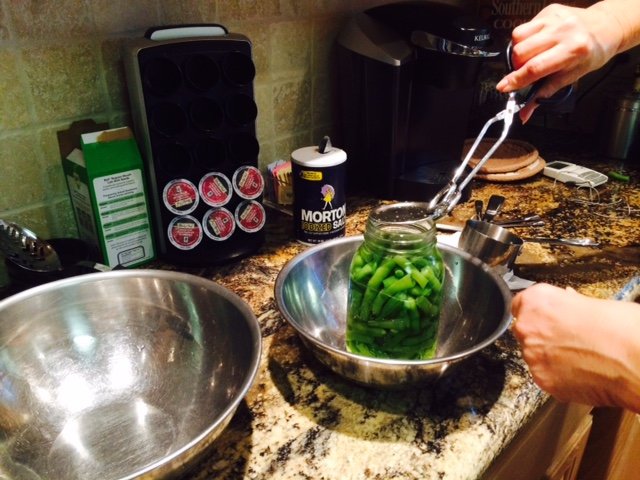 The lids are screwed on hand-tight and jars are packed into the pressure cooker.
 The recipe instructions for the pressure cooker are very specific. Eventually the pressure reaches 10 lbs and the beans are cooked another 25 minutes.
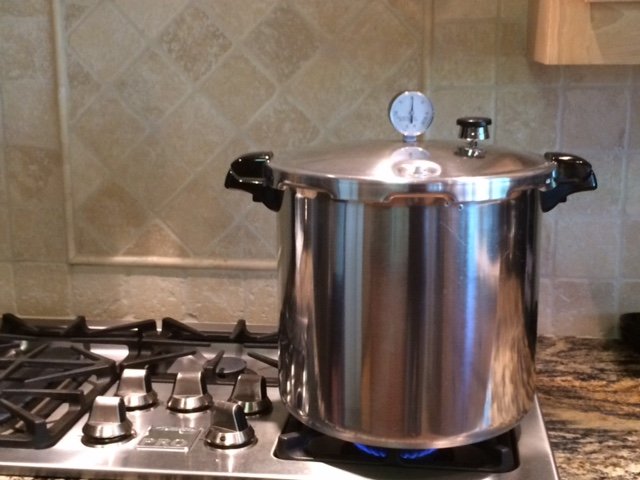 At the end of a couple of hours of wonderful company and conversation and a bit of vino, she had canned green beans and I had more experience and comfort with canning.
 On top of the lesson, she generously shared 2 quarts of the newly canned beans as well as some of their fresh garden bounty. I thanked her by graciously inviting myself to an upcoming tomato canning :)
Early July Update
This morning I started 22 strawberry runners and found another 8 that were already well established in the existing strawberry bed. I began this year with 32 plants and I think I will start 2016 with double the number.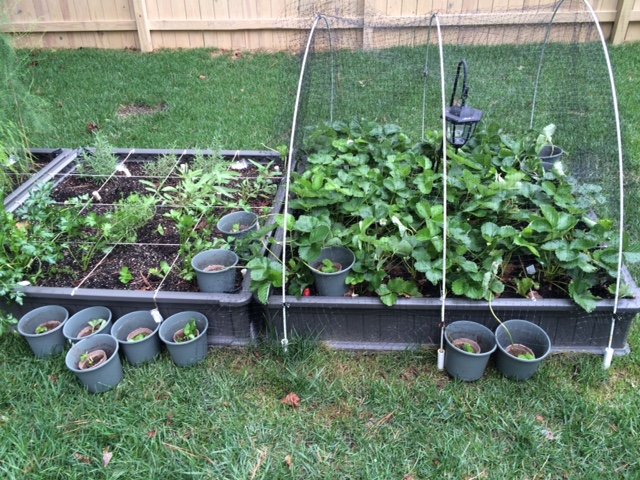 The serrano peppers are being harvested green but I am letting a few go to red also. They are hotter than jalapenos but I think they have a better flavor also.
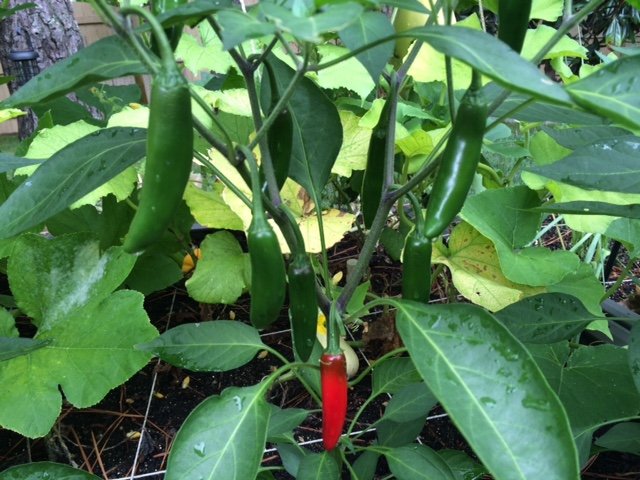 The Blue Beauty heirloom tomatoes are so pretty as their color develops. The bird netting has so far kept all of the slicing and roma tomatoes safe from birds and squirrels. My fingers are crossed that this holds true when they ripen too.
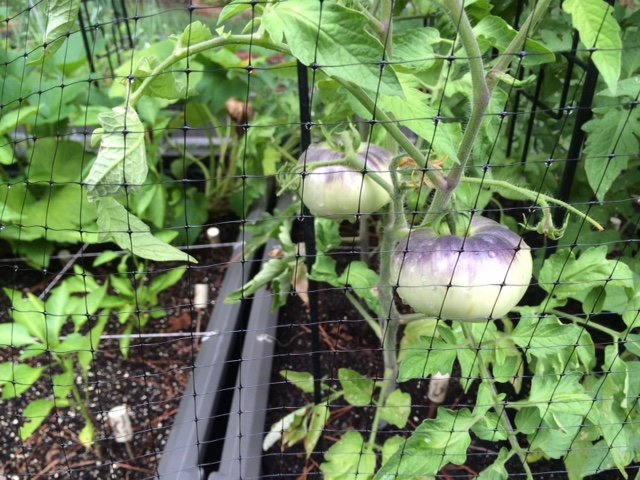 The first year blackberry has sent up one good cane so far which is secured to the trellis and is topped at 6.5' to encourage lateral shoots.
 The edamame is very close to harvest. I will freeze them in serving size vacuum sealed packages and hope to have enough to enjoy them throughout the year until the next harvest.
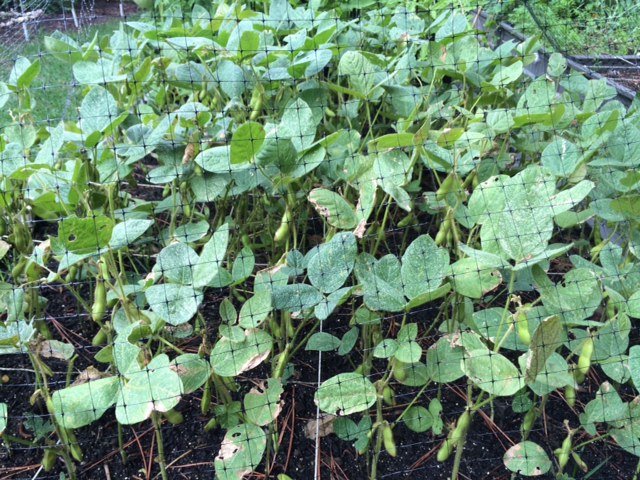 That's the garden update for this overcast and occasionally rainy July 3rd.
Two New Acquaintances
I made two new acquaintances in the garden this week. The first was the American Goldfinch of which the National Audubon Society book says of their call "bright per-chick-o-ree, also rendered as potato-chips", my new favorite bird fact.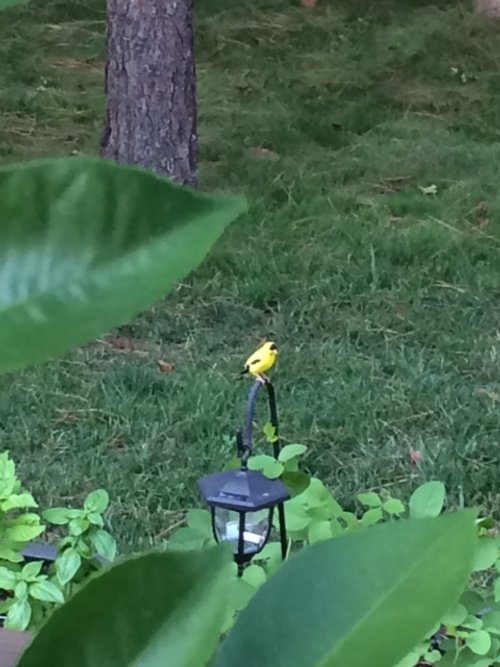 The other new acquaintance this week was not as charismatic as the goldfinch...
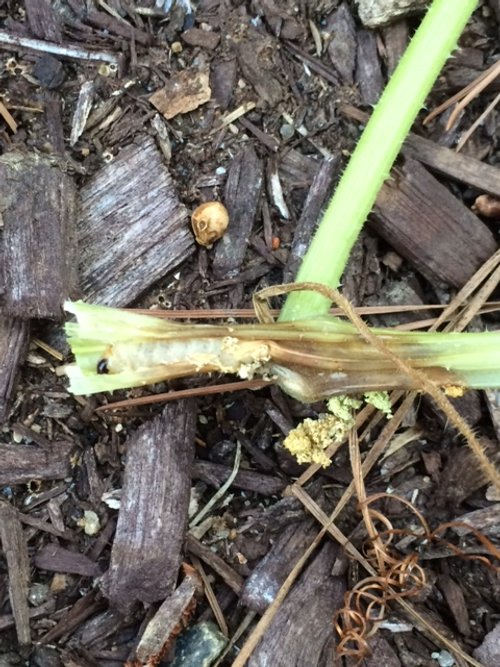 The Squash Vine Borer is the squash killing larvae of the Melitta Curcurbitae moth. As its name indicates, it bores into the hollow stems of squash plants and begins eating the plant from the inside out. Because the pest is hidden with the plant, organic treatments are pretty hands on. The best options are either to perform plant surgery and open up a little of the stem following the bore hole to find and dig out the worm and kill it or, and this will be my preferred method, running a toothpick through the plant stem, skewering and killing the larvae but leaving the plant less damaged than opening a larger hole.Fingers crossed my spaghetti squash makes it though the aggressive acupuncture treatment!
Learn As You Grow
Between now and November the most common phrase in my Google search history will be "when to harvest..." followed by the common name of a first year plant in my garden that is showing signs of being nearly there.In general, operating on a need-to-know-basis with my garden works well for me. A quick search told me that I have some time before my first year spaghetti squash will need to be harvested. But it's not without it's misses too. I mistakenly expected my first year zucchini to continue to grow at something like the rate they did from the 1" to 4" phase. One of the young zucchini shot to 11" and a whopping 1 lbs. in just two days! Researching revealed that I had missed the mark on this one and would need to watch more closely to catch them at the 6"-9" size for the best flavor and texture.
 I do look forward to the day when I have grown my staple cultivars so many times that much of it becomes second nature to me. But I will always experiment a little too, trying new plants and varieties to keep this learn-as-you-grow wonder alive.For the record, my overgrown zucchini was still delicious and I don't think it was just because it was the first one.
A Collaborative Dance
I think of my garden as a collaborative dance with nature and I am always looking for ways to be a better dance partner.My garden is exactly one square foot smaller than the maximum allowed in the HOA rules so I was loathe to use valuable garden space for non-edible plants. Instead I decided to make flower beds around the pines and larger sweet gumballs that occupy the back 1/3 of my yard.When selecting what flowers to grow, I tried to stick with varieties that are native to this area to be low maintenance, have something blooming from spring through fall and hopefully be just like mom's cooking to the wild pollinators.Lucky for me this includes Lily of the Valley and Balsam (below, pink) with Canterbury Bells and Candytuft (below, purple) being naturalized.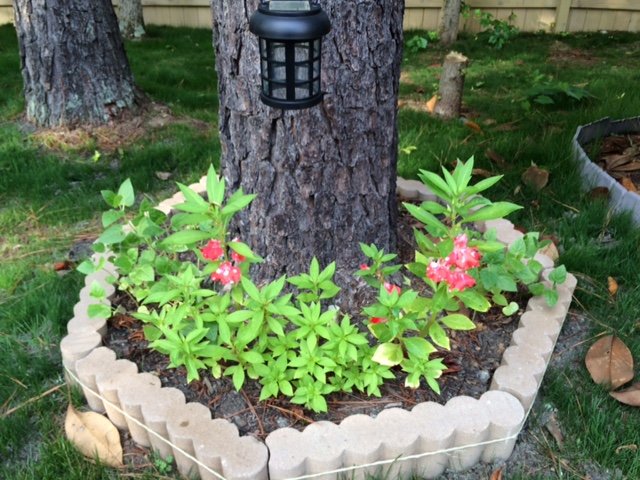
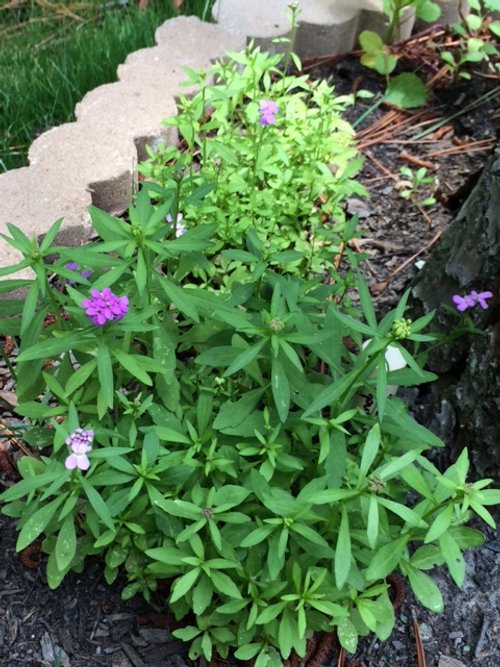 Despite not being native, I couldn't resist Mother of Pearl Poppys (below) and Four O' Clock Sweets.
 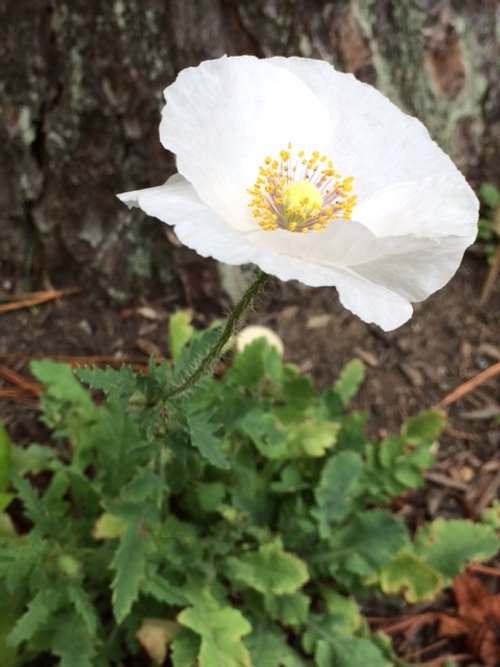 And in spring a colleague gifted me with some pink Calla Lily bulbs.
 I also have a Malope mix, 3 varieties of sunflowers, Blue Zebra Primrose and Zenias growing.I am trying to encourage nature by giving it what it needs, then mostly staying out of the way while it grows delicious food.
Spring Garden to Summer Garden
It is June and the turning from the spring garden to the summer garden is well underway. I am quickly picking the last of my lettuce before it bolts meanwhile the edamame is flowering.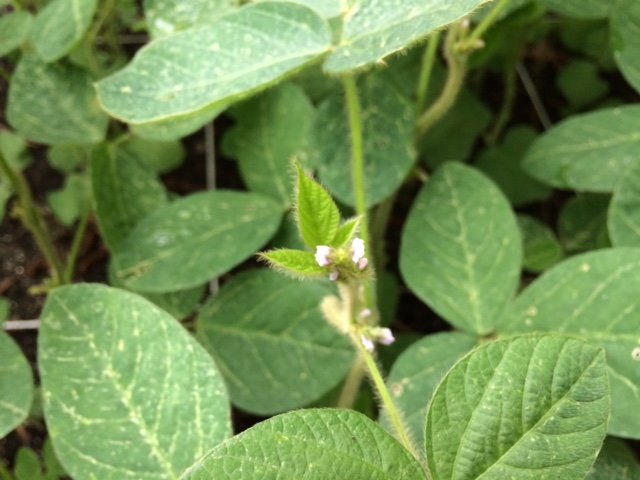 The sugar snap peas, snow peas and strawberries are in full swing while the blueberries are just beginning to take on a purple hue.
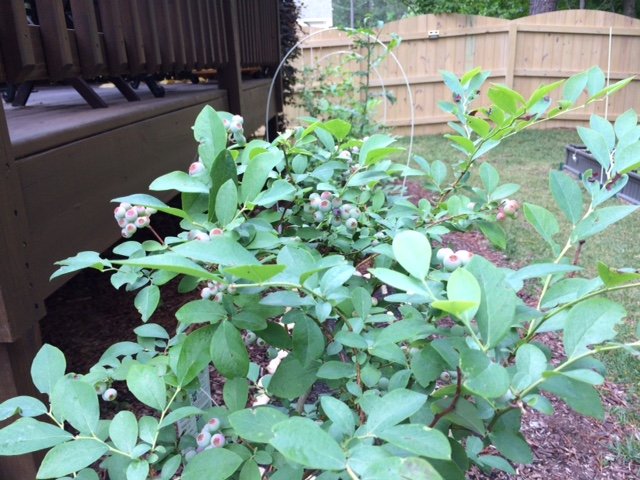 The serrano peppers are fruiting and flowering at the same time.
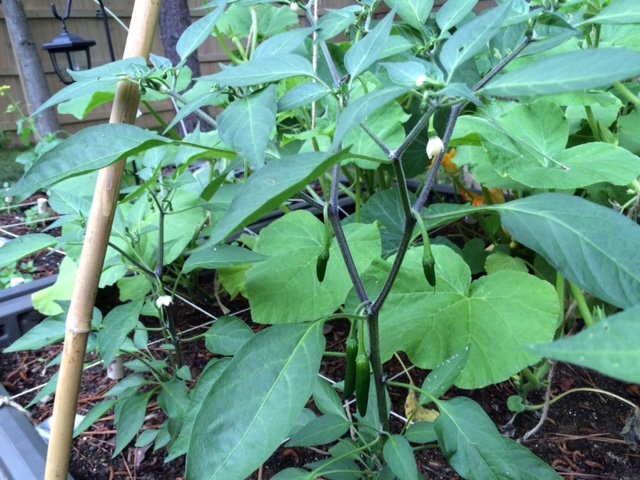 I am pleased with how many spears my first year asparagus crowns are throwing up. The shoots are tall and flopsy when they grow out so they are staked for support during this first unmolested this year. I hope to be able to sample a couple of spears next year and in 2017 they should be healthy, happy crowns I can harvest from.
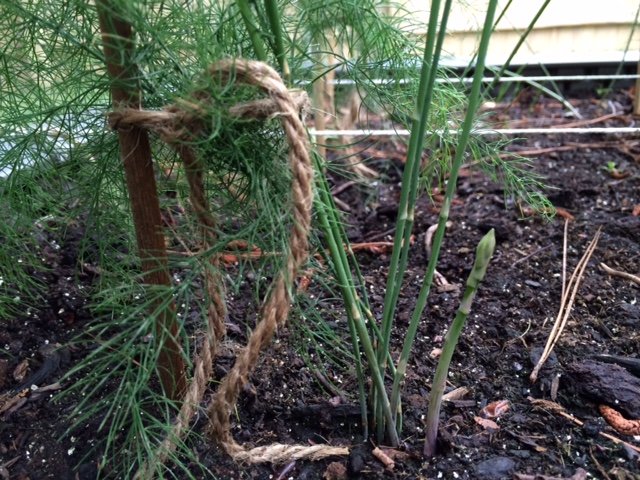 The spaghetti squash have reached the top of the 8' bamboo supports and are making good use of the top bar to spread out.
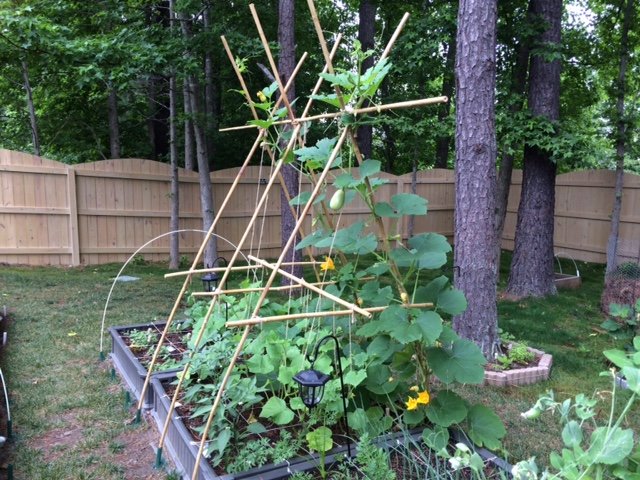 Not pictured:The blackberries are hard, green nubs right now. The pepper plants are flowering as are the zucchini, cucumbers and tomatoes. The chard is getting large and I hope to try stuffed chard leaves soon. The acorn squash is blooming but staying much closer to the ground than the climbing spaghetti.I love this time of year!
On Kaizen and Garden Logs
Kaizen is a word that has one meaning in the dictionary sense and a wholly different meaning in the popular mind. The dictionary definition is "change for the better", but over time, this word has morphed through its adaptation both as a business philosophy and a motivational concept into something more akin to "constant, incremental improvement" - that we should seek to do each and every thing we do, no matter how small or great, a little better than we did the day before. The philosophy that has grown up around kaizen doesn't contemplate ever actually reaching perfection, only continually striving to be closer to it. Jiro Dreams of Sushi is a fantastic documentary that displays the heart of kaizen.Gardens are a great place to embrace the practice of kaizen as they will enthusiastically share with us laundry lists of ways that we could plan, execute, research or just plain do better each day, week, month and year. And luckily we can keep garden logs (or journals) to make note of all of those over and under-estimates, the good ideas and the bad, the lucky guesses and unlucky ones, and of course, how much produce was grown in the garden during the year.Gardens and gardeners are both works in progress, but it is the gardener that must implement the incremental improvements. Noting in my log that my cilantro and spinach bolted this year during the week I was in DC this May, I can plan to harvest a couple of weeks earlier next year and keep more of my spring harvest. Garden logs are also helpful to review in fall/winter when planning the following year's garden. What varieties did well and which did not? Was one variety slower to bolt?Approaching our gardens with the philosophy of kaizen, not always getting it right but always improving and logging on a regular basis what we see happening in the garden is less discouraging when things don't work out as envisioned than "anything worth doing is worth doing right the first time" for new growers.Here's to always growing!
Garden Toy - Hod
Zucchini and squash season is just around the corner and I had been looking for a replacement for my lovely, but somewhat lightweight flower basked that I use to gather what needs picking and what's for dinner (usually the same things) each day. After a few searches for garden baskets I ran across this shiny new toy, I mean garden hod. Pros:Food-grade vinyl-covered mesh means you can hose off produce right in the hod before bringing it inside16 quart capacity means plenty of space for an evening's bountyFlat bottom is perfect for when I want to use a small bowl to separate out small itemsSturdy construction...see belowCons:Sturdy construction - this hod is 3.5 lbs. when emptyPersonally, I am okay with the one con. I garden for a number of reasons and needing to exert a little physical energy to get my food is one of them.I give my new garden hod an A+
Night Garden
My back deck has a beautiful view of the garden and is one of my favorite places to be in the evenings. A few months ago I had the idea of adding some solar lanterns to the garden beds primarily as a safety precaution against guests tripping over raised-bed edges after dark but also to add a little visual interest to the garden during my evening reveries.Since then, the soft light of the lanterns kissing the plants good night has become one of my favorite ways to view the garden. My camera of choice (and necessity) is an iPhone 5s, so it is limited in its nighttime shooting capabilities even with the myriad of apps available so I shot this one just after dusk when the lights had begun their night watch but there was still enough light to not turn out a grainy image.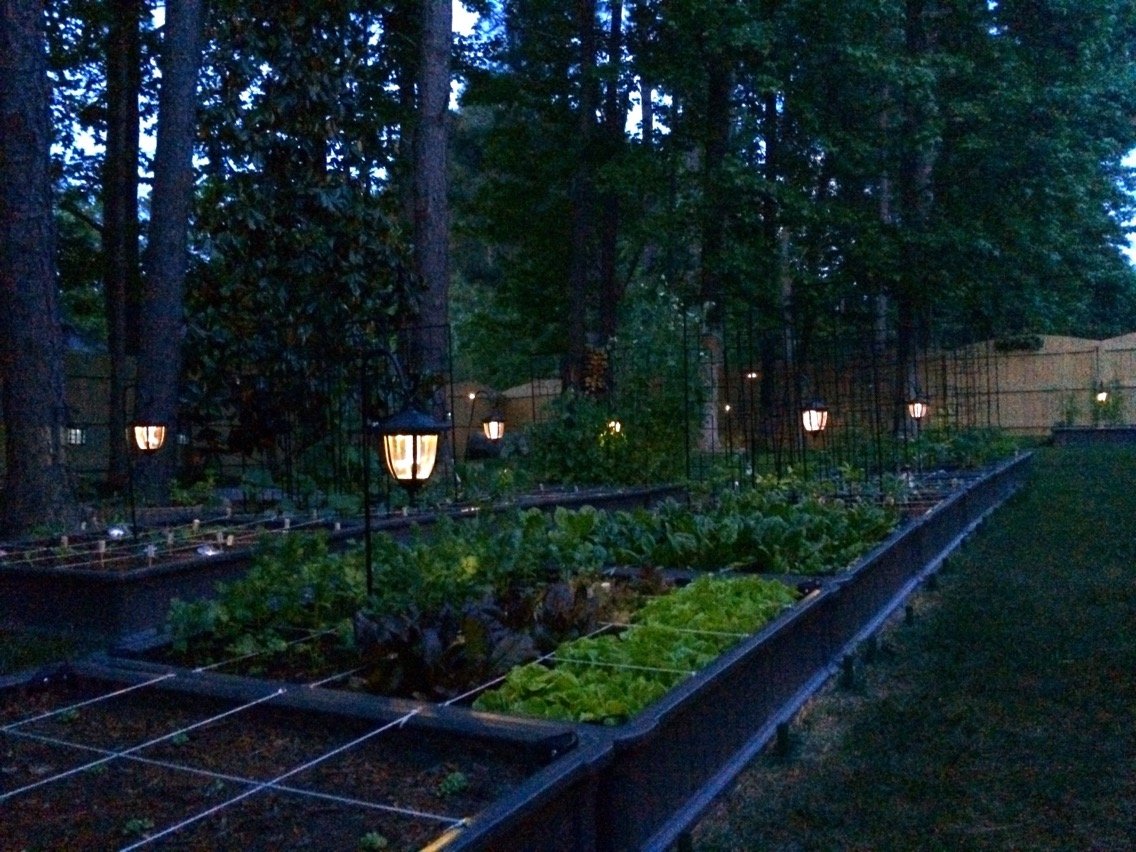
A Tisket, A Tasket
A tisket, a tasket, sandwich greens in my basket!Tonight's dinner shopping spree in the garden was for accouterments for egg salad sandwiches. Clockwise starting at the bottom is some spinach that is on the verge of bolting in this warm weather, some lola rosa lettuce, cilantro and those olive green sprigs at the 3 o'clock position are sweet pea shoots (trimmed from the growing tips of my producing plants) which add a light, sweet pea taste to any sandwich, salad or stir-fry. In the center are leek thinnings which I use like scallions and add a lightly onion taste to dishes.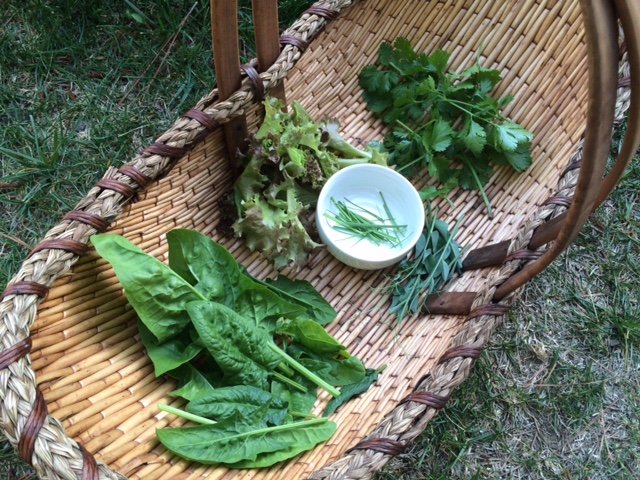 If you to garden but don't want to dine on salads nightly, I agree wholeheartedly and suggest we make a nice sandwich instead!
One Man's Trash is Another Man's Haute Cuisine
In the past couple of years microgreens have become a buzzword on restaurant menus and news articles talking about their nutritional content compared to the mature varieties of the same plant. Some early studies show that there may be reason to laud their nutritional content and chef's put them on their menus because they are delicious to the eye and the taste buds.I grow a number of indoor microgreens (basil, cilantro, mustard, arugula, beets) to add color, flavor and crunch to dishes but you don't have to set up a grow area to get some microgreens in your diet, you can just repurpose your plant thinnings.This year I overseeded my regular and dwarf varieties of pak choy and basil in my backyard garden because I was using 3 year old seeds and suspected that I would have low germination rates. Surprise, the seeds germinated at a remarkable rate and now I have a whole lot of extra seedlings that will have to be removed to make room for the vigorous individuals to grow to maturity. Rather than cut them and toss them in the compost, I let edible seedlings grow enough to be used as microgreens before snipping them down.Below you can see that I thinned one square of the dwarf pak choy that will be used as microgreens today and I will save thinning the square next to it until I can use them in a meal. Waste not, want not!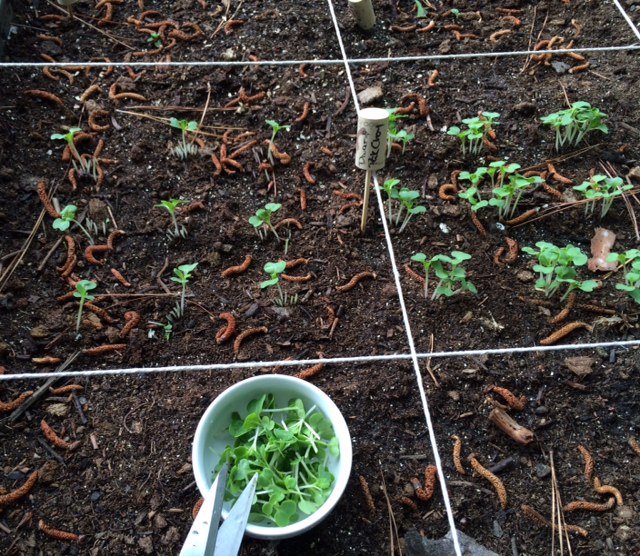 Whether you are just thinning seedlings or clipping microgreens to go into your next meal, be sure to use scissors or a similar sharp pruner to cut the plants at soil level. If you pull on your thinnings, you may damage the delicate roots of the one you have selected to grow to maturity.
Getting The Most From Your Harvest
For urban growers, getting the most production out of the smallest space possible is an absolute priority! I can grow a lot in my 224 sq ft space, but there are ways of making what you grow give you even more.One of my favorite methods of getting more is to harvest leaves, but allow the plant to regenerate and keep growing more leaves. Not all garden plants are suitable to this, but if it is an herb or vegetable you grow for the leaves, chances are that you can.Some of my favorite plants to steal from are cilantro, chard, spinach, lettuce, basil, oregano, rosemary, sage, thyme and parsley and you can do this even when they are quite young. The trick is to only steal a little from each plant so the plant can recover and continue to grow.Below are my young cilantro plants. I choose the largest, oldest leaves from furthest down the plant stem to leave the fresh young growth undisturbed and pinch off one or two from each plant or as much as is needed for a meal.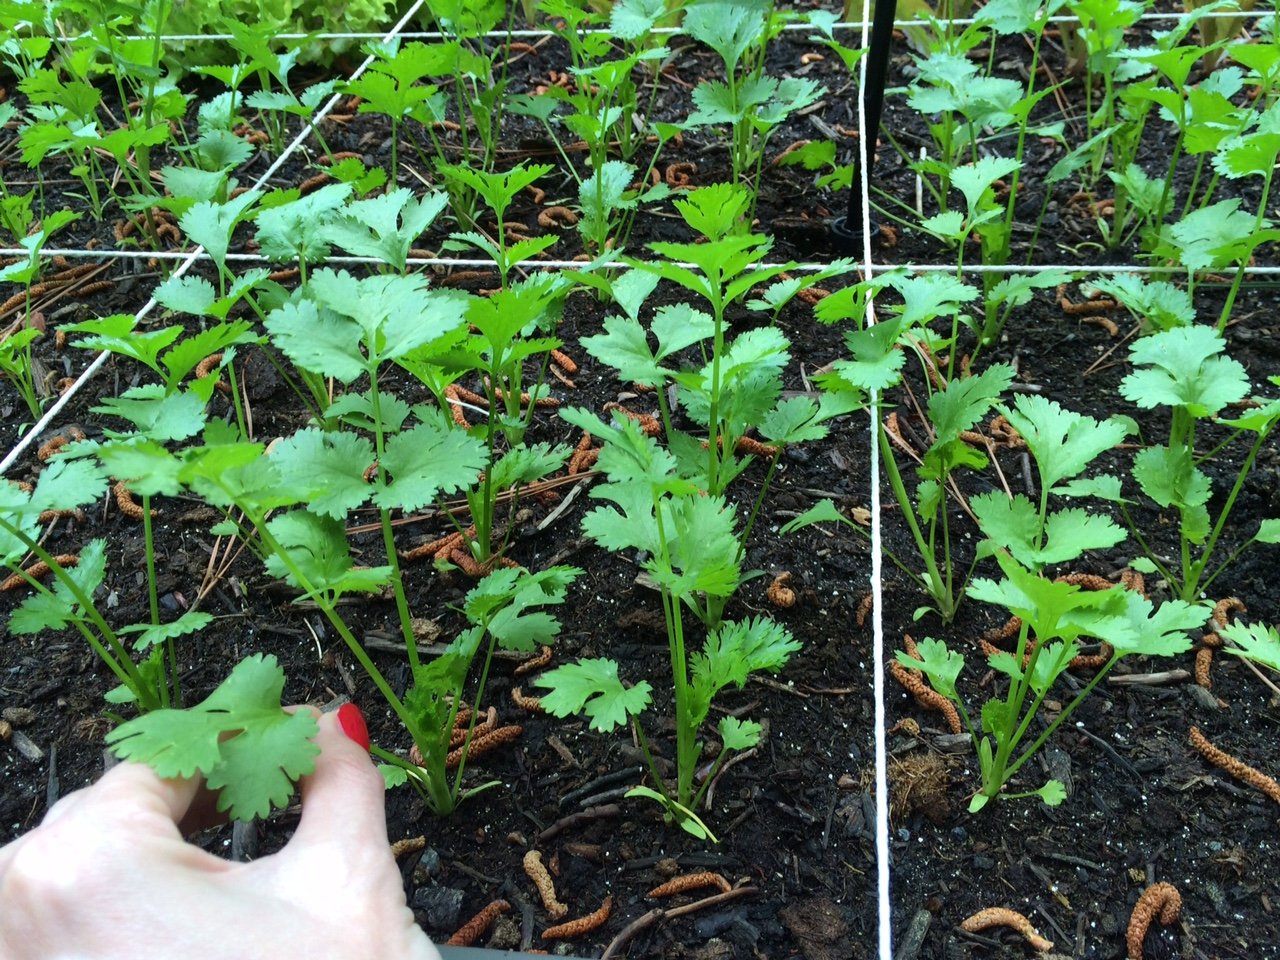 The spinach is more mature but I still want to keep the plants growing and only harvest what I need right before a meal.
 There is nothing fresher than still warm from the sun or wet from the rain.
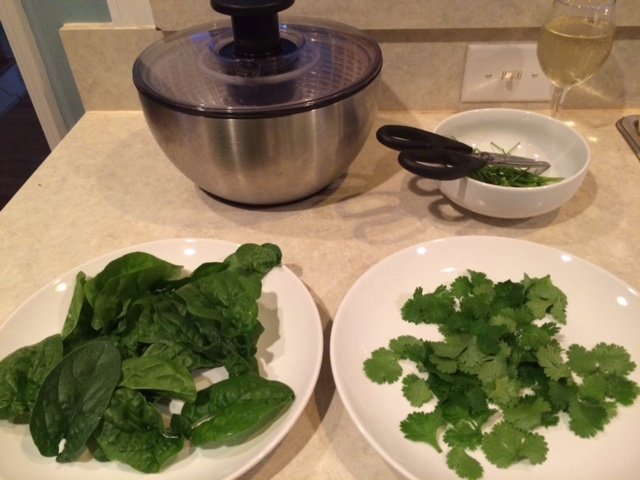 Who says you can't have your plants and eat them too :)*Note - even those little cilantro and spinach stems will be put to good use either as flavorings for stocks or to into the compost.