Each year between September and January the question of "what to grow" must be asked and answered by growers everywhere. This is the time of year when seeds are carefully saved, seed catalogs are perused and garden plans begin to be sketched out for the following year.Asking and answering the question of what to grow necessarily means also answering the question of what not to grow, i.e. "what to buy" the following year with the answer being - everything else.Wendell Berry spoke eloquently on the consumer side of agriculture with his often cited quote, "Eaters must understand that eating takes place inescapably in the world, that it is inescapably an agricultural act, and that how we eat determines, to a considerable extent, how the world is used." So this answer to "what to buy" is in many ways, just as important as what we chose grow.Consumers are considering this question of the provenance of our food more often today and answering it from a variety of perspectives such as the locally-seasonally available movements to reduce food miles like the 100 Mile Diet (and its many variations), the Fair Trade movement and the certified organic movement. We are setting personal standards and restrictions on what we can and will purchase.Though it doesn't have a name or a label, another way to look at growing vs. purchasing locally from other growers vs. purchasing locally after being transported from across the globe is to consider the water content. Fruits and vegetables in particular have incredibly high water content and shipping this water across the world with fossil fuels comes at enormous environmental impact.Foods that are high in water content are highly perishable so the varieties grown are selected for their ability to withstand the journey, not for their flavor or nutrition. The perpetual summer these commercially grown and shipped varieties create in our grocery stores crowds out consumer demand for locally grown produce when it is in season, impacting the number of US family farmers that can make a living growing food.So which foods make a great planned buying list? Outside of locally grown fruits and vegetables, purchased from local farmers when they are in season, buying dried foods which are light and unlikely to be damaged in transport compared to high-water foods helps keep local farmers farming and reduces the need to ship water from one part of the globe to another. Rice, wheat, oats and other grains as well as beans, lentils and pasta are all high in nutrition, lightweight compared to water heavy fruits and vegetables, have a long shelf-life and the water gets added by you when you are ready to use them.A few months ago I wanted to try making a dal fry (a Punjabi lentil dish) and found this great crock pot recipe for toovar dal fry over at The Novice Housewife which I made with only one modification - I added the tomatoes at the end of cooking the dish, not the beginning.The dal fry was fantastic and I wanted to investigate growing lentils myself. I quickly learned that the lentils used in the dish cannot be grown in my humid area so were not a candidate for future garden plans, but since they are a dried and nutritious food as well as being delicious, dal fry will remain on my menu.
Variations On A Theme - Potato Leek Soup
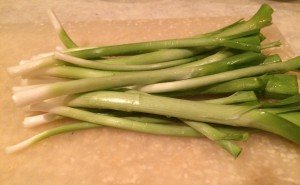
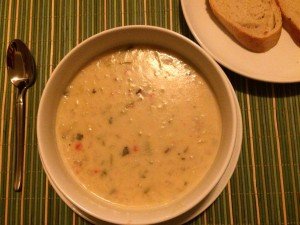
My favorite recipes are the ones that resemble a good canvas - a delicious backdrop that can be accentuated and modified by what is in season and/or on hand. Having just finished a post about an overabundance of serrano peppers, I wanted to do a variation on a fall favorite - potato leek soup.This year's leeks are on the thin side which I attribute to my north facing backyard garden, so I harvested roughly 3x the number I would normally use for this recipe.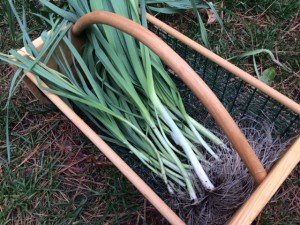
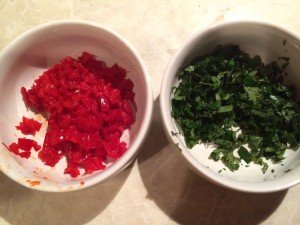
 I decided to add some kick to the background canvas and finely chopped 4 roasted red serranos from my freezer and fresh oregano.
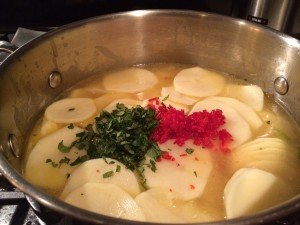 On it's own, this soup is mild but hearty making it a perfect backdrop for any number of flavor profiles.
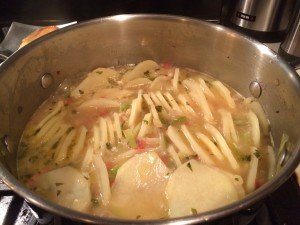 The genius of this soup is the mandolin sliced potatoes.
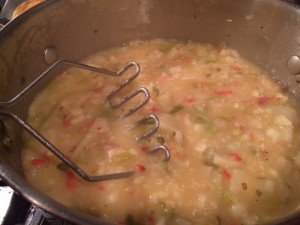 Once cooked through and gently mashed, they thicken the stock and the mashing breaks the potatoes into bite-sized pieces.
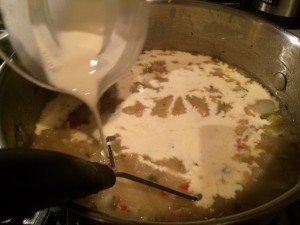 Add a little cream and cook on low for a few more minutes and voila!
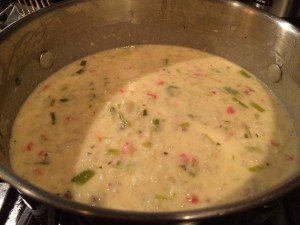 A delicious meal that varies depending on preferences and additions!
Cooking with Wilbur Scoville
My 3 serrano plants have produced so abundantly this year that even after freezing enough raw and roasted peppers to last until next year's harvest, giving away dozens more to friends and co-workers and drying many more to save seed, I am still drowning in the spicy, delicious peppers.I first learned the distinctive flavor and heat of these peppers back in 2010 after searching and trying one of those 'top secret restaurant recipes revealed' sites for the Chipotle guacamole recipe*. As soon as knife met serrano the unmistakable scent that I associated with Chipotle guac filled the air and I was sold on serranos and I have been growing them since.Serranos are a type of chili pepper that fits on the Scoville scale between between the less spicy jalapenos and the more spicy cayenne peppers. The Scoville chart has its shortcomings, but it is the closest thing to an authoritative ranking of spiciness of chiles that is in culinary use.What I like about serranos is that they have a taste, not just heat, so they add an actual flavor layer to dishes made with them, not just spiciness. I have not been able to find a chart on chili peppers and umami but my taste buds tell me serranos have it.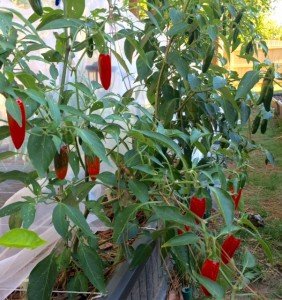 So as much as I love serranos, the still going bumper crop of this year's harvest has presented the challenge of what to do with all of these serranos!Drying ripe, red chiles to save seed made me wonder what the ubiquitous crushed red pepper flakes in my spice jars were made of. A bit of research later and I found that crushed (or dried) red pepper flakes are the result of red chiles, but can be made of a blend or different types and are usually not labeled with the type(s) of chiles inside and are generally blends of several types of peppers.Back in September I decided to gamble some of my over abundance on an experiment and dried about 10 fully red serranos and popped them into the food processor, seeds and all. The seeds are generally believed to convey even more heat to the dishes they are added to than the fruit body so most recipes specify that the seeds should be removed. But the crushed red pepper flakes I have seen always have visible seeds so I left them in.
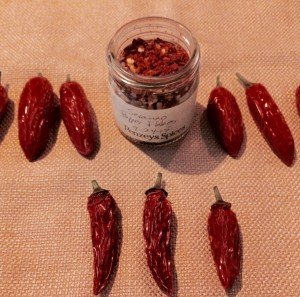 The experiment in making my own crushed red pepper flakes was a huge success! They definitely add the spicy kick that I am accustomed to with the store bought spice and my serrrano-only version is also adding the flavor and body that I associate with serranos.I am drying a second round of serranos to grind into spice mostly because I have to do something with them and I am beginning to think they might make spicy stocking stuffers :)*Interesting side note - the "official" recipe on the Chipotle website calls for jalapenos and is a possible red herring so that the made-at-home version does not taste quite as good as the restaurant version.
Fall Cleaning
Unlike houses that only gently admonish us once a year with the expression "Spring Cleaning", gardens ask that twice a year we get down and dirty and work until our backs and legs are singing to bring a temporary order before allowing nature to rule for another half-year.This weekend I have begun the Fall Cleaning in earnest. After a year of unmolested growth and rooting, it was time to cut back the asparagus and the strawberry runners and bed them down for the winter.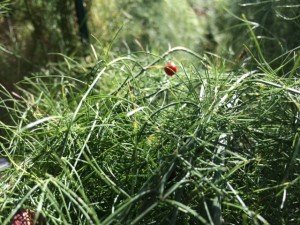 The 5' asparagus plants looked like little Christmas trees even before the seeds turned bright red two months ago and mimicked ornaments. In the past couple of weeks some of the green growth had started to yellow and then brown, signaling the time to remove the above ground part so the underground crowns could prepare themselves for winter.Asparagus has a long and storied history going back at least 5,000 years to Egyptian times and has the rare distinction of appearing in one of the oldest known recipe books De re coquinaria ("On the Subject of Cooking") from the 4th or early 5th century AD.
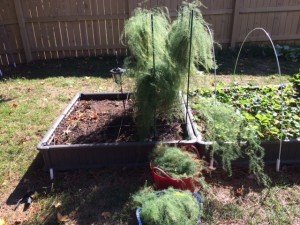 My Jersey Knight and Purple Passion asparagus crowns were transplanted into my garden in the earliest part of 2015 meaning that I could not harvest anything this first year and could only watch as the tender shoots grew to and then beyond edibility stage and finally into the fern like growth above.Although I could not eat the shoots this year, nothing goes to waste in my garden and the green growth that had fed and nurtured the crowns all year were cut into 2-3" sections to be composted and feed future growth.
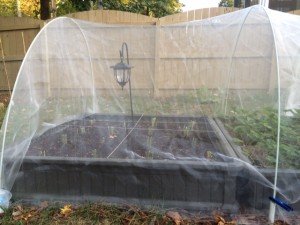 Once the asparagus and strawberry beds were cleaned up they were fitted with low hoops and covered with water and light permeable mesh that will hopefully keep the squirrels and pine needles out until spring.I have been looking into organic mulching options and ran across Leaf & Limb Tree Service's site that offered free wood chips delivered to your home (with some caveats). An inquiry has been sent and hopefully soon I will have my crowns bedded down for winter and am already looking forward to getting to harvest some of my own asparagus shoots next year!
A Fungus Among Us
It is the time of year when harvests from the garden begin to taper off, Halloween decorations go up and a girl's thoughts turn to fungus. It was this time last year that I was trying my hand at growing shiitakes on my breakfast bar.With the success of last year's shiitakes under my belt, I wanted to expand my repertoire this year and grow some Elm Oyster Mushrooms also.My first grow out of my box kit was productive and I am resting the kit for it's second grow now.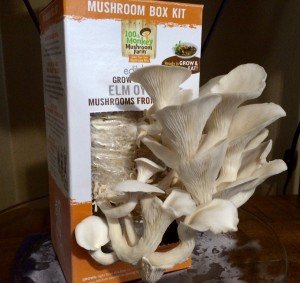 The 'grow your own mushrooms from a kit market' has exploded in the past couple of years and there are many great vendors out there, but I have to give a shout out to the wonderful and personal customer service from 100th Monkey Mushrooms. I love the helpful videos, the quick and helpful response via email for questions and their outstanding customer service - when I placed my order online for my Shiitake blocks and the Elm Oyster box a couple of weeks ago, Jimm called to let me know that the Shiitakes would not ship for another month and to see if I wanted to receive them together or separately.I am still waiting to see what (if anything) will happen with the 2 morel kits I ordered from Gourmet Mushrooms last fall. The information on the website and included with the kits' instructions said to not really expect a harvest until the second year which is finally less than six months away! I have been diligently adding compostable organic material to their separate 2'x2' raised beds to feed the mycelium for a year and a half and have my fingers crossed that in spring 2016 I will have the Holy Grail of forage mushrooms growing in my backyard!
The Race Is On
Haystack of Needles
It has been raining two things since Thursday night. Raindrops and pine needles. Going into my second fall as a North Carolina gardener, I have started calling them Piedmont sand because they are a pain to clean up and get into absolutely everything!Last year I made a leaf composting bin to reduce yard waste and build soil with all the sweet gumball leaves that fall into my backyard. With each infusion of leaves, pine needles inevitably found their way into the bin also and they take much longer to break down. After a year of compositing and being filled to the brim with leaves no less than 4 times, I am left with a small pile of garden gold mixed in with a small haystack of needles.
 There is conflicting information on whether pine needles add a significant amount of acidity to the soil as they break down or not so to be safe, this mixture will be used to compost around my acidity loving blueberry bushes.I am reasonably certain that the 8 pine trees in my backyard are Pinus taeda, the loblolly pine. They will shed needles almost continuously from now until spring. This year's needles will be used to mulch around the magnolia tree, which also likes a bit of acidity, after being broken down a bit with a weed wacker to speed up the decomposition.I hope to find a happy balance between the amount of needles the trees can produce in a two year span and the amount of pine needle compost/mulch I can use.
Fall Garden 2015
As I plan and finish planting my fall garden this weekend I have to give a shout out to the tomatoes, red bell peppers and serrano peppers that don't seem to care that it is the middle of September and are continuing to bloom and set fruit in earnest.Working around these summer hold-overs is a little easier with the addition this weekend of the last two 4-x-4 beds I had planned to add. I have also added 8 1-x-1 boxes that will be used for summer squash next year but are mostly available for planting now.I am trying a non-dwarf variety of collards this fall and trying parsnips for the first time.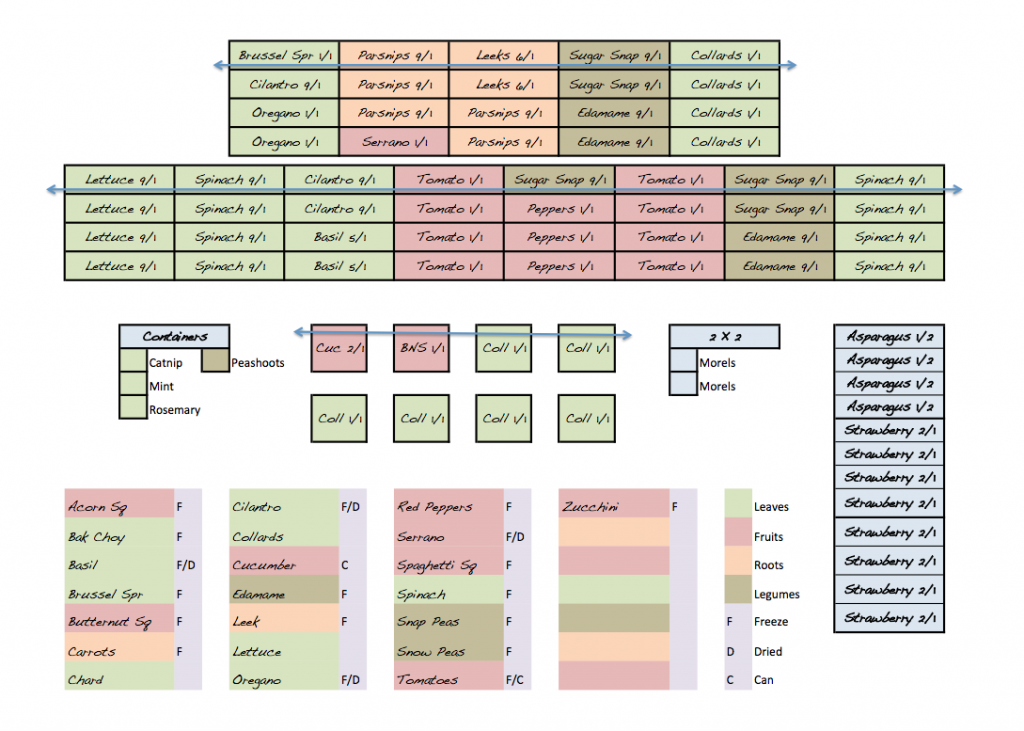 I have added permanent supports along the back portions of beds (blue lines on garden plan) by way of 6' metal fence stakes hung with rungs of coated wire to act as a ladder for climbing plants. It also works well as support for triangle shaped row covers.
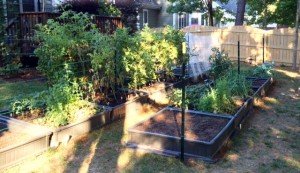 If all goes well I will be serving spinach at Christmas and collards on New Years all fresh from the garden!
Nature v Nature
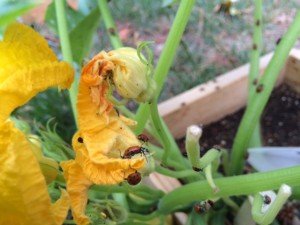
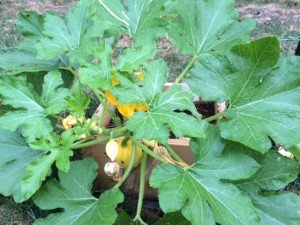 I planted a second run of squash and zucchini in early August and they are faring much better against squash vine borers and squash bugs but two of the plants, the acorn and spaghetti squash have an aphid problem.I have used ladybugs on an indoor aphid infestation before with excellent results. The ladybugs did not explore the house but stayed at the all you can eat buffet of aphids on my indoor spinach and lettuce. Within a few days the greens were completely aphid free and the ladybugs died off as their food dwindled, but not before starting a second generation.In the cool of this overcast morning I released 1,500 ladybugs on my squash, with the heaviest concentration on the acorn and spaghetti.
 The ladybugs fanned out over the squash plant, honing in on the aphid colonies which seem to like gumming up unopened blossoms in particular.
Farming the Burbs
Two of my great passions collided earlier this week when a colleague forwarded a recent REALTOR® Magazine, July/August 2015 issue article about the "emerging real estate niche" of backyard agriculture. My day job that I absolutely love is in the real estate industry where we like distinct categories for types of real estate. Properties are classified as either Residential or Farm, but never as Residential Farm. The effect of these categories makes it appear that houses are only incidental on farm land and that land (and its growing capacity) is only incidental to residential properties.
It warmed my heart to see REALTOR® Magazine run such an excellent, in-depth article on urban agriculture. The Rise of the Backyard Farm is both extremely well written and very timely. It is time for these two passions to collide - in real estate we talk about how owning property helps grow wealth over time, but when real estate and suburban agriculture meet additional dividends are paid seasonally.
Growing Sustainability - Part 1
 I have three 24 x 36 cork boards in my home office, devoted to helping me organize my garden. They are filled with seasonal planting guides for Zone 7, my own garden plans for seasonal and succession plantings, companion planting charts and the listings of vegetables by family that make sense of them.Interspersed between these work-a-day printouts are some of my favorite images of the WWI National War Garden Commission (1910-1920) and WWII Victory Garden (1930-1950) posters. I have long been a fan of these nostalgic images for what they represented at the time and what they represent to me* today.The images, although quaint and nostalgic now, when they were produced were part of a bold initiative that is difficult to imagine ever repeating itself in the light of 21st century politics. The world leaders at that time asked of their people to be a little more self-sufficient for a while, to do a little more for themselves and consume less, not for any immediate personal benefit for those making the sacrifices of growing and preserving their own food, but for "the greater good". They also represent a generally accepted, society endorsed back to the land movement long before the Foxfire books of the 1970s solidified in the public mind that unless you are a farmer by trade, growing a significant portion of your own food is a hallmark of an alternative lifestyle.With the War Gardens of WWI and later the Victory Gardens of WWII, ordinary households economized during rationing. They grew, ate, canned and preserved some of their own produce to nourish their families and to help the war efforts by using less of the nation's production and transportation resources so those resources would be available elsewhere.It was a time of lofty and aspirational ideals and pulling together for a purpose larger than ourselves. Some of the growing ideas and solutions promulgated during that period, particularly of WWII were a mix of good and pretty bad, but the overall concept was a good one - a decentralized food system, self-sufficient citizens and a government system that supported the bootstraps mentality that has become a hallmark of those generations.
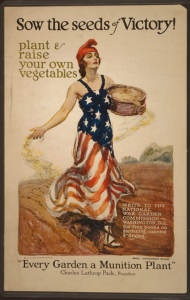 *Results may vary
Rocking in the Kitchen
I received a gift today from a gardening friend in the mid-west. My friend had no way of knowing I had my eyes on these for a while now. I had first seen the Ulu knife of Alaska a couple of years ago in a video about chopping herbs and had been interested since.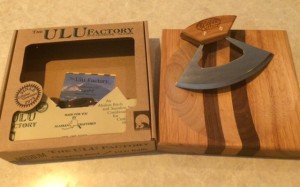 I had some herbs that had been dried over the weekend so I popped them in the bowl side of the cutting board and tested it out. The rocking-cutting motion is distinct from what most of us are used to with a relatively straight blade and a flat cutting board, but I can see how with a little practice this would be extremely effective!A big thank you to my friend for the gift. Sharing (seeds, tips, surplus produce, etc.) seems to be hallmark of the gardening soul and I am grateful to have been bitten by the bug and be counted among its ranks!
Seeding the Future
One of my goals for my 2015 garden is to save more seed. Previously I had saved only cilantro/coriander and some flower seeds, but I am turning a corner in 2015 and saving as many seeds from the varieties I grow as possible. The corner of my home office has become the space for drying seeds to be saved for next year's planting.Some of the seeds I am saving are edible as seed, like the Titan Sunflowers I am growing this year in honor of my years in Kansas. These (and the other Titans) will be split between seeds for planting and snacks.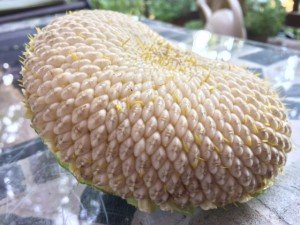 But most are seeds for planting's sake, saving the best and brightest from this year to plan(t) for next year.
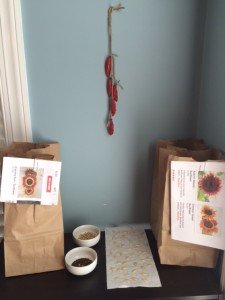 Right now I have some serrano peppers, 3 varieties of sunflowers, spaghetti squash, balsams and candy tufts seeds drying. I will be adding golden acorn squash and oregano to my corner soon.By saving seed from the plants that did best this year, I am selecting those that are most likely to do best in my specific micro-climate again next year, preserving genetic diversity (always a good idea), saving a bit of money in my garden plan for next year and creating a greater level of sustainability for my little acreage and those that want to share in the surplus of seeds.Not a bad way to start the weekend :)
Making Hay While The Sun Shines - Part 3
The wonderful thing about being taken under the wing of a traditional southern food mentor is that in addition to the lesson at hand, there are other tantalizing tidbits sprinkled throughout the lessons like breadcrumbs, just waiting for me to pick up the trail.During my green bean pressure canning lesson, the utensil drawer was opened to look for some other object and the Norpro Wood Corn Cutter and Creamer made its debut into my life. My mentor explained that device is used to cream corn, which she does annually with Silver Queen, her favorite hybrid variety. The tool was dropped back into the drawer and the green bean lesson continued.That night I began researching the tool and process of making and preserving creamed corn. My mentor uses the "Another way" method described at the bottom of this link over at the National Center for Home Food Preservation (the online bible for how to safely preserve food). The creamer tool was so inexpensive and the corn so abundant at the NC State Farmers Market, I had to give it a try!My whopping 45.5 lbs of corn had 65 ears in it and sold for only $25 - one of the many great reasons to grow or buy abundantly in season and preserve in wholesome ways for the off season. I enlisted help from the cutest and most enthusiastic corn shucker imaginable to get through the pile.
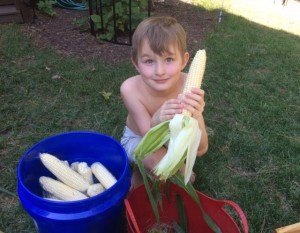 Once shucked, the corn was washed, trimmed of any ear worm damage and ready to be creamed. It took a little experimentation to get the cutters to the right height for the chunkiness I desired. I found compromise by setting it on a creamier height and using knife cut corn once every 8 or so ears to get nice big kernels.
 Following the instructions from my mentor and the National Center for Home Food Preservation the creamed corn was cooked in two double boilers for about 10 minutes.
 Once thickened it the pots were set in an ice bath to stop the cooking process.
 Once cooled, it was ladled into the freezer bags that work with my vacuumsealer at serving sizes of roughly 15.5oz each. They were frozen flat to take up less space then vacuumsealed.
 All in all, my 45.5lbs of corn ended up being 15.5lbs of creamed corn with much of the difference being the cobs that were cut up and added to compost so they were a gain for next year's soil also. The entire process took about 4 hours from shucking to the last batch being put in the freezer and finished with a total of 16 servings. I froze 15 of them for the months to come and made one fresh that night. I knew the project was a success (and one likely to be repeated before the end of corn season) when my little shucker took his first bite of our homemade creamed corn and asked if there was enough for seconds.
Vinegared Cucumbers
 As my Marketmore and Chinese Yellow cucumbers swing into full production I have been looking for a recipe that I recall from childhood. I have heard them called refrigerator pickles, cucumber salad, marinated cucumbers and vinegared cucumbers, though there are multiple meanings to some of those monikers so I am sticking with calling them vinegared cucumbers.Pro Tip - when picking cucumbers, bring them in and pop them into an ice bath to remove the "field heat" and cool them down quickly. They will keep better for longer with this trick.There are many variations on this recipe and I tried a couple before cobbling together this one that comes closest to the crisp, bright taste I remember in my grandmother's vinegared cucumbers:2 cucumbers with the skin peeled in strips then sliced to preferred thickness3/4 cup apple cider vinegar1 1/2 cups waterA few slices of red onion (optional)Pack cucumber slices into two 1/2 pint canning jars (or whatever you have that you can put a lid on), packing red onion along sides and top. Mix together vinegar and water and pour over until cucumbers are covered. Close jar and marinate in the refrigerator for at least 12 hours.
Growing Food, Growing Farmers
I have been looking for a graph that shows the number of US farmers and the average age of farmers on the same graph, but looking at the graphs separately, the impression is still strong. We have less and less farmers each year (2% of the population) and the ones that are left are aging faster than many other industries (average 58.3 years) due to the very small numbers of young people joining the increasingly slim ranks.For the young people that do want to grow food for a living they must first overcome the high land and capital good costs to get started as well as knowing they are pursuing a career that expects much of them physically and mentally but that society as a whole does not particularly esteem. So I get very excited about the future of food when I see young farmers like these on Jenny Jack Sun Farm making a go of it on their 4 acres with sustainable practices that are not generally found in industrial agriculture.The next thing young, small-scale food growers have to overcome is the notion that somehow they are only playing at farming if they can't "feed the world" with their output. The history of this phrase and it's attendant expectations can be traced directly back to the "fence row to fence row" and "get big or get out" exhortations of 1971-1976 USDA Secretary, Earl Butz. Before Butz moved the finish line to feeding the world, US farmers were only expected to feed themselves and their own communities to be considered successful.For an interesting perspective on how far we have moved away from community farming, this timeline begins with the percentage of US workers being farmers in 1790 at 90% and details the steady, downward shift from there to 38% in 1900 and down to 2.6% in 1990 where the timeline ends. We will never have a farming population of even 25% again in the US, but something more than a mere 2% will be needed to return to a food system that is healthy and sustainable for both the US population that depends on it and for the land that will be expected to continue to produce food for many generations to come.And the current trend of less and less farmers that are getting older and older is not sustainable even in the short-term. With many of today's farmers already approaching 60, how many more years before our current 2% retire from their physically demanding jobs? Young people making a choice to farm and trying to feed their communities should be celebrated for taking on a tough job that we all depend on but clearly, not that many people want to do themselves.Kudos to the farmers of Jenny Jack Sun Farm and all the others like you!
Making Hay While The Sun Shines - Part 2
Even before the surprise bounty of figs arrived on my doorstep Saturday morning, I had a hefty agenda for my first full weekend back home in my garden in 3 weeks.Serranos - picking them at both the green and red stages, sharing some with friends and preserving the rest. My favorite methods for enjoying serranos in the off season are vacuum packing them fresh and whole and freezing or else sliced in half, seeded, roasted on the grill and then vacuum packed.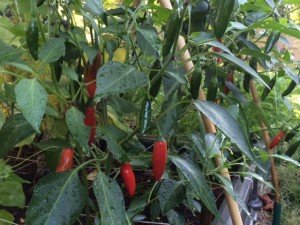
 (roasted, vacuum sealed and frozen)
Cucurbits - I needed to put out 8 new 1'x1' boxes for the fall planting of cucumbers and summer and winter squashes to keep them from shading their neighbors in the garden as well as giving them a bit more room to spread out as well.
 I will be making an A-frame trellis out of bamboo poles and chicken wire this weekend to provide a climbing structure for the back/north-most row that will have cucumbers and spaghetti squash. I am planting 4 varieties of zucchini on the front, south-most row which include 3 new variates in addition to the Black Beauty that have done well despite the invasion of squash vine borers.
I also removed the herbs from the middle garden bed in the above shot to make room to double my strawberry patch into a second box for next year with the prolific runners from this year's plants that I have been rooting in containers.
The most handsome specimens of rosemary, sage, parsley and thyme were put into terracotta containers and the rest were dried in the inaugural run of my food dehydrator, crushed and stored in spice jars.
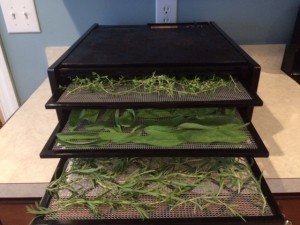 To me, the expression 'making hay while the sun shines' means thinking about where the food on my table in January will come from when I am drowning in the abundance of summer.
Making Hay While The Sun Shines - Part 1
After three weeks of much longer than normal hours during the week and attending conferences on the weekends in service to my day job, I had a two whole days at home with my garden this weekend. I found it doing very well despite my glancing harvests and prunings, but also in need of some more thoughtful attention so I started on a prioritized list of what needed to be done...and then the doorbell rang.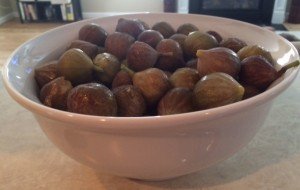 Earlier this year I had struck up a conversation about fig trees with one of my subdivision neighbors after he noticed my 2nd year trees that are a lot more potential than production even at this point. He had shared with me how productive his established tree was with quantities that sounded more fantasy than fact compared to the 25 or so figs I expected off of my 4 immature trees. He arrived at my door on Saturday morning with a bag full of figs, the third such of the morning he told me!Most of the figs were at the peak of ripeness, but a few were so soft that even the weight of figs on top of them in the bag distorted and split them. I popped the bag into the fridge to firm up the softest of them and stop the ripening of the freshest and went online to see what my options were.Canning jam and/or preserves was the resounding result, despite changing search terms several times and going 4 search results pages deep. I did not feel ready to do canning on my own and hadn't purchased a hot water bath canner yet, but there was this unexpected bounty to deal with...An hour and multiple recipes later, I was ready to make my first fig jam. The recipe was simple:8 cups quartered figs3.5 cups sugar3 TBS lemon juice
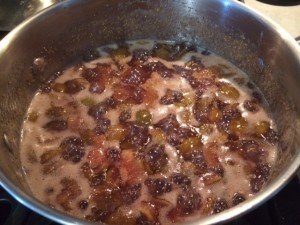
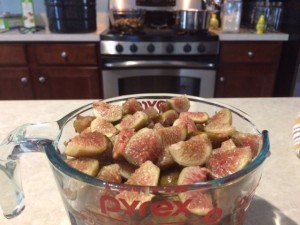 It was an easy recipe and the figs smelled and tasted heavenly as they and the sugar slowly caramelized on my stove top. I was nervous about the canning part but made an emergency phone-a-friend to my canning mentor to ask a few questions and by the end was more focused on saving every drop of this delicious concoction than thinking of all the ways the canning portion might go wrong.
 I ladled the preserved into 5 half-pint jars and prepared my first hot water bath.
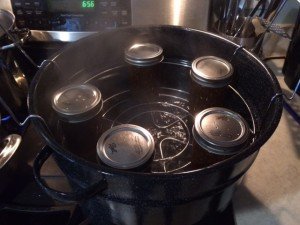 They cooked for 10 minutes in the hot water bath after it returned to a boil. I set the jars on cooking cooling racks to increase the air circulation and was pleased to hear my first *pop* of a sealing jar not long after.
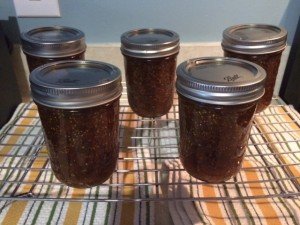 All 5 jars popped within 3o minutes of coming out of the bath and are now labeled and in my pantry.The title of this post is about doing what needs to be done when the opportunity exists - trying a new fig jam recipe and canning for the first time were not on my to-do list, but I couldn't let this unexpected windfall go from overripe to compost in my refrigerator without at least trying my hand at canning to preserve the bounty.As a postscript, I had enough jam for 5 3/4 jars and since the 6th jar did not meet the headspace requirements for the canning recipe, I sealed it the same as the others but put into the refrigerator immediately after it too popped. Tonight's desert was a french bread smothered in this homemade jam and it was wonderful!
Inadvertent Homage
...to Scarborough Fair on my deck.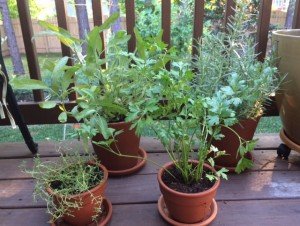 Companion planting 1670 style! Here is the Simon and Garfunkel version if you need to get the song unstuck from your head.
Saving Seed - Tomatoes
One of my goals for this year's garden is to save more of my own seeds for varieties I know I will be planting year after year. Saving my own seed moves my garden a little closer to being self-sufficient and maybe more importantly, by picking the best of the crop to save seed from year after year, I will be naturalizing the seeds to the place where they are grown instead of having seeds ideally suited to growing somewhere else.It is important to note that while the seeds of hybrid varieties can be saved, what grows from those seeds will likely have little resemblance to the previous year's plants. With the heirloom varieties I grow, I should be able to save seeds with reasonably reliable results but with normal variations.I am familiar with the fermenting method of saving tomato seeds but wanted to research my options to see if another method would work. I ran across this video that shows how to save tomato seeds on a paper towel.Fermenting definitely has benefits, the fermenting process helps break down the outer coating on tomato seeds, improving germination rates the following year, but increases the amount of seed handling and well...comes with a stinky, moldy cup hanging around for a week or two.I went with the paper towel method because it is easier, cleaner and has the added bonus that the bits of paper towel that will be torn off with the seeds next year will help hold moisture next to the seeds as they start to germinate.These Roma tomatoes will be popped in the freezer until I have enough to make a big batch of sauce to can or freeze.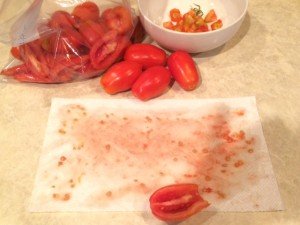 Selecting only the best specimens to save seed from and making sure to save from more than one plant to maintain genetic diversity. Each paper towel of seeds is from one tomato.
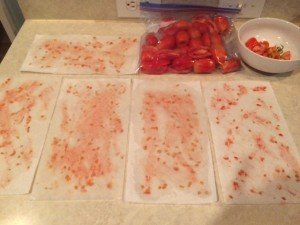 I have also been saving seed from the Amana Orange Beefsteak tomatoes.
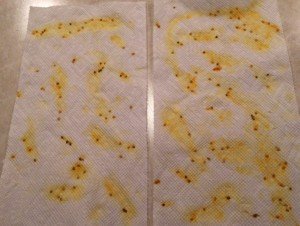 The seeds have been drying on wire shelving for a little over a week and are ready to be packaged, labeled and tucked into my seed box for next year.
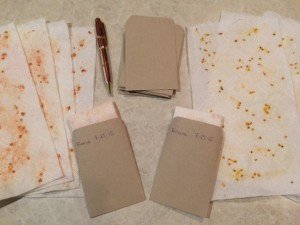 I plan to test the germination rate in late winter when there is still time to order and start seeds if this method does not prove viable. If it does work well, I will be looking to use something similar to paper towels again next year, but with recycled material that has not been bleached. Kaizen!

